In this article, we will learn how to change the service account for Distributed Cache Service and avoid Distributed Cache Service does not support this operation from Central Administration. Please use SharePoint Powershell commandlets in SharePoint 2016.
Change Distributed Cache Service Account
In SharePoint 2016, I tried to change the distributed cache service account using SharePoint Central Administration as the following:
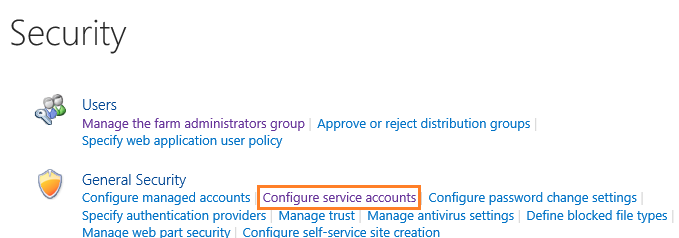
- Go to Central Administration > Security > Configure Service Accounts.
- On the Service Accounts page > Select Windows Service – Distributed Cache.
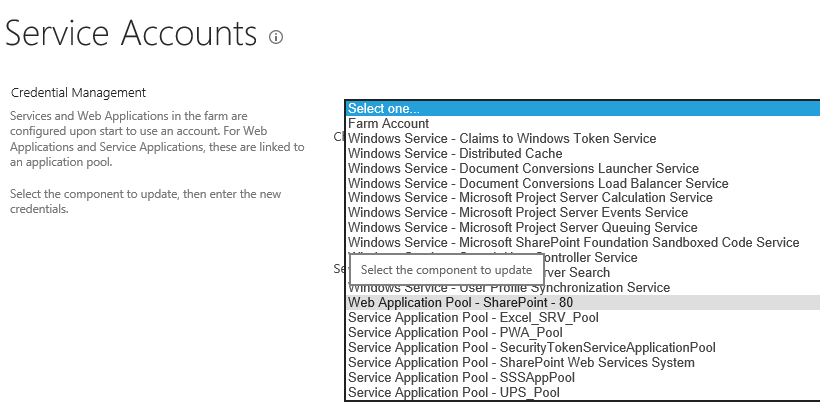
- In the “Select an account” list > Choose an appropriate account for this component > OK. I got the following error
Distributed Cache Service does not support this operation from Central Administration. Please use Sharepoint Powershell commandlets
Looks like we can’t change the Distributed Cache Service Account from Central Administration, and to be able to change its service count you should instead use SharePoint PowerShell Cmdlets.
In this section we will show how to change Distributed Cache Service account in SharePoint 2016 / 2013 using PowerShell by doing the following:
- Register Service Account as a Managed Account.
- Use PowerShell to change Distributed Cache Service account.
- Check your updates
Register Service Account as a Managed Account
First make sure that the new service account is already registered as a SharePoint Managed Account.
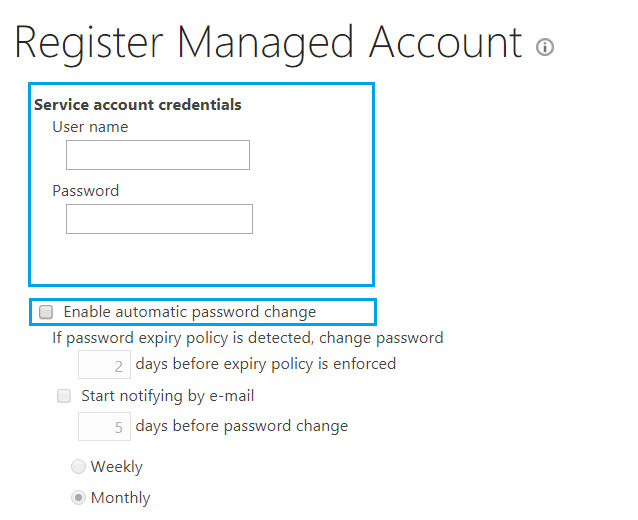
Check also which service accounts should be registered as as Managed Account at SharePoint 2019: Register Managed Account using PowerShell
- Run SharePoint Management Shell as Administrator.
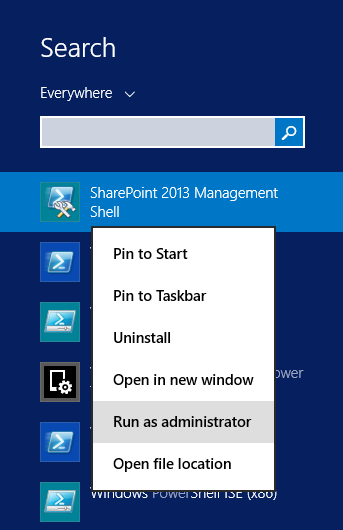
- Run the following cmdlets one by one to change Distributed Cache Service account.
$farm = Get-SPFarm
$cacheService = $farm.Services | where {$_.Name -eq "AppFabricCachingService"}
$accnt = Get-SPManagedAccount -Identity
 domain\user
$cacheService.ProcessIdentity.CurrentIdentityType = "SpecificUser"
$cacheService.ProcessIdentity.ManagedAccount = $accnt
$cacheService.ProcessIdentity.Update()
$cacheService.ProcessIdentity.Deploy()
Also, you can run Windows PowerShell as Administrator and add PowerShell Snapin “Microsoft.SharePoint.PowerShell”
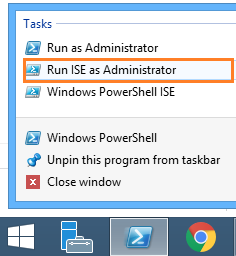
Then paste the below script to change Distributed Cache Service account using PowerShell.
Add-PSSnapin Microsoft.SharePoint.PowerShell -ErrorAction Stop
$farm = Get-SPFarm
$cacheService = $farm.Services | where {$_.Name -eq "AppFabricCachingService"}
$accnt = Get-SPManagedAccount -Identity
 domain\user
$cacheService.ProcessIdentity.CurrentIdentityType = "SpecificUser"
$cacheService.ProcessIdentity.ManagedAccount = $accnt
$cacheService.ProcessIdentity.Update()
$cacheService.ProcessIdentity.Deploy()
Don’t forget to domain\user with your new service account
Check which service account used for Distributed Cache Service
- Go back to Central Administration > Security > Configure Service Accounts.
- On the Service Accounts page.
- Select Windows Service – Distributed Cache.
- Make sure that the service account has been updated successfully.
Conclusion
In conlusion we have learned we can’t change Distributed Cache Service account from Central Administration, instead we must use PowerShell to avoid this error Distributed Cache Service does not support this operation from Central Administration.
Applied To
- SharePoint 2016.
- SharePoint 2013.
Have a Question?
If you have any related questions, please don’t hesitate to ask it at deBUG.to Community.


Pingback: Database is in compatibility range and upgrade is recommended in SharePoint | SPGeeks
Thanks for this post. Good work.
welcome, glad to hear it helped you
Thanks for a great article . You covered the topic perfectly. Down to every important detail. Always greatly appreciated!!!
Most Welcome, Glad to hear it helped you