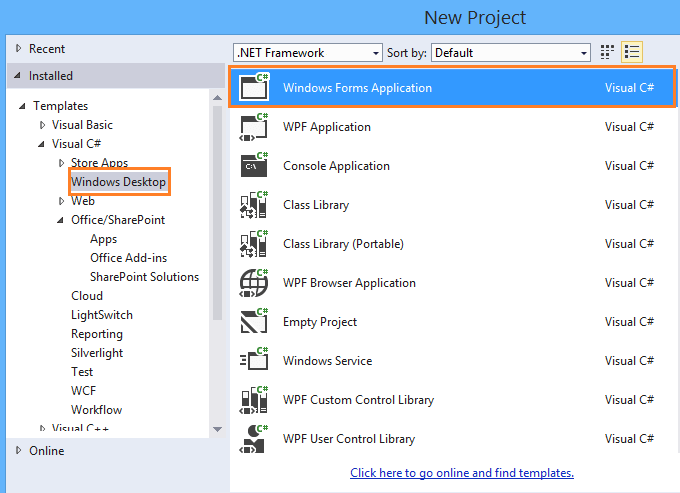
In this post, we will learn how to add Microsof.SharePoint.dll reference in Windows Forms Application to be able to connect and create SharePoint Windows Forms Application in Visual Studio.
You might also like to read SharePoint Framework For SharePoint Server 2016.
In Visual Studio, I want to build a SharePoint desktop application and consume SharePoint Object Model inside Windows Forms Application instead of SharePoint Solutions, So that I have tried to create a new Windows Forms Application, then I have added Microsoft.SharePoint.dll reference and finally, I hit the build button to build the solution.
But I had noticed that the Microsoft.SharePoint.dll was removed from the reference list automatically and I can’t use SharePoint.dll reference In Desktop Windows Application using Visual Studio.
In Visual Studio Windows Forms Application, to can connect and deal with your SharePoint farm through one of the below Models:
- SharePoint Server Side Object Model (Microsoft.SharePoint.dll). or
- SharePoint Client Side Object Model (Microsoft.SharePoint.Client.dll and Microsoft.SharePoint.Client.RUNTIME.dll).
| SharePoint Object Model | Supported Language | Supported SharePoint Versions | Used In | Notes |
|---|---|---|---|---|
| SSOM – Server Side Object Model | C#, VB.NET | SharePoint 2007,2010, 2013 and 2016 | Wed and Desktop | 1. SharePoint Installation is required. 2. Must be deployed on the farm side. |
| CSOM – Client Side Object Model | C#, VB.NET | SharePoint 2010, 2013 and 2016 | Wed and Desktop | 1. No SharePoint Installation required. 2. No deployment on the farm side. 3. Faster |
| JSOM – JavaScript Side Object Model | JS/JQuery | SharePoint Online, 2010, 2013 and 2016 | Web |
In this section we will explain
- How to use SharePoint SSOM in Windows Forms Application?
- How to use SharePoint CSOM in Windows Forms Application?
In this section, we will show How to use SharePoint Server Side Object Model in Visual Studio Desktop Windows Application by adding Microsoft.SharePoint.dll reference as the following:
Solution
- Change Platform Target.
- Change Framework Target.
- Add SharePoint Reference.
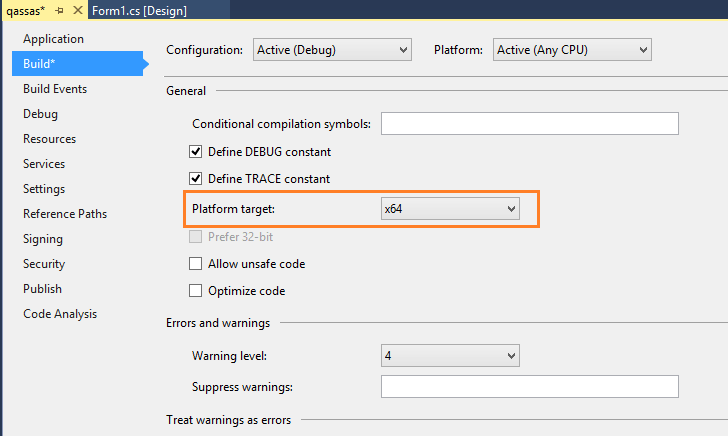
SharePoint doesn’t support x86 platform, so you should change it to x64 as the following:
Steps
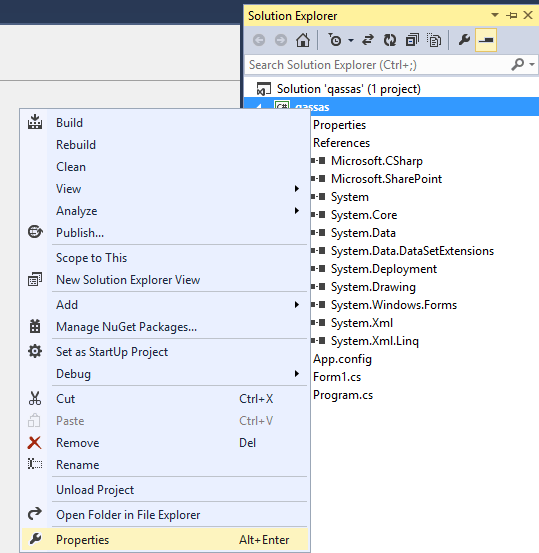
- Open your Windows Forms Application in Visual Studio> Right click on the Project Name > Click on Properties.
- Click on Build Tab > at Platform Target > Change Platform Target from 86x to 64x.
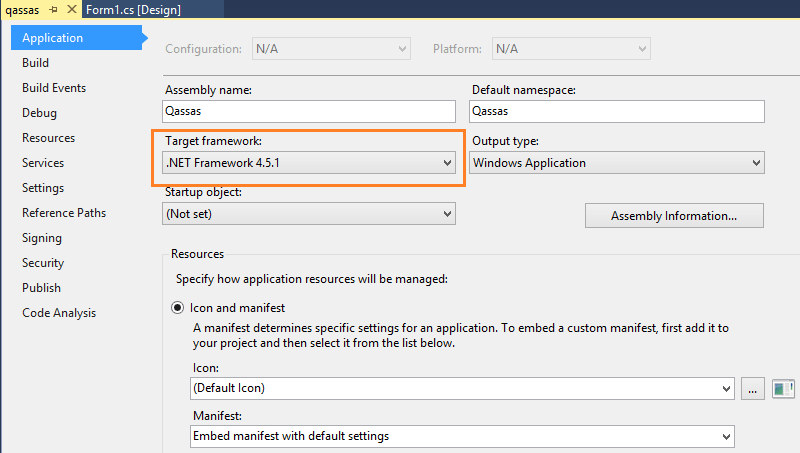
Based on SharePoint version, you should make sure that you are targeting the supported framework by doing the following:
Steps
- Select Application Tab > Target frameworks.
- For SharePoint 2010, you should change Target Framework from .Net Framework 4 client profile to .Net framework 3.5.
For SharePoint 2013 and 2016, you should use Microsoft .NET Framework version 4.5 or higher.
As we earlier mentioned, to use SharePoint SSOM in Windows Forms Application, you should add the Microsoft.SharePoint.dll reference as the following:
Steps
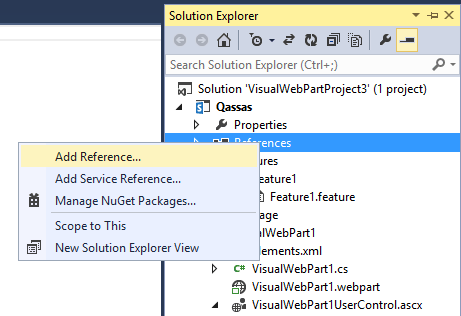
- Try now to add the Microsoft.SharePoint.dll reference to your windows forms application.
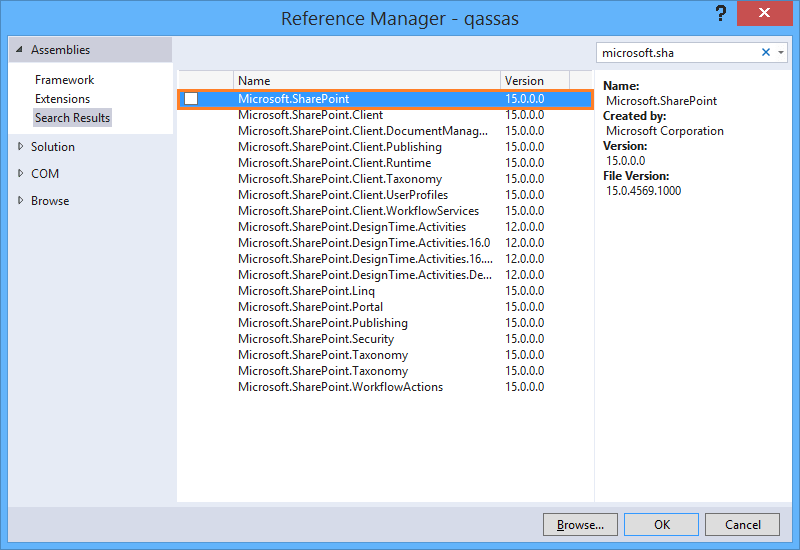
- Search for Microsoft.SharePoint > Select Microsoft.SharePoint.dll > Click Ok.
- Now, try to build your solution that should be working properly.
In the SharePoint Client Side Object Model, no need to have SharePoint installed. however, you should have a copy of the following dlls in your development environment:
- Microsoft.SharePoint.Client.dll
- Microsoft.SharePoint.Client.RUNTIME.dll
You can get these dll files from a SharePoint farm at C:\Program Files\Common Files\microsoft shared\Web Server Extensions\15\ISAPI
In case, you have already a SharePoint installed, you can add Microsoft.SharePoint.Client.dll reference as the following:
Steps
- Right-click on References > Click Add Reference.
- Search for Microsoft.SharePoint.Client.dll and Microsoft.SharePoint.Client.RUNTIME.dll > Click OK.
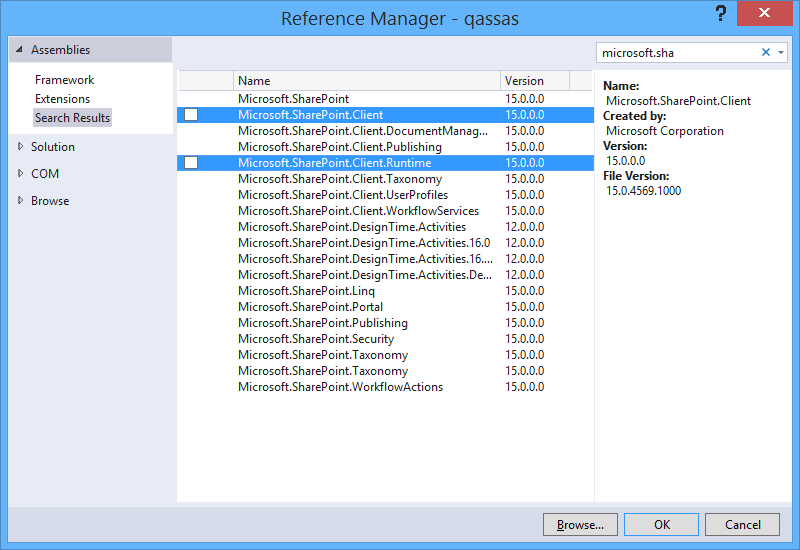
In case, you don’t have already a SharePoint installed, you can add Microsoft.SharePoint.Client.dll reference as the following:
Steps
- Right-click on References > Click Add Reference.
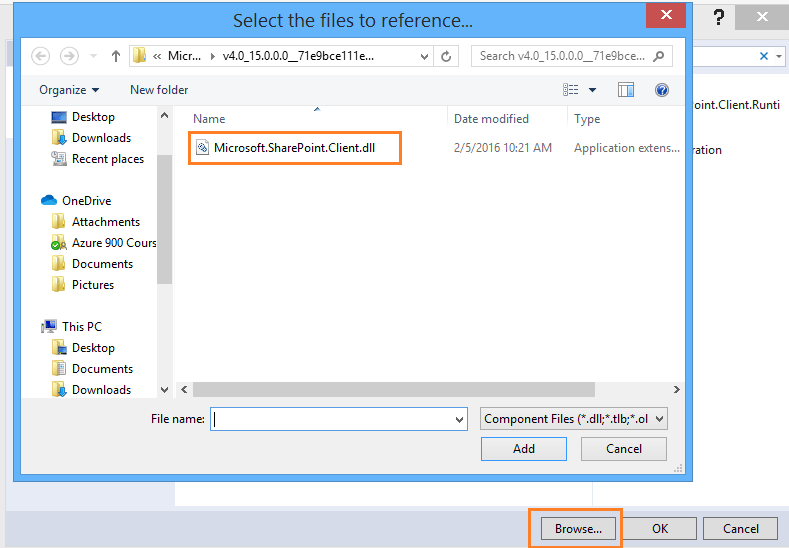
- Click browse to browse the folder that holds the copied dlls (Microsoft.SharePoint.Client.dll and Microsoft.SharePoint.Client.RUNTIME.dll) from another SharePoint farm > Click OK.
Conclusion
In conclusion, we have learned how to How to create SharePoint Windows Forms Application in Visual Studio using SharePoint SSOm or CSOM. also, we have learned the main differences between SSOM, CSOM, and JSOM.
Applies To
- SharePoint 2016.
- SharePoint 2013.
- SharePoint 2010.
- Visual Studio.
You might also like to read
- Missing Office / SharePoint template in Visual Studio 2017
- Visual Studio 2015 Missing SharePoint Templates.
- Missing SharePoint 2016 Project Template in Visual Studio 2015.
- Missing office / SharePoint Template in Visual Studio 2013.
- Choose the right API set in SharePoint
Have a Question?
If you have any related questions, please don’t hesitate to ask it at deBUG.to Community.



You could certainly see your skills within the article you write.
The arena hopes for more passionate writers such as you who aren’t afraid to mention how they believe. Always go after your heart.
Great beat ! I wish to apprentice while you
amend your web site, how could i subscribe for a blog site?
The account aided me a acceptable deal. I had been tiny bit acquainted of this your broadcast offered bright clear idea
I was very happy to discover this great site.
I want to to thank you for ones time for this wonderful read!
! I definitely really liked every little bit of it and i also have you bookmarked to
look at new things in your web site.
Hi! Would you mind if I share your blog with my twitter
group? There’s a lot of folks that I think would really appreciate your content. Please let me know. Many thanks
You are welcome 🙂
Do you have a spam problem on this site; I also am a blogger, and I was wanting to know your situation; many of us have developed some nice procedures and we
are looking to trade strategies with others, why not shoot me an
e-mail if interested.
Until now No 🙂