In this article, we will learn How to Create Custom Action in SharePoint 2013 programmatically using Visual Studio.
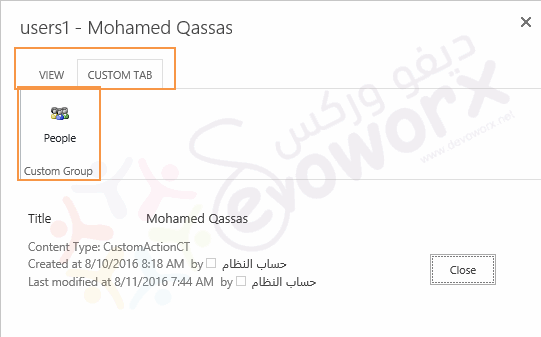
In SharePoint 2013/ 2016, I need to add a new Tab to the Display Form Ribbon for only one list in my SharePoint site as shown below:
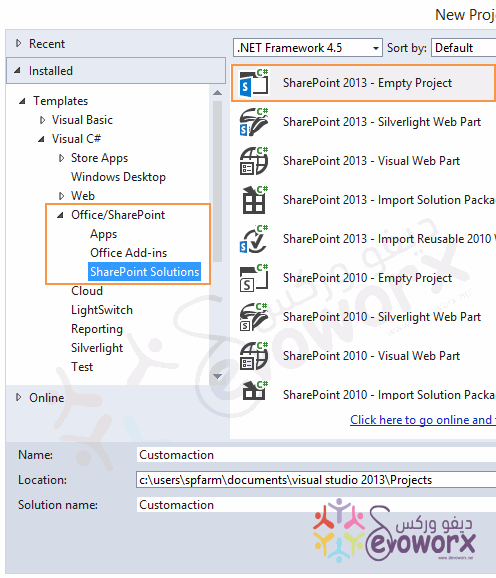
- Open Visual Studio > Create a new empty SharePoint solution .
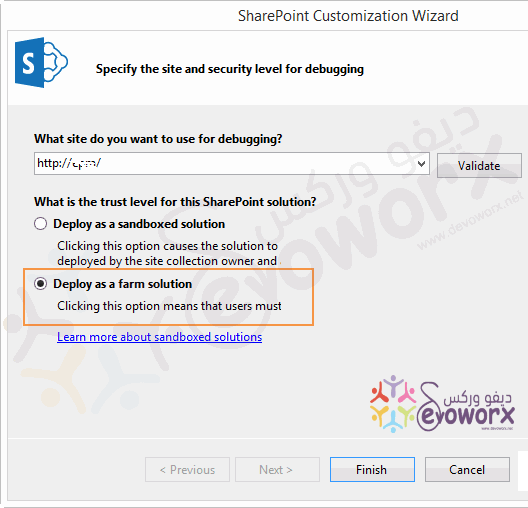
- Select Deploy as a farm solution .
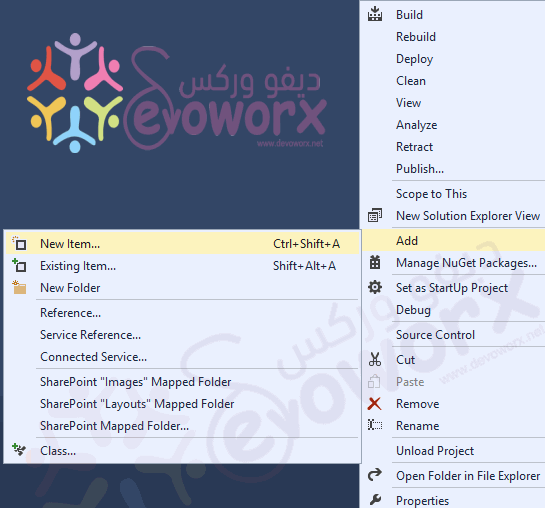
- Right Click on Project Name. > select Add.
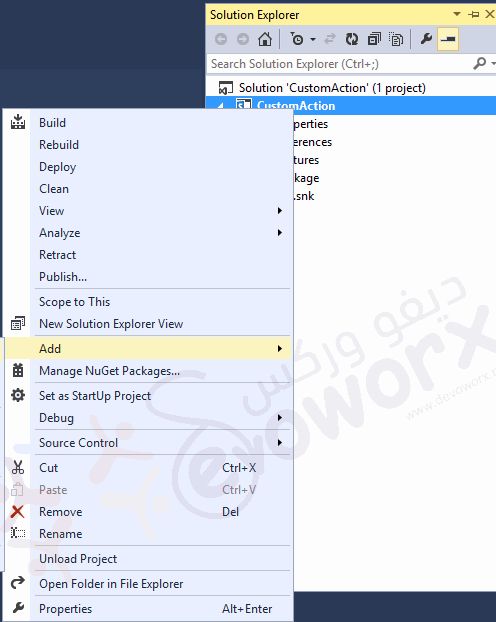
- Add New Item.
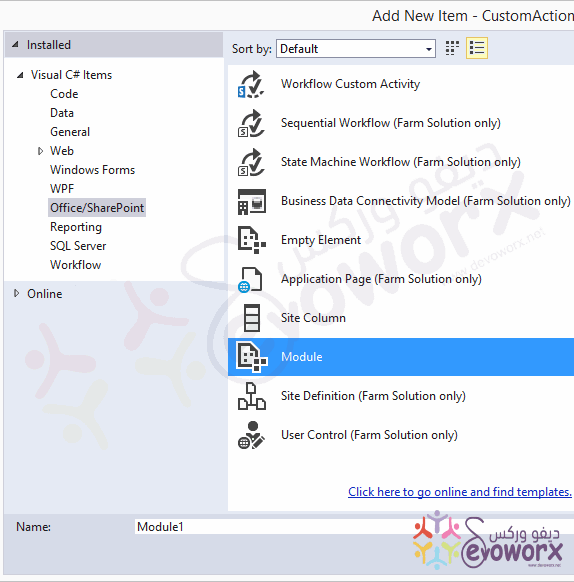
- Add Module item.
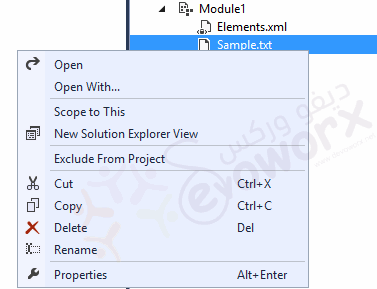
- Delete Sample.txt file.
- Remove the current code at Element.xml.
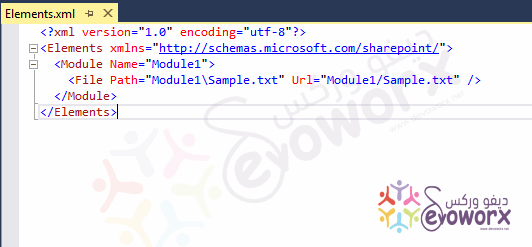
Element.xml structure for Custom Action
- Paste the following code at Element.xml.
<?xml version="1.0" encoding="utf-8"?>
 <Elements xmlns="http://schemas.microsoft.com/sharepoint/">
  <CustomAction
  Id="CustomRibbonTab"
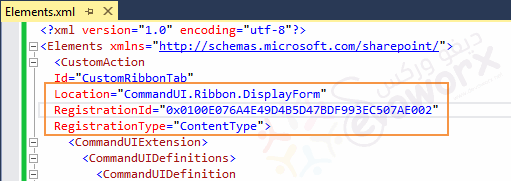
  Location="CommandUI.Ribbon.DisplayForm"
  RegistrationId="0x0100E076A4E49D4B5D47BDF993EC507AE002"
  RegistrationType="ContentType">
  <CommandUIExtension>
  <CommandUIDefinitions>
  <CommandUIDefinition
  Location="Ribbon.Tabs._children">
  <Tab
  Id="Ribbon.CustomTab"
  Title="Custom Tab"
  Description="Custom Tab !!!"
  Sequence="501">
  <Scaling
  Id="Ribbon.CustomTab.Scaling">
  <MaxSize
  Id="Ribbon.CustomTab.MaxSize"
  GroupId="Ribbon.CustomTab.CustomGroup"
  Size="OneLargeTwoMedium"/>
  <Scale
  Id="Ribbon.CustomTab.Scaling.CustomTabScaling"
  GroupId="Ribbon.CustomTab.CustomGroup"
  Size="OneLargeTwoMedium" />
  </Scaling>
  <Groups Id="Ribbon.CustomTab.Groups">
  <Group
  Id="Ribbon.CustomTab.CustomGroup"
  Description="Custom Group!"
  Title="Custom Group"
  Sequence="52"
  Template="Ribbon.Templates.CustomTemplate">
  <Controls Id="Ribbon.CustomTab.CustomGroup.Controls">
  <Button
  Id="Ribbon.CustomTab.CustomGroup.CustomButton"
  Command="CustomTab.CustomButtonCommand"
  Sequence="15"
  Description=""
  LabelText="People"
  Image32by32="/_layouts/images/PPEOPLE.GIF"
  TemplateAlias="cust1"/>
 </Controls>
  </Group>
  </Groups>
  </Tab>
  </CommandUIDefinition>
  <CommandUIDefinition Location="Ribbon.Templates._children">
  <GroupTemplate Id="Ribbon.Templates.CustomTemplate">
  <Layout
  Title="OneLargeTwoMedium"
  LayoutTitle="OneLargeTwoMedium">
  <Section Alignment="Top" Type="OneRow">
  <Row>
  <ControlRef DisplayMode="Large" TemplateAlias="cust1" />
  </Row>
  </Section>
  </Layout>
  </GroupTemplate>
  </CommandUIDefinition>
  </CommandUIDefinitions>
  <CommandUIHandlers>
  <CommandUIHandler
  Command="CustomTab.CustomButtonCommand"
  CommandAction="javascript:alert('Hello, world!');" />
  </CommandUIHandlers>
  </CommandUIExtension>
  </CustomAction>
 </Elements>
Changes for Custom Action Element.xml file
In the above code, you should change the below elements based on your current entries
- The location: where you want to add your custom action button / Tab (Display form, Edit Form ..etc). see also the full Location ID List.
- RegistrationId: it is the template type id of the object like the list, library … etc that you need to add a custom action within its ribbon. (or the Content-Type ID for a specific list).
- RegistrationType: to define the type as List or Content-Type or File Type or ProgID.
If you need to apply the custom action for all custom lists in Display Form ,so you just need to set the registration ID and type as shown below
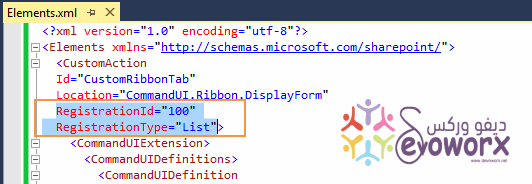
In my case, I only need to create a custom action for only one list in to be shown in the Display Form, so I would use the below entry
- Location = “CommandUI.Ribbon.DisplayForm“
- RegistrationId = “Content Type ID“
- RegistrationType = “ContentType“
Create a site content type
To create a custom action for a specific list, I should first create a site content type for this list by doing the following:
- Go to List Settings. (Make sure that the content types has been allowed).
- Advanced Settings > Allow management of content types.
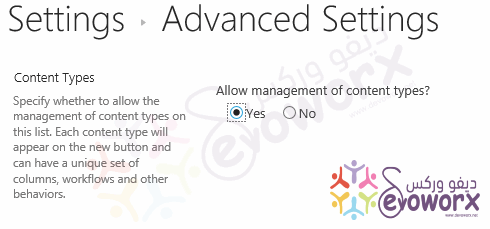
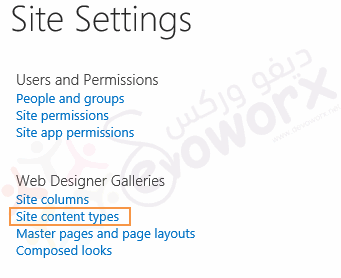
- Go to Site Settings > Web Designer Galleries > Site Content Type.
- Click Create.

- Set the name of the content type and set the other entries as the following:
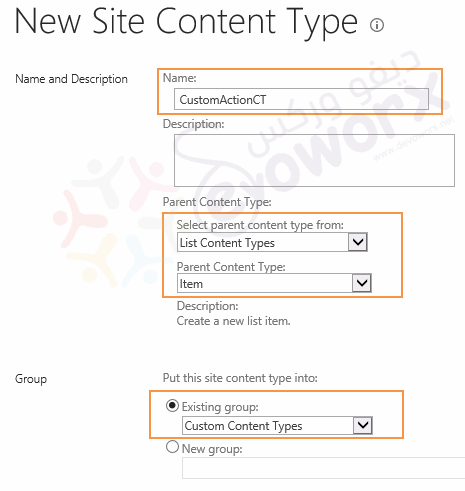
- Go to List settings > below content types > click on Add from existing site content types

- Add the content type that you created
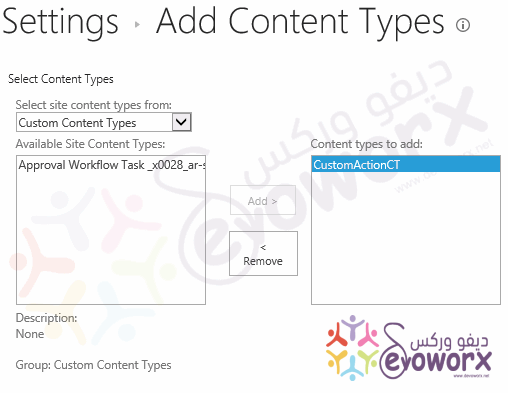
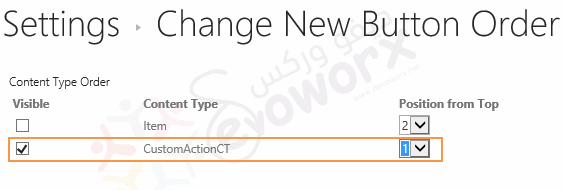
- Set it as default by clicking on Change new button order and default content type.
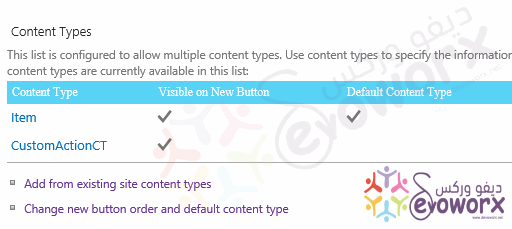
- Check it and uncheck the default item content type > and select its order to 1.
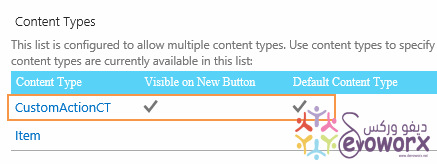
- It’s should look like
Adjust custom action for Content Type
- Now you should get Content Type ID by following the mentioned steps at Getting Content Type ID of SharePoint List.
- The final settings for location and registration id and registration type should look like the following
- Deploy the solution > go to your list > add new Item > display it > it should look like the following :

Conclusion
In conclusion, we have learned how to Create custom action in SharePoint 2013 programmatically using visual studio for a specific list.
Applies To
- SharePoint 2016.
- SharePoint 2013.

Hello,
I have done the same, but still the custom action is not visible on my list.