In this post, we will learn How to quickly create a Power BI Report from SharePoint List using the Power BI Integration option and without using Power BI Desktop.

Power BI reports can be created straight from SharePoint and Microsoft Lists by users in your organization using Power BI Integrate Option in an easy manner.
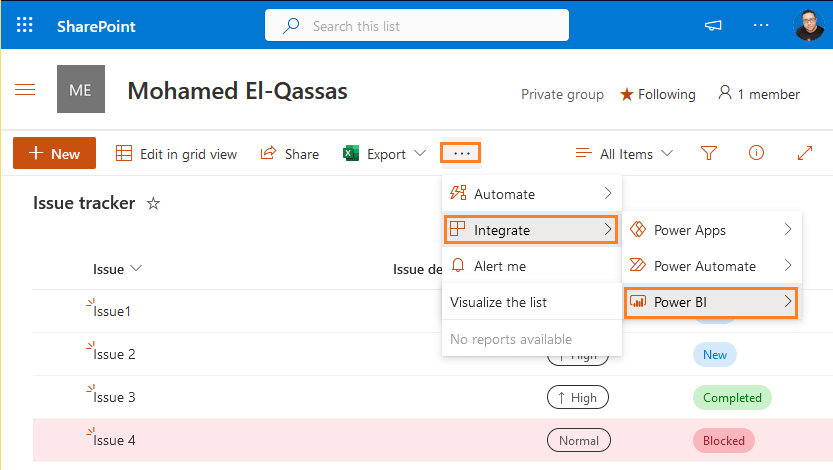
Once the user creates Power BI reports based on the data in those lists and publishes them back to the lists, anyone who has access to the list can see them.
To enter the full edit experience, publish reports, access reports that others have published, or delete reports, you must have a Power BI Pro license. Moreover, A Power BI Pro license is also required for your report Readers and Viewers.
Besides he license considerations, you have to be aware of the following:
- Row-level security (RLS) isn’t supported for reports created using Power BI Integrate
- Anyone who can read your report can also edit it.
- Currency formatting is not currently supported.
- Only data in the root folder will be visualized.
- Very large lists may be slow or may time out altogether.
- This feature isn’t supported for guest users in a tenant.
Read more at Power BI Integrate with SharePoint Consideration and Limitation
If Power BI does not appear on the Integrate option in a SharePoint or Microsoft list or library, your Power BI administrator may have disabled it for select groups or your entire organization.
As Power BI Admin, you can enable Power BI Integration with Microsoft List or SharePoint List from tenant settings as stated below:
- Open Power BI Service.
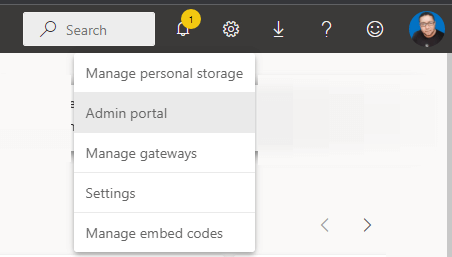
- Click on Settings gear icon > Admin Portal.
- Click on Tenant Settings.
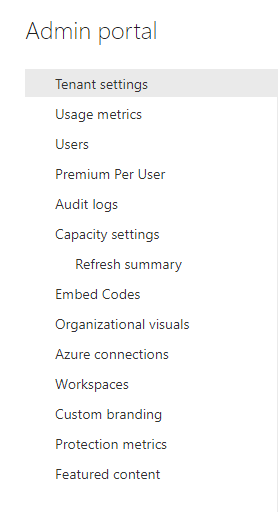
- Scroll down to Integration with SharePoint and Microsoft Lists
- Click
Enabled to allow Power BI Integration with SharePoint List for- Entire Organization
- Specific security groups
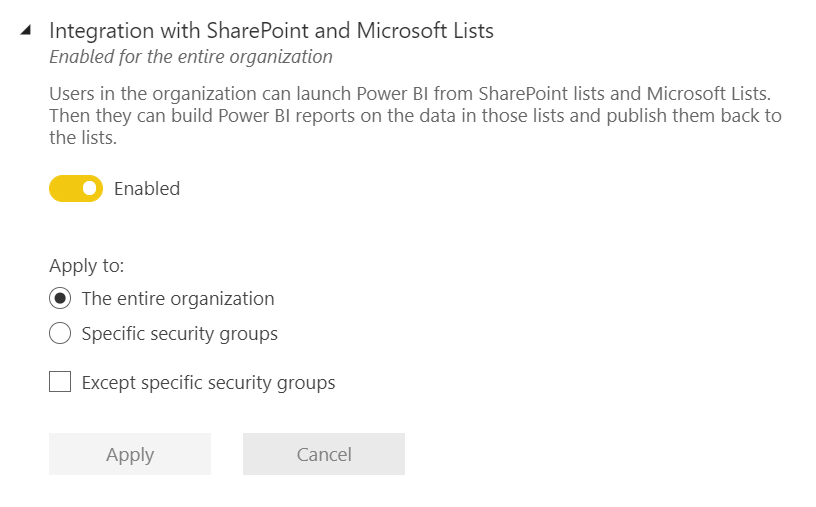
Note: Tenant settings changes will be applied within the next 15 minutes and may take more than this period.
To create Power BI Report From SharePoint List using Power BI Integrate, you have to do the following:
Steps
- Open SharePoint List.
- Click on the Three-dot button then Integrate > Power BI > Visualize the list.

- You will be asked to sign in to Power BI Service.
- Once you sign in, go back to integrate Power BI with your list as mentioned in step 2.
The cool thing is that your dashboard is generated automatically with the most KPIs and charts that you want to make without having to start from scratch as shown below
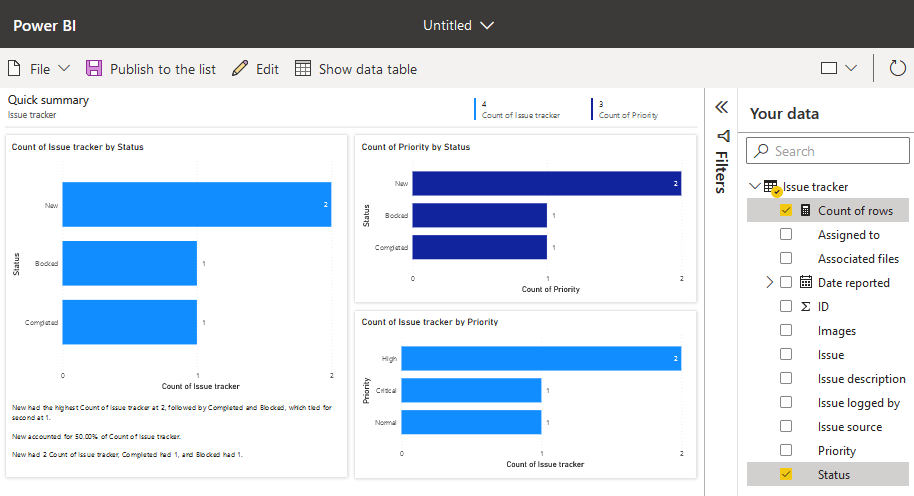
- Now, you can click on Edit to customize it as you prefer


- Once you finish editing click on Publish to the list button, then provide your report name
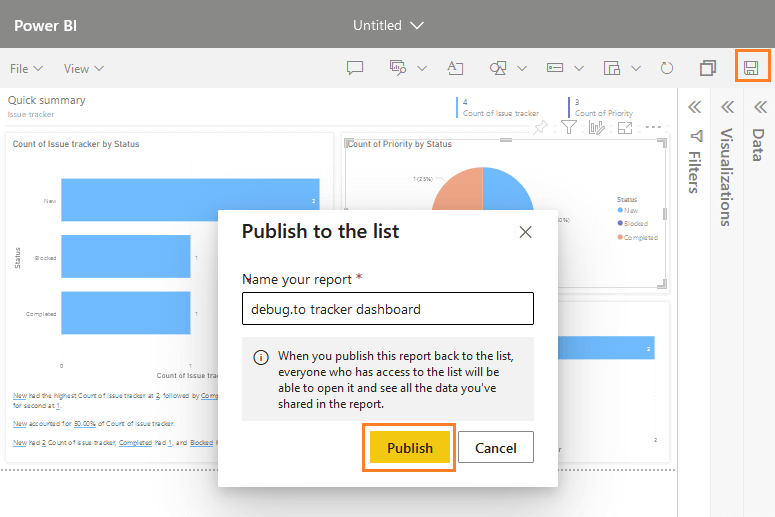
Great, go back to your SharePoint List > Integrate > Power BI, you will notice that the new report is listed as shown below:
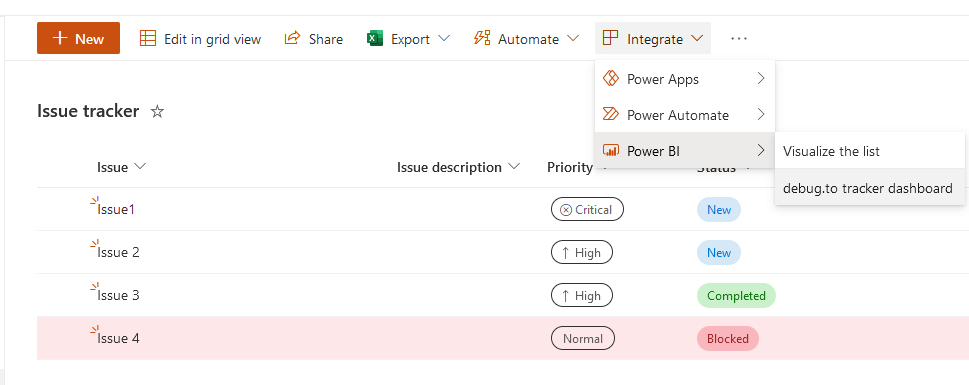
Note: you may need to reopen the list again, to get your report listed
Conclusion
To create a quick Power BI report from SharePoint List or Microsoft List based on the list data and without creating the report from scratch it’s preferred to use the Power BI Integrate option in your SharePoint List toolbar. However, you have to check first the limitation and considerations of this method before proceeding to ensure it will meet your needs.

