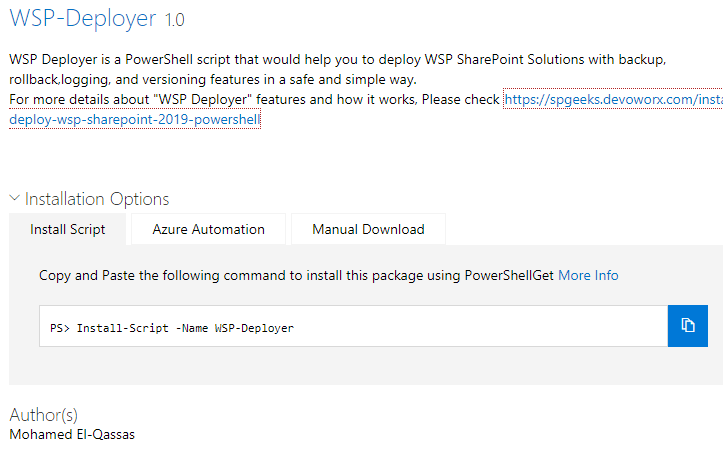
Today, we’re going to introduce a new PowerShell Script called “WSP SharePoint Deployer” that would help you to safely and easily install and deploy WSP SharePoint 2019 solutions on your farm with Backup, Rollback, Logging, and Versioning capabilities.
The “WSP SharePoint Deployer” is a PowerShell Script that would help you to easily deploy WSP SharePoint 2019 with backup, rollback, logging, and versioning capabilities. It also supports SharePoint 2016,2013, and doesn’t require any additional configurations on your side!
To illustrate the key needs of “WSP SharePoint Deployer“, let’s first define the limitations of the current SharePoint deployment process.
1) No Backup
As you can see in the Solution Management, there is no option to perform a backup for all deployed solutions before applying a new release to allow the rollback.
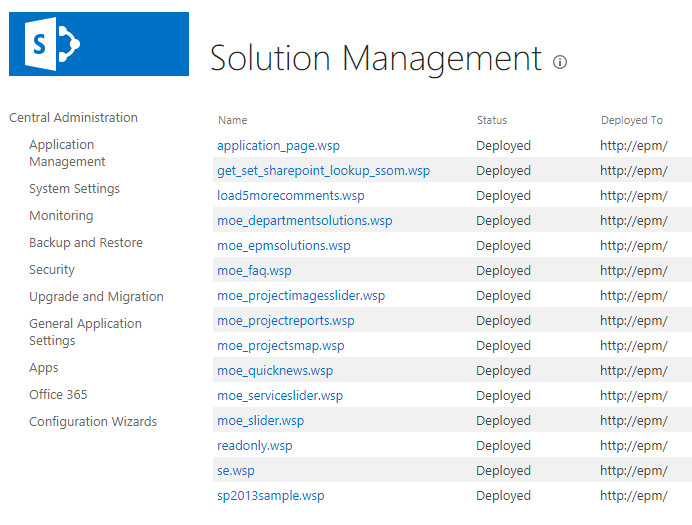
We have already implemented a simple and smart PowerShell script that will help you to backup all deployed WSP solutions with versioning and log features to overcome this limitation in the SharePoint Solution Management.
2) No Tracking
Also, the SharePoint Solution Management doesn’t provide an option to track the whole history of the previous deployment operations to find out when these solutions were deployed and by whom!
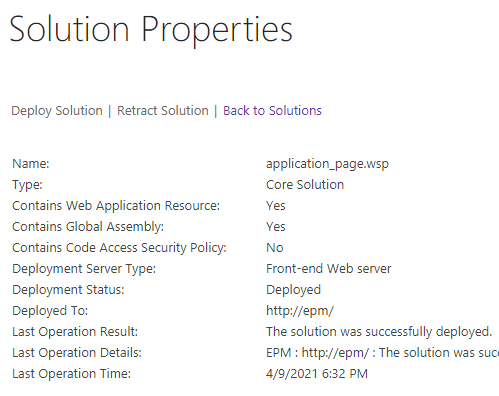
Even if you check the solution properties, you will notice that it only shows the LAST operation without any additional information about the user who performed the deployment operation, or additional info about the previous deployment operations.
Moreover, to show the solution properties, you will need to click on each solution name one by one and I think it’s a silly task if you have many WSP solutions!
3) No Rollback
Besides the above limitations, there is no option to perform quick rollback in case the newly deployed solution is causing errors on your farm, and in this case, you will need to go back to the DEV team to get a copy of the previously deployed solutions. Of course, it will take more time to roll back and return your farm to its previous stable state!
So we decided to implement a new PowerShell script that provides several features like backup, deploy, rollback, logging, versioning to overcome such deployment issues that you might encounter while deploying a new release for the SharePoint WSP solutions on your farm.
Below are the main features of our WSP SharePoint Deployer to install and deploy SharePoint solution packages on your farm in a safe, efficient and effective manner.
The WSP SharePoint Deployer was tested on multiple farms that have the following SharePoint versions installed:
- SharePoint 2019.
- SharePoint 2016.
- SharePoint 2013.
2) Validate and Verify
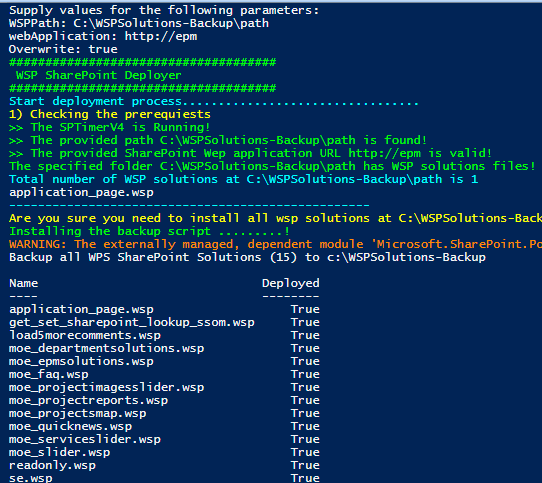
When running WSP SharePoint Deployer, you will first be prompted to provide the required parameters such as the WSP folder path, the Web application, and the Overwrite parameters.
Once you provide the required information correctly, The Deployer will perform a quick check on the below requirements:
- The SharePoint Timer Service is up and running.
- The provided WSP Folder Path is found.
- The SharePoint Web Application URL is valid.
- The provided WSP Folder Path holds WSP files.
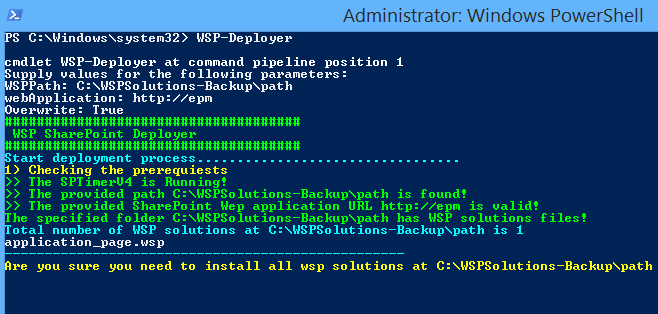
If everything is Ok, the WSP Deployer will show the below check process details.
But if the provided parameter values were incorrect, a clear error message will appear and guide you to provide the correct values as explained below:
WSP Folder Path
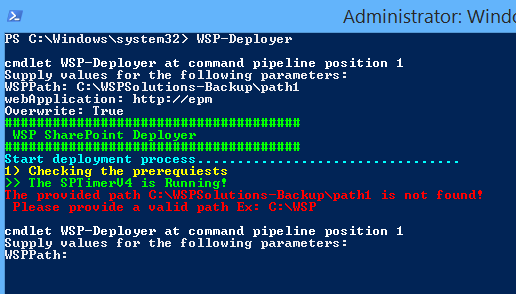
If the provider folder path that holds the WSP files is not found or incorrect, you will receive the below error message.
WSP Files
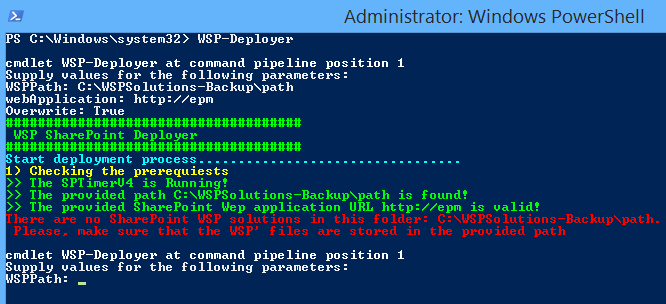
Also, it checks and makes sure that the specified folder actually contains valid WSP files, and if it’s empty or there are no WSP files, you’ll get the below error message.
SharePoint Web Application URL
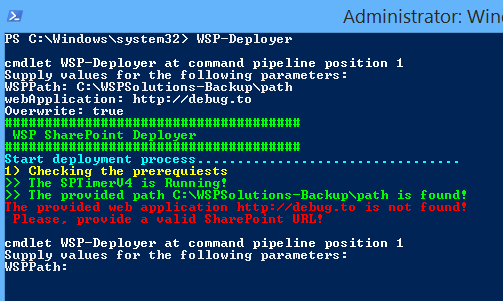
Again, If you have provided invalid or unfound SharePoint Web Application URL, you will get the below error message.
SharePoint Timer Service Status
As a prerequisite for deploying WSP solutions, the SharePoint Timer Service must be running. So the WSP Deployer checks the status of SPTimerV4 and if it’s not running, it will tell you to start it.
To simplify this task, the WSP Deployer will open the Services automatically to allow you to manually check and run the SharePoint timer service.
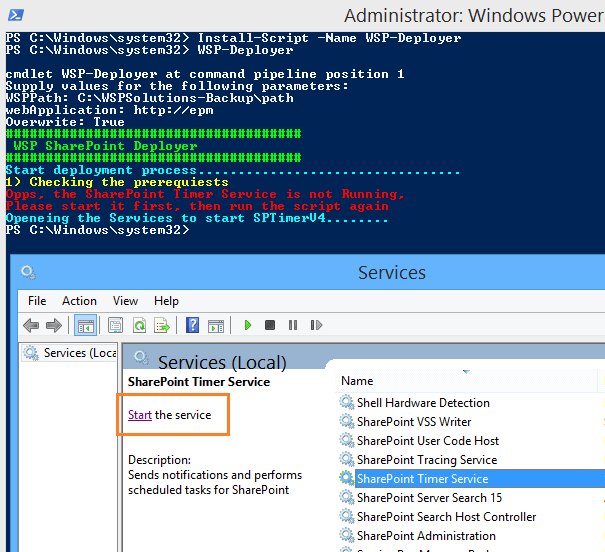
We didn’t automate the startup of the Timer Service because in many cases it stopped due to a Login failure issue, and you have to provide the farm service account credential manually. so just make sure the SPTimerV4 is running and then rerun the WSP deployer again.
2) Confirm before proceeding
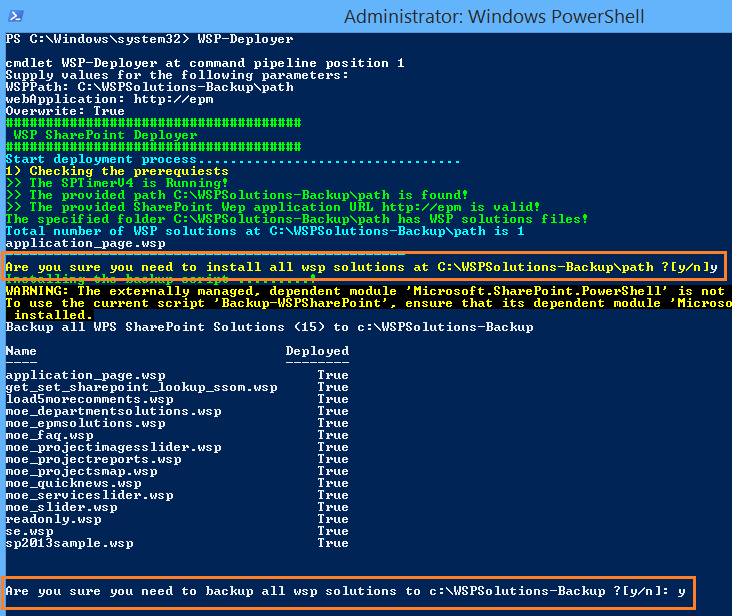
The WSP SharePoint Deployer provides also confirmation messages for each step will be performed on your farm. So once you submit the correct parameter values, you will receive a confirmation message to start the deployment process as shown below.
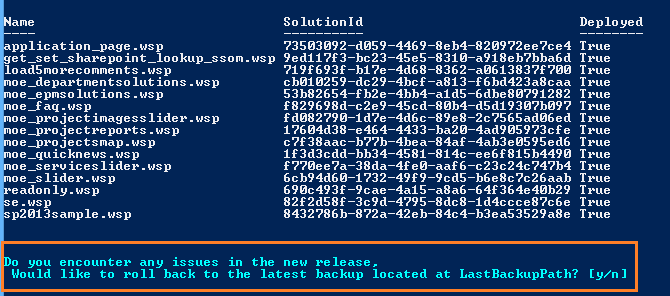
Also, you will be asked to perform a rollback for the previously deployed WSP solutions or not. in case, the newly deployed release cause an issue on your farm!
3) Informative
When you run he WSP Deployer, you’ll get detailed information to keep track for each action will be applied on your farm such as:
- The total number of all currently deployed WSP solutions on your farm.
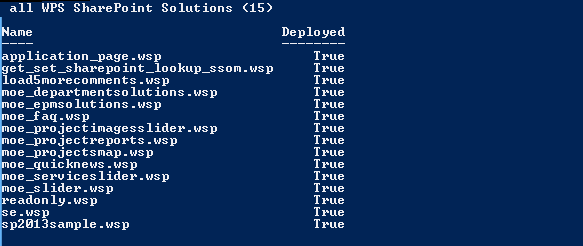
- List of all WSP files located in the provided folder, and how many WSP files you will deploy.

- Clear status for each WSP file.
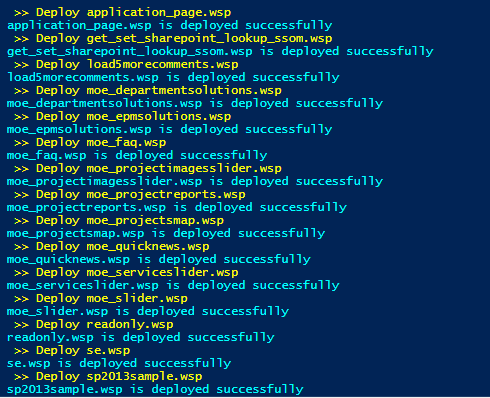
4) Backup before deploy
One of the main features of the WSP Deployer is performing a backup for all currently deployed WSP before installing a new release to allow the rollback process. Once the backup operation is finished, the root backup folder will be automatically opened as shown below.
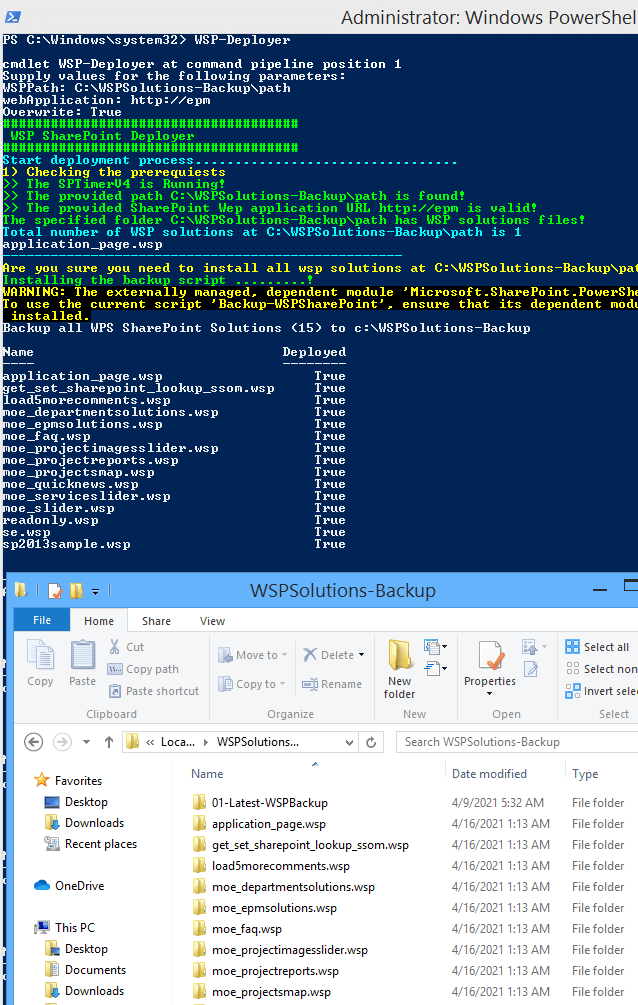
The backup operation mainly depends on our own script WSP-Extractor 1.4 which already published on the PowerShell Gallery and you can use this script independently without having to deploy a new release on your farm.

For more details about the Backup operation, Please check Backup all WSP SharePoint Solutions using PowerShell
5) Versioning
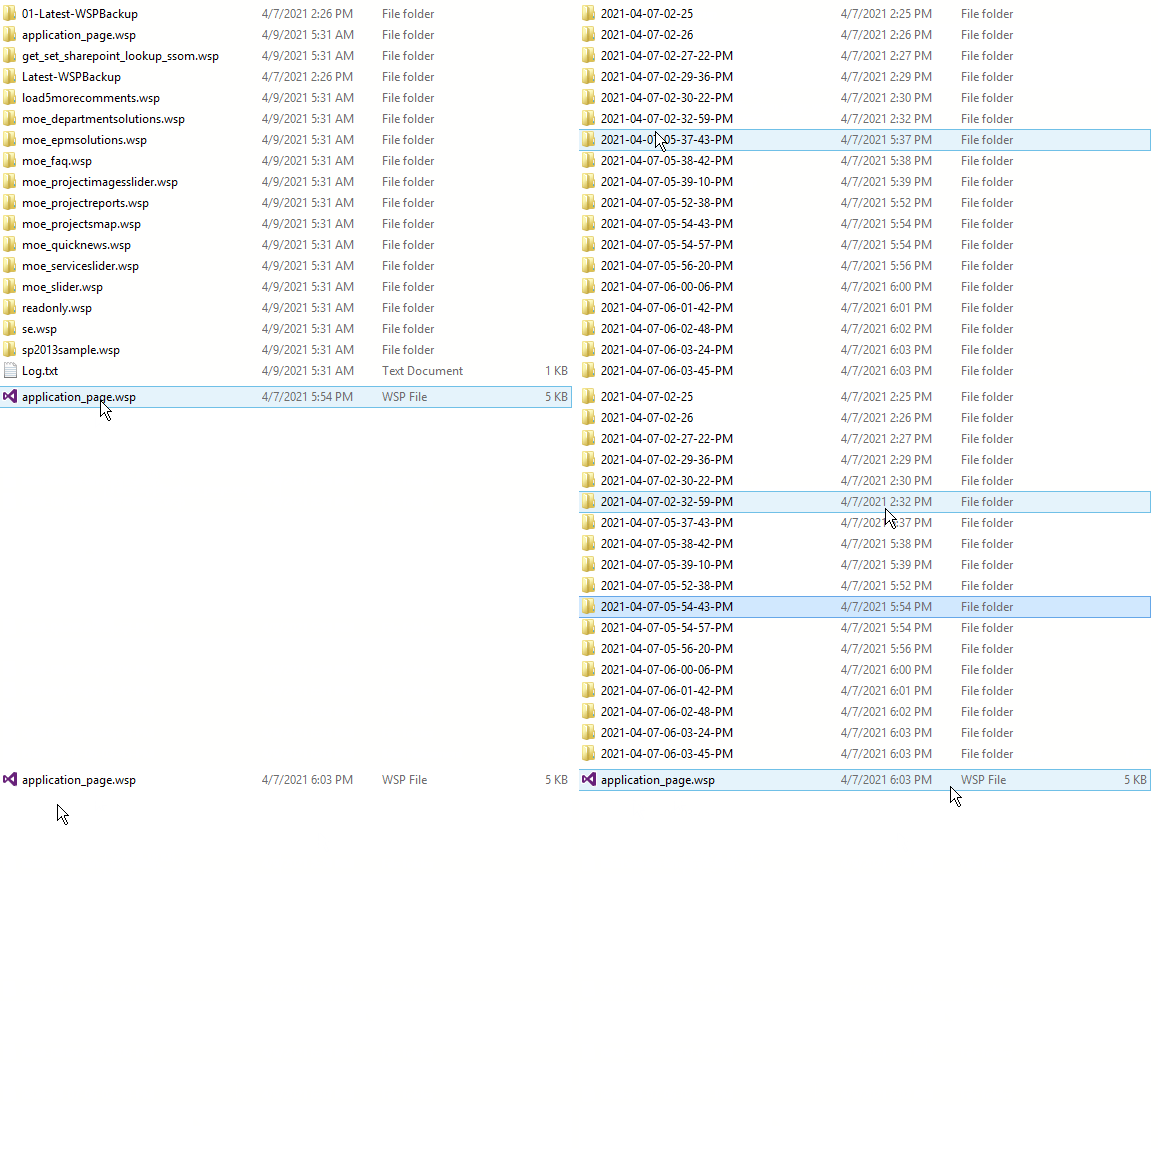
After confirming the backup process for the currently deployed WSP solutions on your farm, you will find out a separate folder for each WSP solution named by the solution name has been automatically created to hold each backup of the WSP file.
Within each WSP folder, a new folder will be created for each backup, and this folder will be named according to the date and time of the backup process.
Therefore, you can easily revert to any previous WSP version based on the backup date.
6) Quick Rollback
Once the new WSP solutions are deployed, you should first perform a quick smoke test to ensure that the newly deployed solutions have no negative impact on your farm.
So the WSP Deployer offers you to quickly roll back to the previously deployed version in case a newly deployed solution causes errors on your farm.
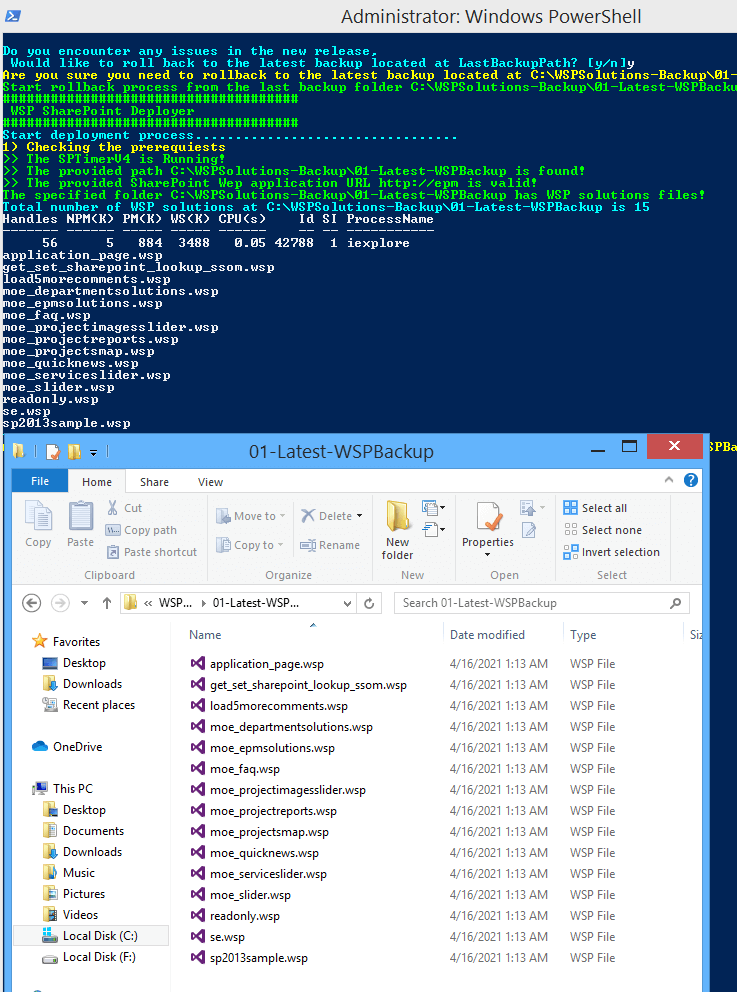
The rollback process will restore the WSP solutions backup that was already taken before performing the deployment process.
7) Logging
Once the deployment has been completed successfully, you will get a detailed log about the deployment operation with the below valuable information:
- List of all deployed solutions with their status and scope.
- Who performed the deployment operation.
- When the deployment operation has been done.
- The total number of the deployed WSP solutions.

8) Ease to use
No additional configurations required on your side, you just need to install the WSP Deployer script then provide the correct parameter values to deploy your WSP solutions in a smart and seamless way.

To install the SharePoint WSP Deployer, you have to check first the below prerequisites:
Prerequisites
- SharePoint Timer Service is up and running.
- The WSP Deployer will inform you if the Timer service is not running, then it will open the Services automatically to start the Service manually.

- The current user has sufficient permission to deploy the WSP solution.
- Check the required permission to deploy WSP SharePoint Solutions.
- The current Windows PowerShell version is 5.0 or later.
- To can Install-Script you must have PowerShell 5.0 or later release, to upgrade the PowerShell Version, please check The term ‘Install-Module’ is not recognized.
Installation Steps
- On your SharePoint Server, open Windows PowerShell as Administrator.
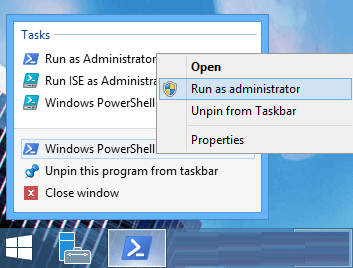
- Run the below cmdlet to Install WSP-Deployer script.
Install-Script -Name WSP-Deployer
If you have already installed the “WSP-Deployer” script before, and you would like to get the latest version, so you will need to reinstall the script again with the -force parameter as below:
Ex: Install-Script -Name WSP-Deployer -force
After installing the “WSP-Deployer” script, you will be ready to install and deploy WSP SharePoint 2019 Solutions in an easy and safe way by following the below steps:
- Type the below cmdlet to install and deploy WSP SharePoint 2019 Solutions using WSP Deployer.
WSP-Deployer- The WSP Deployer will ask you to provide the below parameter values:
- WSPPath: the folded path that hod the WSP files.
- WebApplication: the web application that you would like to deploy your WSP solution on it.
- Overwrite: Type True to overwrite the deployed WSP solution with the new one.

For the Web application parameter, type “All” if you would like to deploy the WSP solutions on All web applications on your farm or specify the correct web application URL that you need to deploy your WSP solution on it.
- After providing the correct values, the WSP Deployer will ask you to confirm and start the deployment process. Click “Y” to start.

- Now, the WSP Deployer will install the Backup module and list all the currently deployed Solutions on your farm.
- Click “Y” to take a backup for the currently deployed WSP solutions to enable the rollback process later.

- Great, the WSP backup is taken, and the backup folder will be automatically opened.

- Also, the deployment operation should be now starting properly to deploy all WSP SharePoint solutions on the specified path.
- Wait a moment until the deployment process completed successfully.
- Now, you will note that the Log file is opened automatically to show the status of the deployment process for each WSP solution.
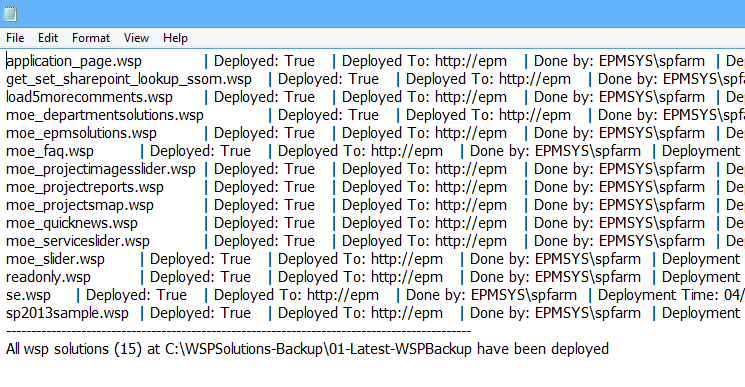
- Also, the SharePoint Solution Management Page will be opened automatically to make sure that the WSP solutions had been deployed successfully.

- Now you should perform a quick smoke test to make sure that the newly deployed solutions don’t encounter any errors.
- Go back to the Windows PowerShell, you will be asked to perform a quick rollback if the newly WSP solutions cause any kind of errors.
- If everything was ok, just click “N” to bypass the rollback process, Otherwise, if the newly deployed solutions cause any errors and you would like to quickly roll back to the previously deployed WSP version, just Click “Y” to start the rollback process.

As you can see, SharePoint deployment is now a safe, simple process where you can easily backup, track each deployment as well as you can rollback and downgrade to the previously deployed version in an effective and efficient way.
WSP Deployer Roadmap
Currently, we are working on another WSP-UnInstaller script that would help you uninstall WSP SharePoint Solutions with backup and rollback functionality and we are planning to add this new script to be a part of our WSP Deployer script.
Also, we’re planning to embed the WSP SharePoint Deployer as a module in the SharePoint Central Administration with Web Interface.
Conclusion
The WSP Deployer is a smart script that helps you to deploy WSP SharePoint solutions with backup and rollback functionality in a safe abd . It supports SharePoint 2013, 2016, and 2019 and provides logging and versioning for each SharePoint WSP release.
Applies to
The “WSP SharePoint Deployer” supports the following SharePoint versions:
- SharePoint 2019.
- SharePoint 2016.
- SharePoint 2013.

