In this article, we will learn how to Backup and Restore SharePoint 2016 Web Application to another Farm.
- 1 Migrate SharePoint 2016 Web Application to another farm
-
2
Backup and Restore SharePoint 2016 Web Application to another Farm step by step
- 2.1 Specify the web application content database.
- 2.2 Take a full database backup from the web application content database.
- 2.3 Backup your custom WSP SharePoint solutions.
- 2.4 Create a new web application, site collection.
- 2.5 Take a full database backup for the web application content database
- 2.6 Dismount the web application content database.
- 3 Restore the database backup
You might also like to read Backup and Restore Site Collection SharePoint 2016
Before we getting started, you should be aware of
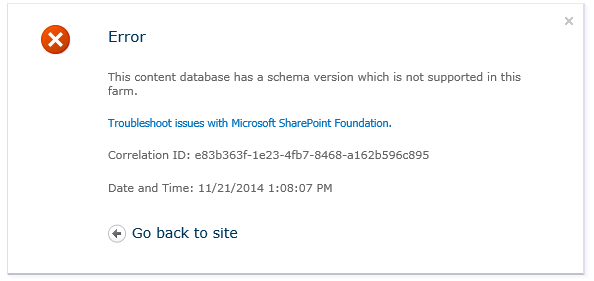
- In the database attach upgrade method, The destination SharePoint farm build number must be higher than the source farm build number or at least the same build number of source farm (Not lower than the source farm) to avoid this error “This content database has a schema version which is not supported in this farm”

- In the case of using Backup-SPFarm & Restore-SPFarm cmdlets, The destination farm build number must be the same as or higher than the source farm build number. To determine the build number of your source farm Check Find the latest Cumulative Update installed in a SharePoint Farm.
- You cannot use the database attach upgrade method (backup and restore the database) on the same farm.
Each site collection within the farm has a unique ID, which is not changed during the database restore process. Instead, you must use
Backup-SPSiteandRestore-SPSitewhich changes the ID of the Site Collection that is restored.
In the below section, we will list the main steps that you should perform in the current farm and the target farm.
- In the current farm, you should do the following:
- Specify the web application content database.
- Backup the content database.
- Backup all the deployed SharePoint solutions (WSP).
Specify the web application content database.
- Open SharePoint Management Shell as Administrator.
- Run the
Get-SPContentDatabaseto list all web applications with their content database.
Take a full database backup from the web application content database.
- Open SQL Server Management Studio.
- Connect to SQL Server instance.
- Backup the content Database.
In case, the web application have more than one content database. you should backup all web application content databases
- Create a ‘WSPSolutions’ folder at any location.
- Open SharePoint Management Shell as Administrator.
- Run the below cmdlets to backup all the deployed WSP solutions on your farm.
$FolderPath = "c:\WSPSolutions"
foreach ($solution in Get-SPSolution)
{
$id = $Solution.SolutionID
$title = $Solution.Name
$filename = $Solution.SolutionFile.Name
$solution.SolutionFile.SaveAs("$FolderPath\$filename")
}
For more details, please check How to install and deploy WSP solution
- In the destination farm, you should do the following:
- Prepare your SharePoint destination farm.
- Create a new web application, site collection.
- Take a full database backup for the web application content database to enable the rollback if the migration process failed.
- Dismount the web application content database.
- Restore the database backup taken from the source farm.
- Mount the content database for the web application.
- Test the mounted content database.
- Upgrade the mounted content database.
- Deploy the custom WSP SharePoint solutions.
- Change the site collection administrator.
Create a new web application, site collection.
- Open Central Administration > Application Management > Manage Web Application > Click New to create a new web application.
- Once the web application has been created, create its site collection.
Take a full database backup for the web application content database
Take a full database backup for the web application content database to enable the rollback if the migration process failed.
- Open SQL Server Management Studio.
- Connect to SQL Server instance.
- Backup the content Database.
Dismount the web application content database.
- Using SharePoint Management Shell, Run the Dismount-SPContentDatabase cmdlet to de-attach the content database from its web application.
Dismount-SPContentDatabase "content database name"The Dismount-SPContentDatabase cmdlet detaches the content database from the Web application, but it does not delete the content database from SQL Server.
- Using Central Administration:
- Open Application Management > Manage Content database.
- Select the Web Application URL.
- Click on Content Database name > Check Remove Content Database > OK.
Restore the database backup
- Verify that you have the following memberships:
- securityadmin fixed server role on the SQL Server instance.
- db_owner fixed database role on all databases that are to be updated.
- Open SQL Server Management Studio.
- Connect to SQL Server instance.
- Restore the database backup taken from the source farm.
Mount content database to a web application
To attach a content database to a web application you should run the below cmdlet
Mount-SPContentDatabase "" -DatabaseServer "" -WebApplication http://SiteName- Test the mounted content database.
Test-SPContentDatabase "content database name"- Upgrade the mounted content database.
Upgrade-SPContentDatabase "content database name"
- Deploy the custom WSP SharePoint solutions.
- Copy the WSPSolutions folder from the source farm to the destination farm.
- Perform deploy to WSP SharePoint solutions.
- From the source farm, copy all DLL files in the bin folder of the web application located in \\inetpub\wwwroot\wss\VirtualDirectories\[Web Application Port Number]\bin
- Paste it into the same path on destination farm.
- Update web.config of the web application with all custom entries in web.config of Web Application in Staging farm.(Connection String,Chart Settings ,Custom Configurations ….etc).
Note: don’t use any online text compare tool to check the difference between web.config files, these files have a sensitive data, so it’s heavily recommended to use an offline tool like Windiff.exe Utility
- Change the site collection administrator.
- Open Central administration > Application Management > Chanage the site collection administrator.
- Select the site collection > Set the new site collection administrator.
All the above steps have been demonstrated in more details with image at SharePoint 2013 migration from staging to the production farm.
Conclusion
In this article, I have explained How to migrate SharePoint Web Application to another SharePoint farm.
Applies To
- SharePoint 2016.
- SharePoint 2013.
- SharePoint 2010.


Awesome guidelines, thanks for sharing
glad to hear it helped you