In this article, we’ll explain how to perform Project Server 2013 migration to move PWA instance from one farm to another.
- 1 Move PWA Instance from one farm to another farm in Project Server 2013
-
2
Project Server 2013 Migration Guide
- 2.1 PWA 2013 Migration Steps on Staging Environment
- 2.2 Backup all the deployed SharePoint solutions (WSP)
-
2.3
PWA 2013 Migration Steps on Production Environment
- 2.3.1 Install and configure Project Server 2013
- 2.3.2 Perform full database backup for the new PWA instance databases
- 2.3.3 Dismount PWA Instance
- 2.3.4 Dismount PWA Instance Content Database
- 2.3.5 Dismount web application Content Databases
- 2.3.6 Restore Old PWA instance Database Backup
- 2.3.7 Mount ‘WSS_Content’ content database to the new PWA instance
- 2.3.8 Mount PWA content database
- 2.3.9 Mount ‘ProjectWebApp’ project database
- 2.3.10 Mount PWA Instance
- 2.3.11 Deploy custom WSP solution
- 2.3.12 Change PWA Instance Administrator
- 2.3.13 Perform a Bulk Update connected SharePoint sites
- 2.3.14 Update Project Server Cube settings
Move PWA Instance from one farm to another farm in Project Server 2013
Consider, you have production and staging environments for Project Server 2013, and you would like to move PWA instance from the production farm to the staging farm or from staging to production.
So the important question is How we can move and migrate PWA instance between two farms?
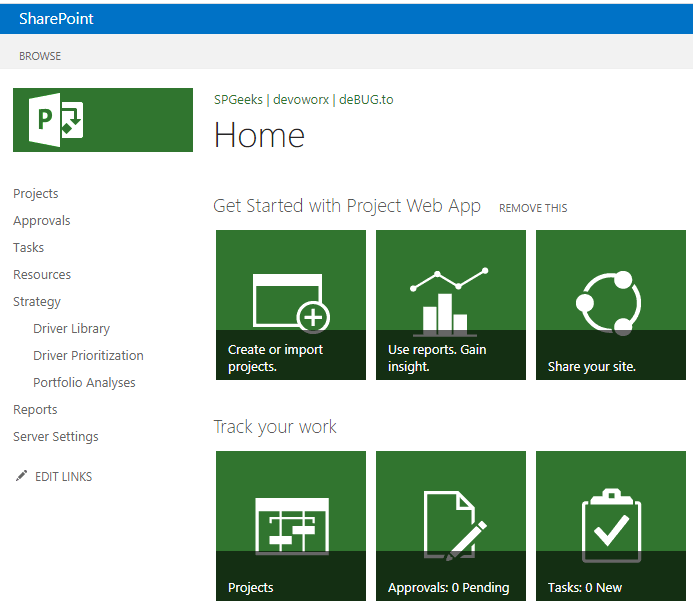
In the next section, we will explain step by step how to perform PWA instance migration from one farm to another in a correct and smooth way.
You might also like to read Migrate from Project Server 2013 to Project Server 2016.
Project Server 2013 Migration Guide
Here, we will consider that we’re gonna performing Project Server 2013 Migration from Staging environment to Production environment.
Therefore, to organize the migration process, we will divide our steps into two main parts, some steps will be performed on the first farm (Staging Environment), and other steps will be performed on the second farm (Production environment).
PWA 2013 Migration Steps on Staging Environment
On the Project Server 2013 Staging farm , we should do the following:
- Get the Web Application content databases.
- Get the PWA ‘Project Web App’ database name.
- Perform a full database backup for the PWA instance database.
- Perform a full database backup for the web application content databases.
- Backup all the deployed SharePoint solutions (WSP) on your farm if exist.
Get the Web Application content databases
- Open SharePoint Management Shell as Administrator.
- Run “
Get-SPContentDatabase” to get the attached content databases for the web application that holds the PWA instance.
Get-SPContentDatabase -WebApplication http://epm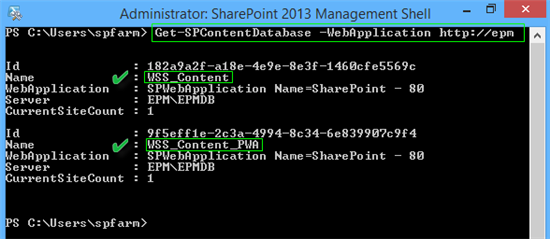
In our case, we have two content databases:
- WSS_Content.(The Main web application Content Database that holds the root site collection).
- WSS_Content_PWA.(An independent Content Database for PWA site collection).
Get PWA Database Name
- Open SharePoint Management Shell as Administrator.
- Run “
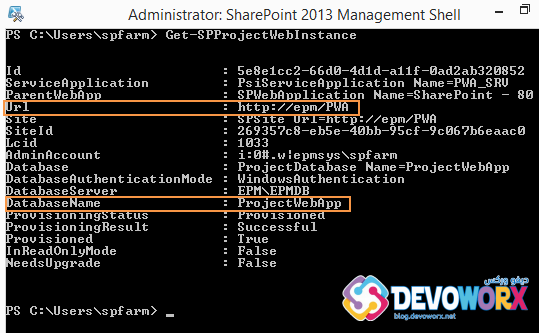
Get-SPProjectWebInstance” to get the PWA instance details.
Get-SPProjectWebInstance- In our case, I have one PWA instance ‘http://epm/pwa’ with a project database called “ProjectWebApp”.
You might also like to read Get PWA Instance Details using PowerShell
Perform a full database backup for the PWA Instance Database
- Open SQL Server Management Studio.
- Connect to the SQL Server instance.
- Backup PWA Instance Database, In our case, it is “ProjectWebApp”.
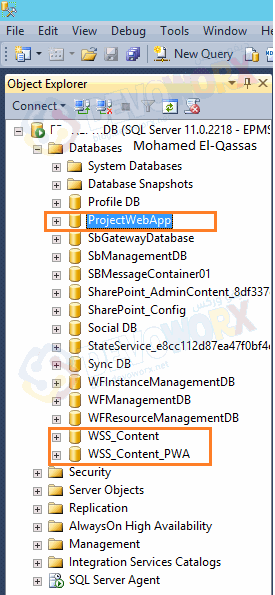
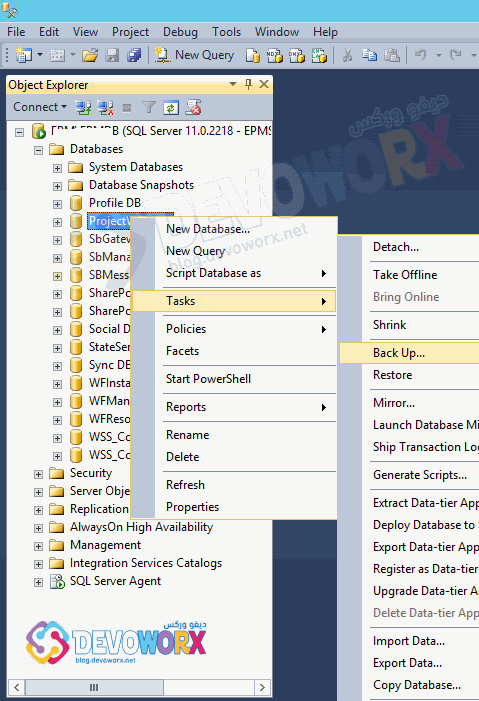
- Right click on Database name > Tasks > Back Up.
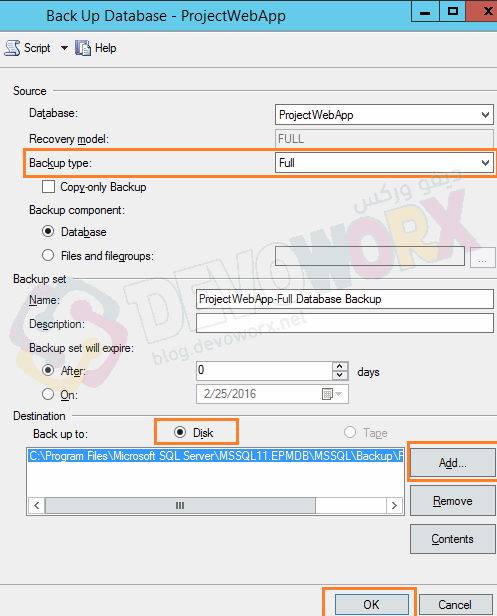
- Ensure Backup type is Full > Disk > Select the back up path > OK.
- Backup has been taken successfully.

Alternatively, you can use the following T-SQL to take a full database backup:
BACKUP DATABASE WSS_Content_PWA
TO DISK = 'C:\WSS_Content_PWA.BAK'
GO
Perform a full database backup for the web application content databases
- Repeat the above backup steps for the following content databases:
- WSS_Content.
- WSS_Content_PWA.
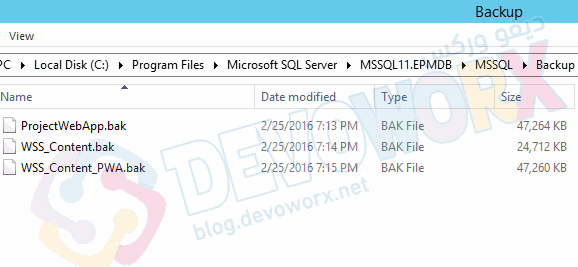
- Once you have finished, check the backup path to make sure that the required database backup has been taken as shown below.
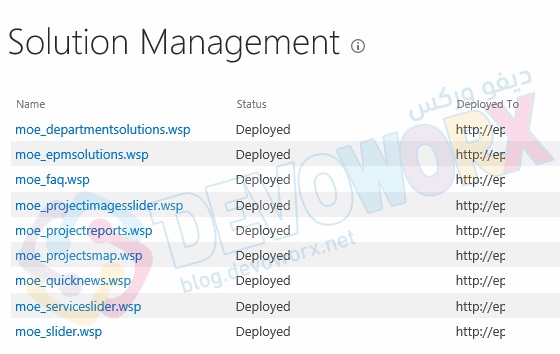
If you have custom solution in your farm, so you will need to backups these WSP solutions from the first farm and deploy it to the destination farm.
- Create a ‘WSPSolutions’ folder at any location.
- Open SharePoint Management Shell as Administrator.
- Run the below cmdlets to backup all the deployed WSP solution in your farm.
$FolderPath = "c:\WSPSolutions"
foreach ($solution in Get-SPSolution)
{
$id = $Solution.SolutionID
$title = $Solution.Name
$filename = $Solution.SolutionFile.Name
$solution.SolutionFile.SaveAs("$FolderPath\$filename")
}
You might also like to read Install and deploy SharePoint Solution Package (WSP) Using PowerShell
PWA 2013 Migration Steps on Production Environment
On the Project Server 2013 Production farm , we should do the following:
- Prepare Project Server 2013 farm.
- Take a full database backup for the following database to enable the rollback if the migration process failed.
- ProjectWebApp.(Projects Database).
- WSS_Content.(The web application Content Database).
- WSS_Content_PWA.(In case of you are using an independent Content Database for PWA Instance).
- Dismount Project Web App Instance.
- Dismount PWA Instance Content Database.
- Dismount Web Application Content Databases.
- Restore the source database backup.
- Mount ‘WSS_Content’ Content Database.
- Mount ‘WSS_Content_PWA’ Content Database.
- Mount ‘ProjectWebApp’ Project Database.
- Mount the PWA Instance.
- Deploy your custom WSP solution if exist.
- Change the site collection administrator.
- Change PWA Instance Administrator.
- Perform a Bulk Update connected to SharePoint sites.
- Update Project Server Cube settings.
Install and configure Project Server 2013
In this article, we’ll not cover the detail steps to prepare the Project Server 2013 destination farm. however, we just will outline the main steps that should be applied to be ready as the following:
- Install and Configure SharePoint Server 2013 with SP1 Enterprise Edition.
- Install Project Server 2013 with SP1.
The Project Server 2013 destination farm build number must be higher than the source farm build number or at least have the same build number of source farm (Not lower than the source farm) to avoid this error This content database has a schema version which is not supported in this farm.
- Install the latest Cumulative Update that already installed in the source farm.
To determine the build number of your source farm and get the latest CU that already installed. Check What’s the current Cumulative Update installed on SharePoint Farm?
- Install the corresponding Language Pack that already installed in the source farm.
- Create a Web Application and Site Collection.
- Provision a Project Server Application Service.
- Lockdown the content database if you are using an independent content database for PWA in the source farm. For more details check Content Database Consideration during the provision of a new PWA Instance In Project Server 2013.
- Provision a PWA instance.
You might also like to read Install and Configure Project Server 2016 step by step
Perform full database backup for the new PWA instance databases
To enable the rollback in case of the migration process failed, It’s recommended to take a full database backup for the following databases:
- ProjectWebApp.
- WSS_Content.
- WSS_Content_PWA.
Dismount PWA Instance
- Open SharePoint Management Shell as Administrator.
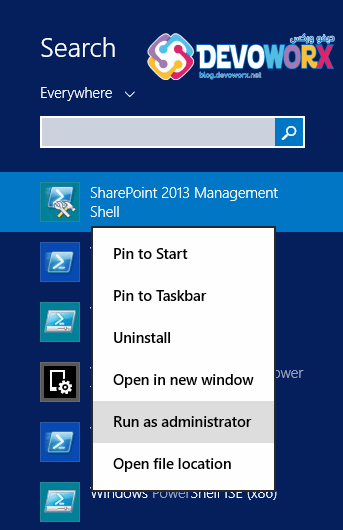
- Run the below cmdlet to get all provisioned PWA instances on the farm.
Get-SPProjectWebInstance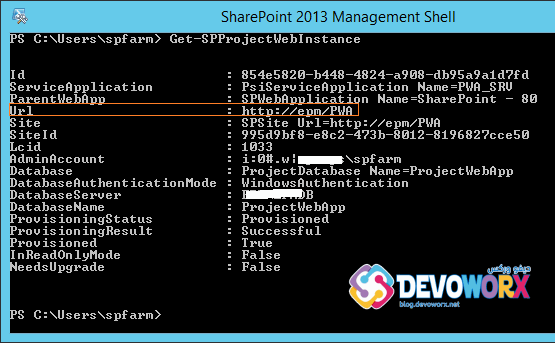
You can also get the provisioned PWA instances via Central Administration as mentioned below.
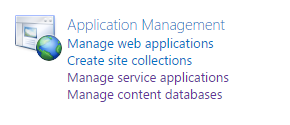
- Open Central Administration > Application Managemet.
- Click on Mange Service Application.
- Click on PWA service application to show all the PWA instances that already provisioned in the farm.
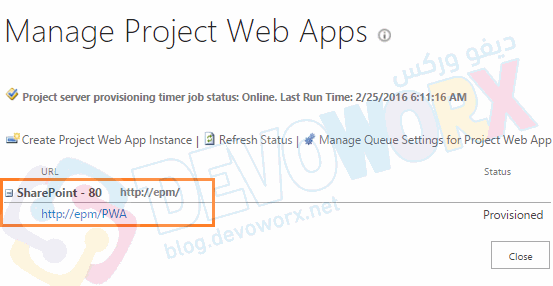
- Dismount the existing Project Web Instance to disconnect the SharePoint site collection from the Project Web App database by running the below cmdlet.
Dismount-SPProjectWebInstance -SiteCollection "http://SERVER/pwa"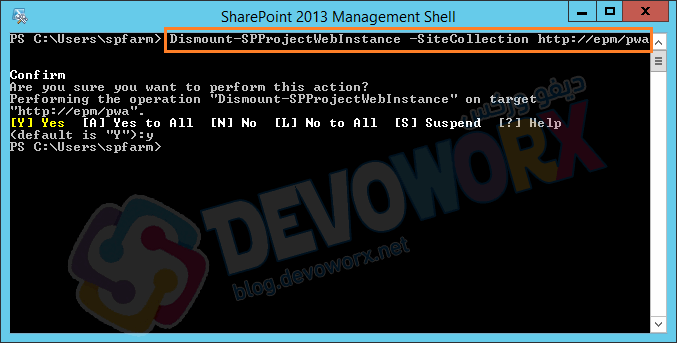
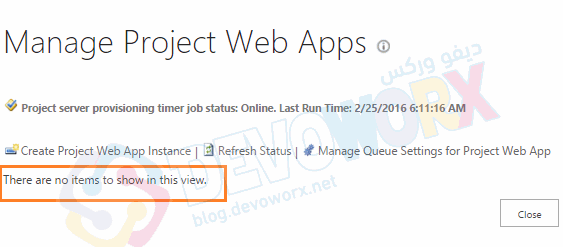
- You should now note that the PWA instance has been removed in the Central Administration > Manage PWA.
Dismount PWA Instance Content Database
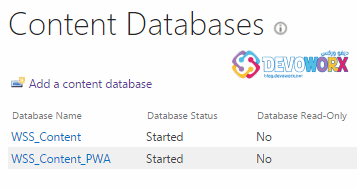
- Dismount the PWA content databases from its currently associated web application that host the PWA instance.
Dismount-SPContentDatabase WSS_Content_PWA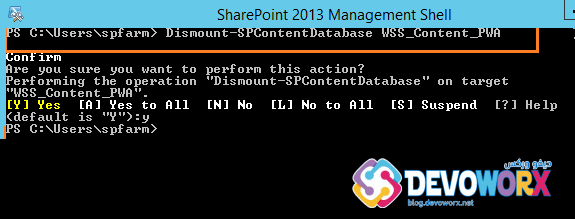
The Dismount-SPContentDatabase cmdlet detaches the content database from the Web application, but it does not delete the content database from SQL Server.but it does not delete the content database from SQL Server.
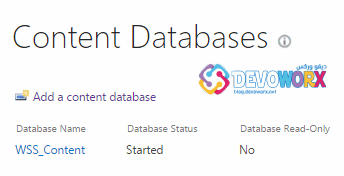
- After performing ‘Dismount-SPContentDatabase’, you should note that the dismounted database has been removed from Content Databases in central administration as shown below:
Dismount web application Content Databases
- Again, Dismount the ‘WSS_Content’ Content Database.
Dismount-SPContentDatabase WSS_Content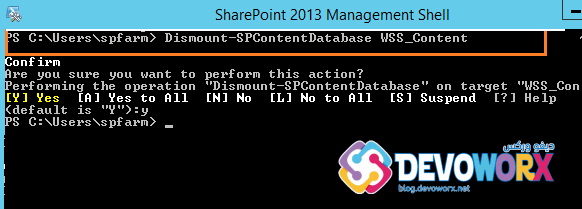
- The Content Database is now dismounted successfully as shown below.

Restore Old PWA instance Database Backup
Now we are ready to restore the database backup from the source farm to the destination farm by doing the following:
- Move the database backup from the source farm to an appropriate path (Backup Path) in SQL Server of the destination farm.
- ProjectWebApp.
- WSS_Content.
- WSS_Content_PWA.
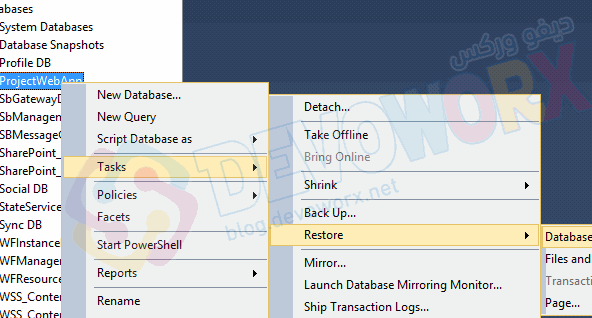
- Open the SQL Server Management Studio > Connect to your instance.
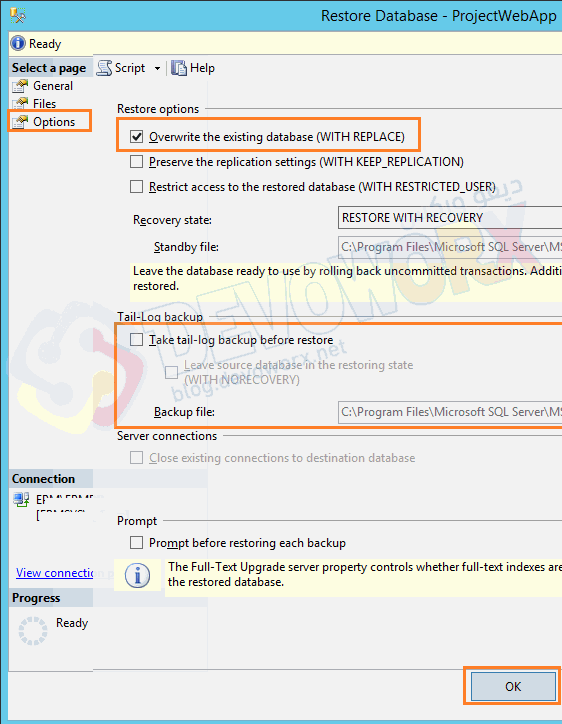
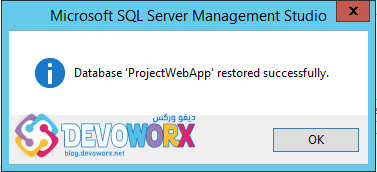
- Perform the restore operation for each database as shown below.
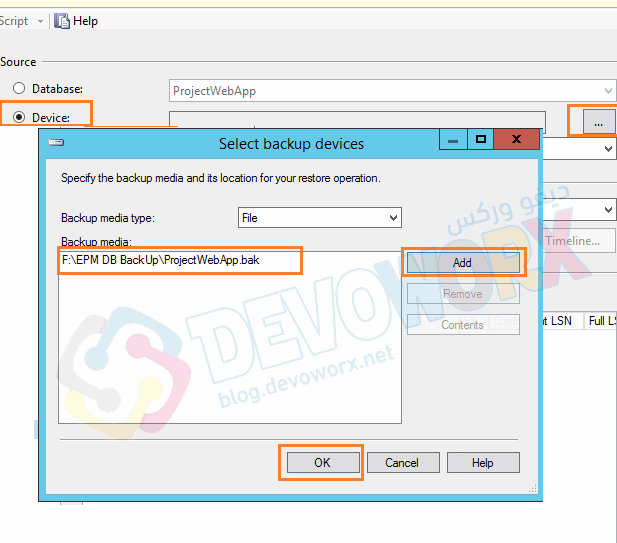
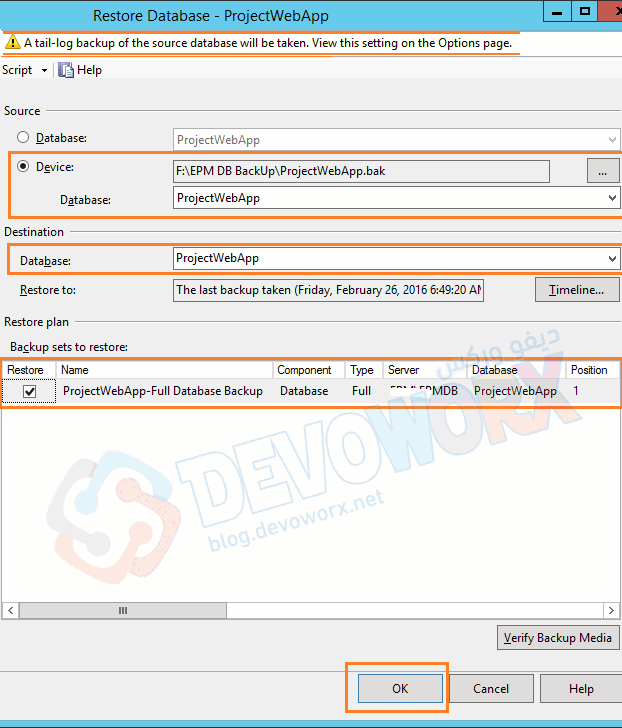
A tail-log backup is unnecessary if you are moving or replacing (overwriting) a database.
- Repeat the above steps for other databases.
Mount ‘WSS_Content’ content database to the new PWA instance
Once the restore operation is done, we should now mount (reattach) each database again to its web application as mentioned below:
- Run the ‘Mount-SPContentDatabase’ for ‘WSS_Content’ database to attach it to its web application that host the PWA instance.
Mount-SPContentDatabase "MyDatabase" -DatabaseServer "MyServer" -WebApplication http://sitename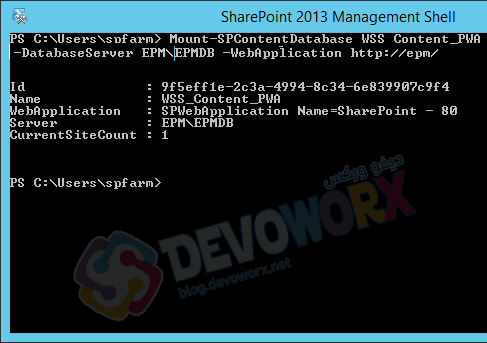
Mount PWA content database
- Again, Mount ‘WSS_Content_PWA’ database to the web application that host the PWA instance.
Mount-SPContentDatabase "MyDatabase" -DatabaseServer "MyServer" -WebApplication http://sitename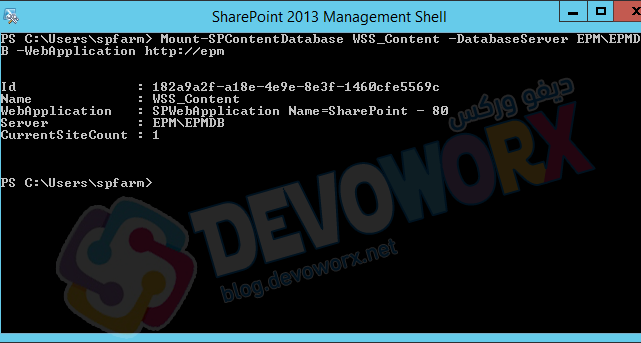
Mount ‘ProjectWebApp’ project database
- Now you should Mount the ‘ProjectWebApp’ database to the web application that host your PWA instance.
Mount-SPProjectDatabase "MyDatabase" -DatabaseServer "MyServer" -WebApplication http://sitename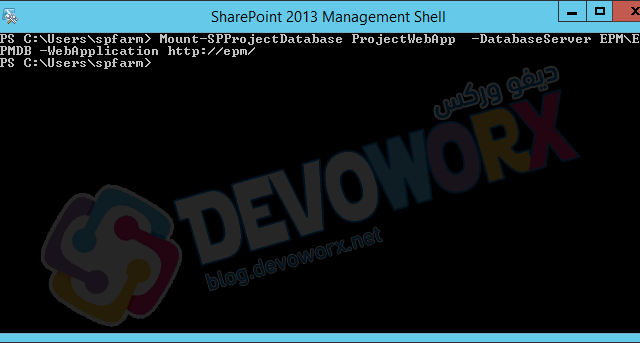
Mount PWA Instance
- Mount the PWA Instance to associate the PWA site collection to its Project Web App database.
Mount-SPProjectWebInstance -SiteCollection "http://SERVER/pwa -DatabaseServer" "SQLSERVER" -DatabaseName "ProjectWebApp"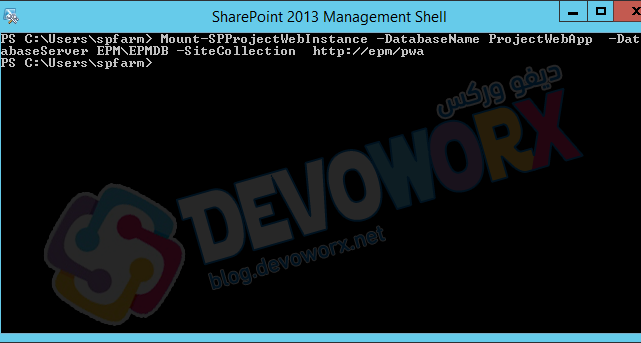
- Go back to central administration > to make sure that the PWA Instance has been mounted and provisioned successfully.

Deploy custom WSP solution
- Copy all DLL files in ‘bin‘ folder of the source web application that located in
\\inetpub\wwwroot\wss\VirtualDirectories\[Web Application Port Number]\bin
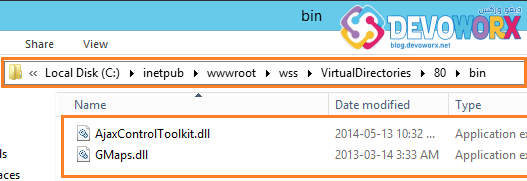
- Paste DLL’s to the ‘bin‘ folder of the destination web application.
- Now, install and deploy the WSP solutions to your destination farm as mentioned at Install and deploy a SharePoint (WSP) Solution Package using SharePoint Shell
- Make sure that the solutions have been deployed successfully by going to.
- Central Administration > System Settings > Manage Farm Solution.

Change PWA Site Collection Administrator
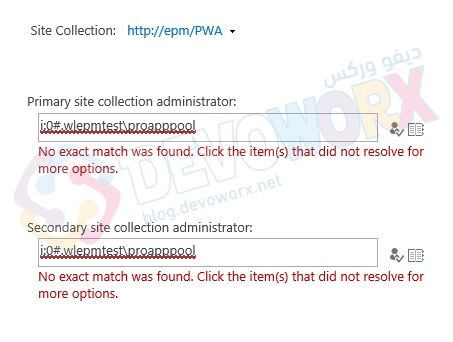
To avoid the below access permission issue. “Sorry, this site hasn’t been shared with you.“

You should change the old PWA Site collection administrator as the following:
- Open Central Administration > Application Management > Change Site Collection Administrators > Select your Web Application > Select the PWA site collection.
- Remove the old site collection administrator then add the new site collection administrator of the current farm.
Change PWA Instance Administrator
- Open Central Administration > Application Management > Manage Service Application.
- Click on PWA service application to show the provisioned PWA instances.
- Edit your PWA instance as shown below.
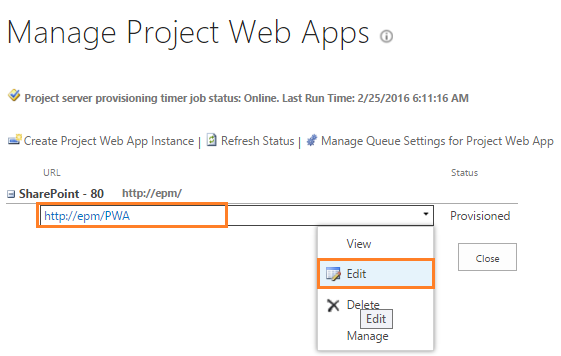
If the Edit option is missing, please check View, Edit, Delete options are missing in Project Server
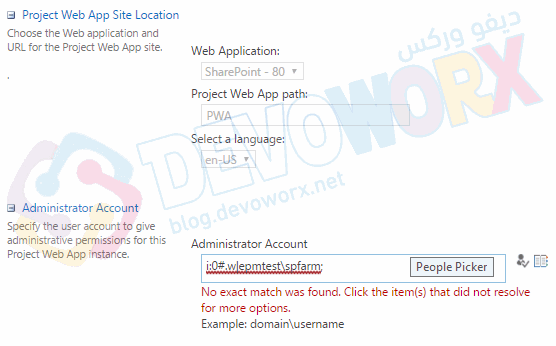
- Provide the New PWA instance administrator.
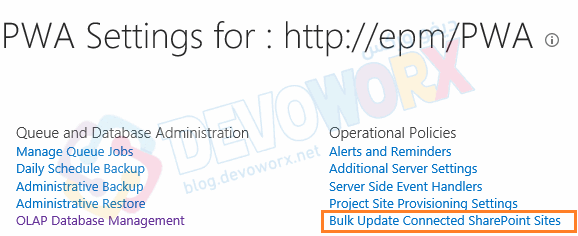
If the PWA site URL has been changed in the new environment, so you should perform a Bulk Update to re-linking the projects with its related connected SharePoint sites as the following:
- Go to Central Administration > General Application Settings > PWA Settings > Manage.
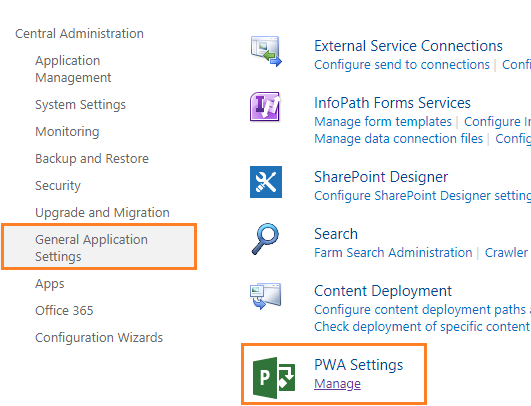
- Click on “Bulk Update Connected SharePoint Sites”.
- Update new site path with your new site URL.
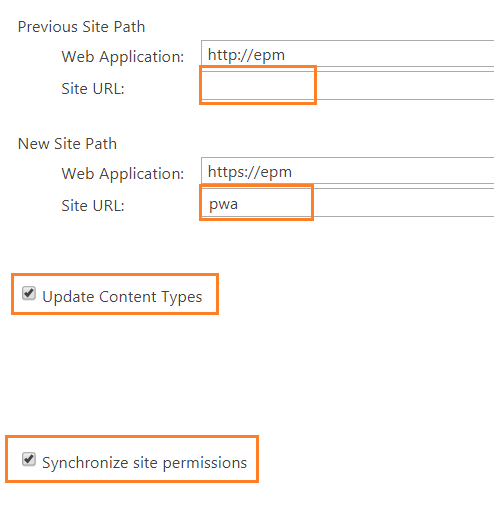
For more details, Please check Change Project Site URL in Project Server 2013
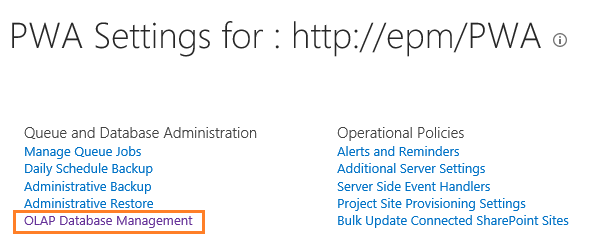
Update Project Server Cube settings
- Go to Central Administration > General Application Settings > PWA Settings > Manage > OLAP Database Management.
Conclusion
In conclusion, we have learned step by step how to perform Project Server 2013 Migration to move a PWA instance from one farm to another farm.
Applies To
- Project Serve 2013.
You might also like to read
- Install and Configure Project Server 2016 step by step.
- Upgrade to Project Server 2016 Step By Step.
- Configure Workflow Manager SharePoint 2016.
Have a Question?
If you have any related questions, please don’t hesitate to ask it at deBUG.to Community.

Pingback: Can't find multiple value lookup table custom fields in EpmProject Userview | SPGeeks
Pingback: Sorry, you don't have a license to use Project Web App In Multi-Tenant Project Server | SPGeeks
Great details. Clarification question … Why do you need to move the WSS_Content DB. I have PS set up so it has its own WSS_Content DB as it appears you do in your steps. Can I just move the MSPS WSS_Content DB or do I need to include the WSS_Content DB?
Tx
Andrew
Well explained . Very nice way of knowledge sharing.
Hi. Thanks for the details. But for me the workflows which is already there in the EPM are not moving into the next level. Can you help me on that