In this article, we’ll explain How to “Show / Hide fields based on choice field selection using JQuery in SharePoint 2016 / 2013“.
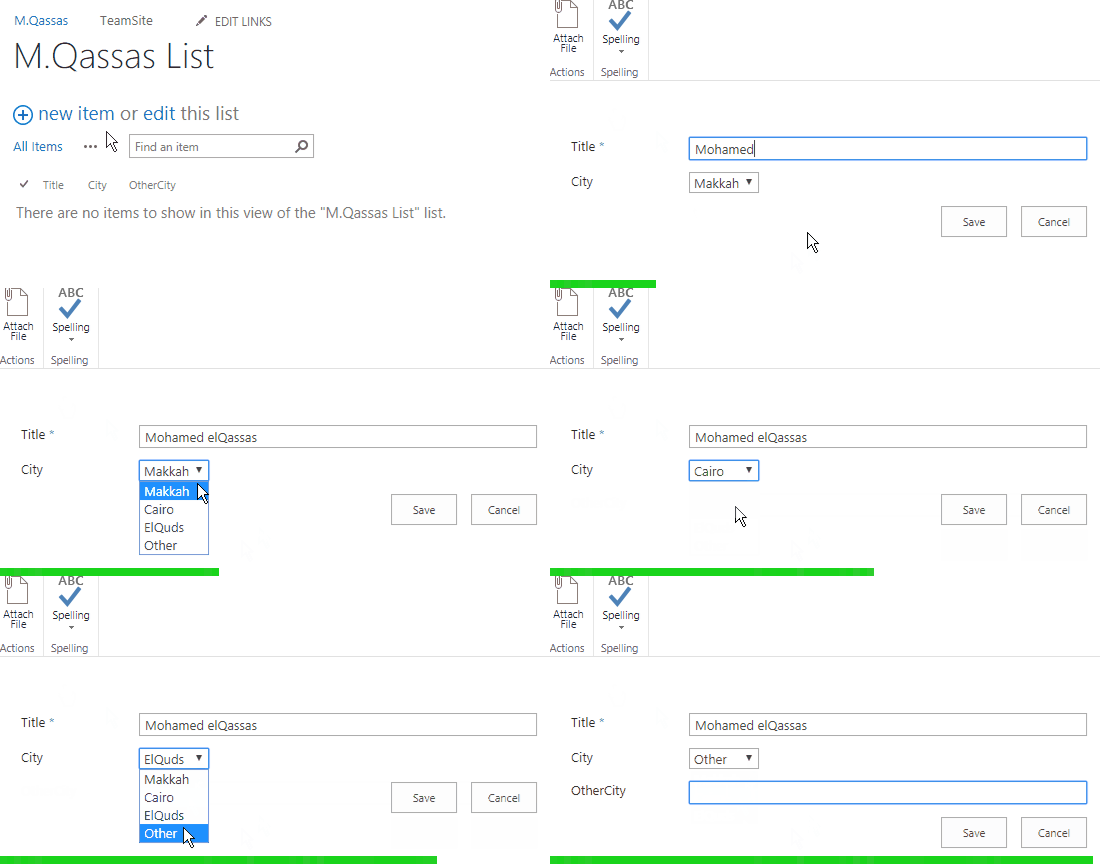
We’ll also learn how to
Applies To
- SharePoint 2016.
- SharePoint 2013.
- SharePoint 2010.
You might also like to read SharePoint Auto Populate Column based on another Column.
In this section, we’ll learn
- Show and hide a column based on Choice field / Drop-down selection in New Form?
- Show and hide a column based on Choice field / Drop-down selection in Edit Form?
- Show and hide a column based on Choice field / Drop-down selection in Display Form?
Show / Hide fields based on choice field selection: Create a Custom List.
Steps
- Open the SharePoint Site > Site Settings > Click on Add an app.
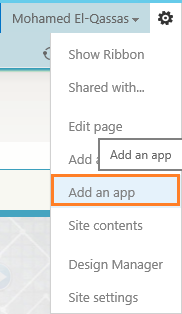
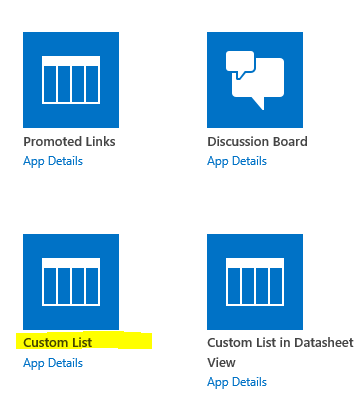
- Click on a Custom List.
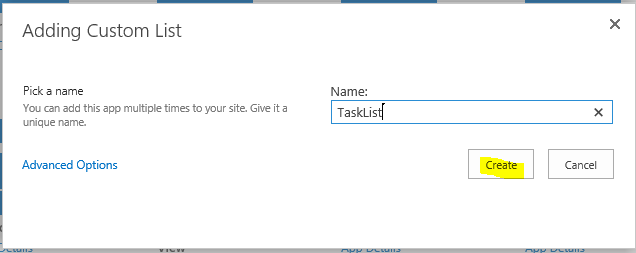
- Specify your custom list name > Click on Create.
- The custom list is created successfully.

- At the above ribbon > List Tab > Select List Settings.

- Below Columns section > Click on Create column.
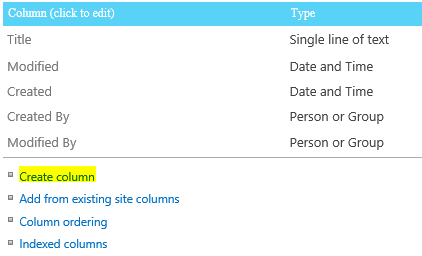
- Specify the column name > Select ‘Choice’ data type.
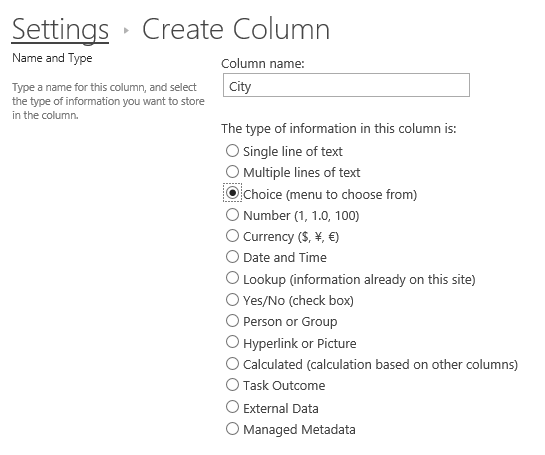
- Type your choices and select Drop-Down Menu.
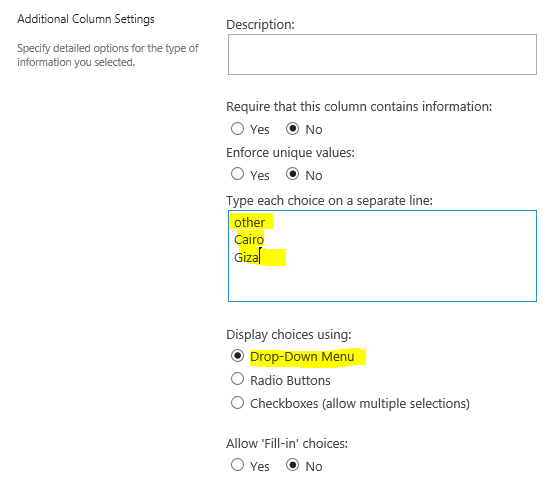
- Again, Create a new column with a ‘Single line of text’.
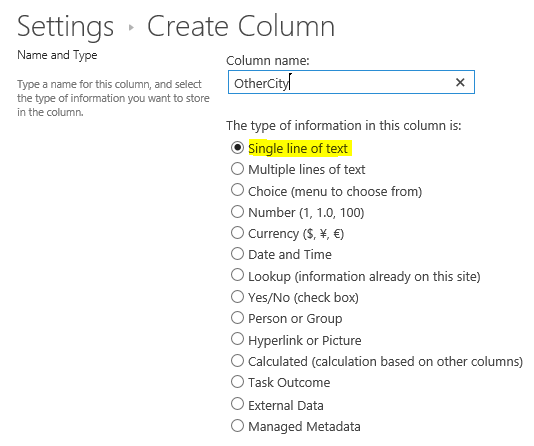
- Now you should have two columns as shown below.

Show / Hide fields based on Choice field selection in New Form
In this section, we’ll explain how to show and hide fields based on Choice field selection in SharePoint List New Form by following the below steps:
Steps
- In ‘All items’ Page, > From the above ribbon, > In ‘Customize List’ Section > Click on ‘Form Web Parts’ > Select Default New Form.

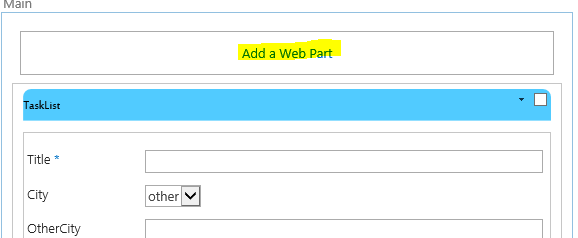
- The ‘New Form‘ will be opened in ‘Edit Mode‘ > Click on ‘Add a Web Part‘.
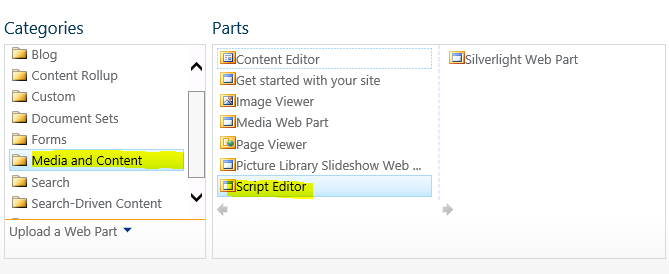
- Inside Media and Content > Script Editor > Click on Add.
In SharePoint 2010, There is no a Script Editor web part, you should follow the same below steps by using Content Editor Web Part.
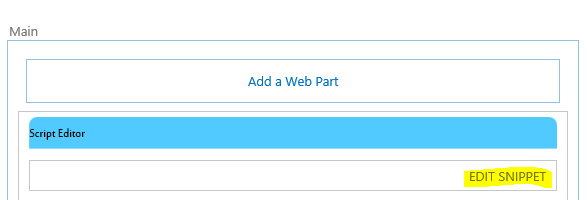
- Click on EDIT SNIPPET.
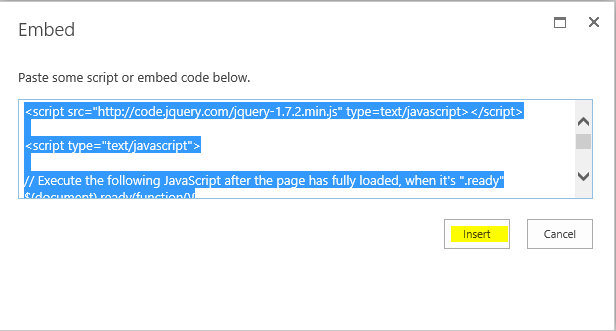
- Add the following code.
    $(document).ready(function() {
        //Show/hide columns based on Drop Down Selection
        $("select[title='City']").change(function() {
            if ($("select[title='City']").val() != "other") {
                $('nobr: contains("OtherCity")').closest('tr').hide();
            } else {
                $('nobr: contains("OtherCity")').closest('tr').show();
            }
        });
    });
Download the full code for New Form on GitHub at Show / Hide fields based on choice field selection in SharePoint
What you should change in your side, to get this code working
- Replace the choice field name ‘City’ at
$("select[title='City']").change(function() {if ($("select[title='City']").val() != "other")with your column name. - Replace the field name ‘OtherCity’ that you need to hide or show at
$('nobr:contains("OtherCity")').closest('tr').hide();with your field name.
You can Show and Hide multiple fields by repeating the code with your second field name in IF-Else block as shown below:
if ($("select[title='City']").val() != "other") {
    $('nobr:contains("OtherCity")').closest('tr').hide();
    $('nobr:contains("Field2")').closest('tr').hide();
} else {
    $('nobr:contains("OtherCity")').closest('tr').show();
    $('nobr:contains("Field2")').closest('tr').show();
}- Click on Insert.
- In the above ribbon > Page Tab > Click on Stop Editing.

- Go back to test your code and click on Add New Item.
- The ‘other city’ field should be shown in a case of the ‘other’ option is selected from “City” drop-down field.
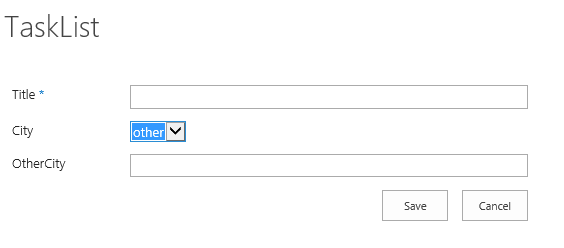
- Select any value else ‘other’ where the ‘OtherCity’ field will be hidden.

You can also show hide another drop-down field based on a drop-down selection with the same code.
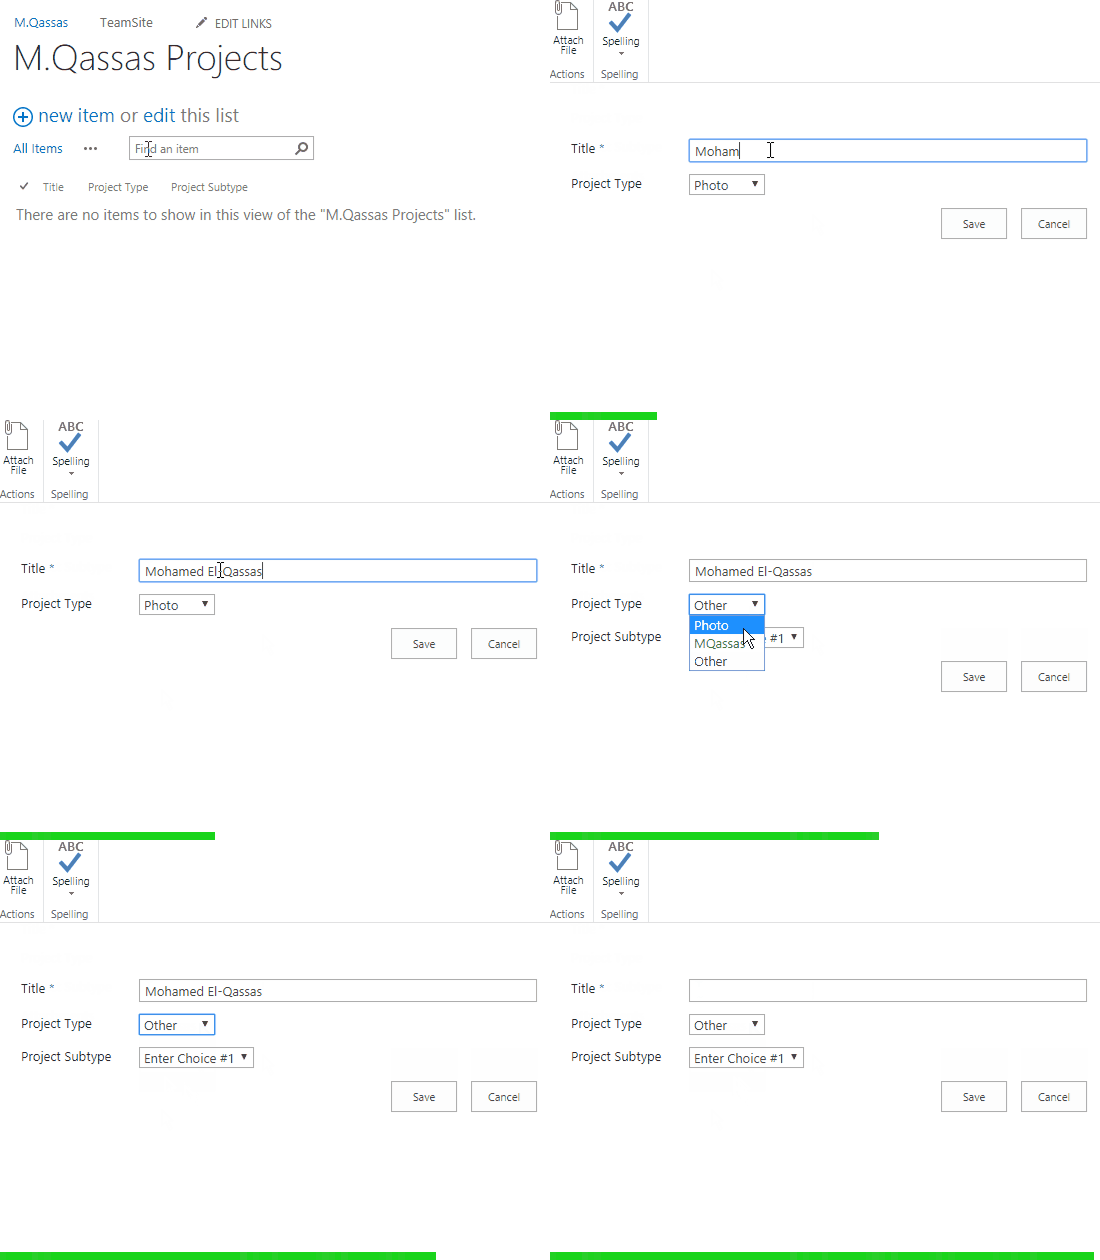
Note: if you have many columns, it will lead to having a long and complex code with many if/else conditions, in this case, you should use this workaround as mentioned at Show and Hide columns based on choice selection in SharePoint 2016
Show / Hide fields based on a lookup selection in Edit Form
In this section, we’ll explain how to show and hide fields based on Choice field selection in SharePoint List Edit Form by following the below steps:
Steps
- In ‘All items’ Page, > From the above ribbon, > In ‘Customize List’ Section > Click on ‘Form Web Parts’ > Select Default Edit Form.

- The ‘Edit Form‘ will be opened in ‘Edit Mode‘ > Click on ‘Add a Web Part‘.

- Inside Media and Content > Script Editor > Click on Add. (Note: in SharePoint 2010 there is only Content Editor).

- Click on EDIT SNIPPET.

- Add the following code.
 $(document).ready(function() {
        if ($("select[title=’City’]").val() != "other") {
            $('nobr: contains("OtherCity")').closest('tr').hide();
        } else {
            $('nobr: contains("OtherCity")').closest('tr').show();
        }

        //Show/hide columns based on Drop Down Selection
        $("select[title=’City’]").change(function() {
            if ($("select[title='City']").val() != "other") {
                $('nobr: contains("OtherCity")').closest('tr').hide();
            } else {
                $('nobr: contains("OtherCity")').closest('tr').show();
            }
        });
    });
Download the full code for Edit form on GitHub at Show / Hide fields based on choice field selection in SharePoint
What you should change in your side, to get this code working
- Replace the choice field name ‘City’ at
$("select[title='City']").change(function() {if ($("select[title='City']").val() != "other")with your column name. - Replace the field name ‘OtherCity’ that you need to hide or show at
$('nobr:contains("OtherCity")').closest('tr').hide();with your field name.
You can Show / Hide multiple fields by repeating the code with your second field name in IF-Else block as shown below
if ($("select[title='City']").val() != "other") {
    $('nobr:contains("OtherCity")').closest('tr').hide();
    $('nobr:contains("Field2")').closest('tr').hide();
} else {
    $('nobr:contains("OtherCity")').closest('tr').show();
    $('nobr:contains("Field2")').closest('tr').show();
}- Click on Insert.

- At the above ribbon,> Click on Stop Editing.

- Go back to test your code and Click on Edit Item.where “OtherCity” field should be hidden in a case of the selected city was not “other” option
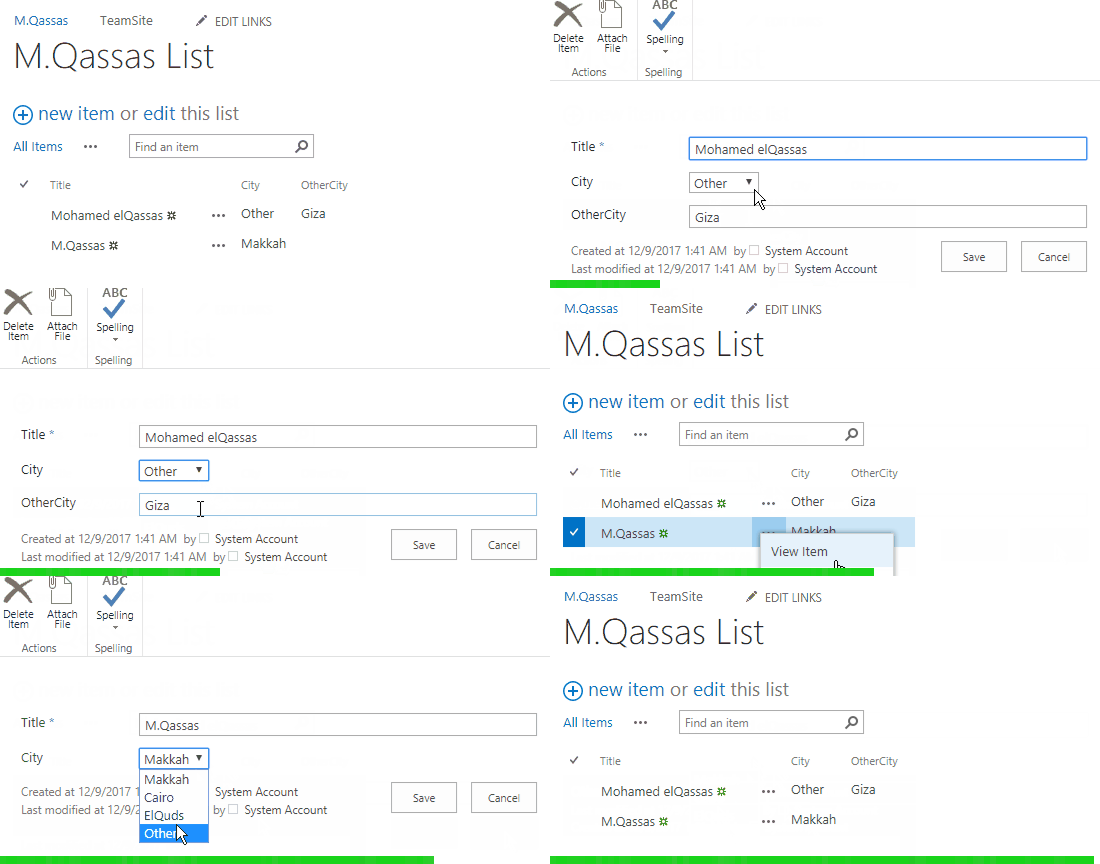
You might also like to read Auto Populate Field Values based on Lookup Selection In SharePoint.
Show / Hide fields based on Choice field selection in Display Form
In this section, we’ll explain how to show and hide fields based on Choice field selection in SharePoint List Display Form by following the below steps:
Steps
- In ‘All items’ Page, > From the above ribbon,
- In ‘Customize List’ Section > Click on ‘Form Web Parts’ > Select Default Edit Form.

- The ‘Display Form‘ will be opened in ‘Edit Mode‘ > Add a Web Part > Media and Content > Script Editor.
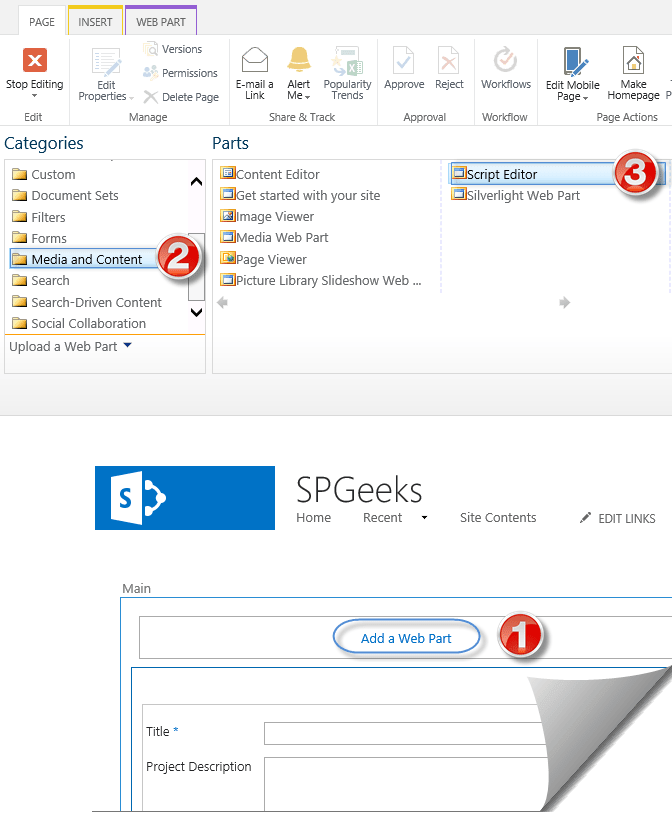
- Add the below code.
 $(document).ready(function() {
        if ($('h3: contains("City")').closest('td').next('td').text()
            .indexOf(‘other’) == -1) {
            $('h3: contains("OtherCity")').closest('tr').hide();
        } else {
            $('h3: contains("OtherCity")').closest('tr').show();
        }
    });
Replace the choice field name ‘City’ at if condition
$('h3:contains("City")').closest('td').next('td').text()with your columns name.
- Open Display form, the ‘OtherCity’ field should be hidden if the selected city was not “other”.
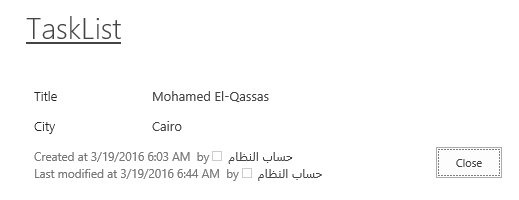
- In a case of ‘City’ is “other”. so that, the “OtherCity” should be shown.
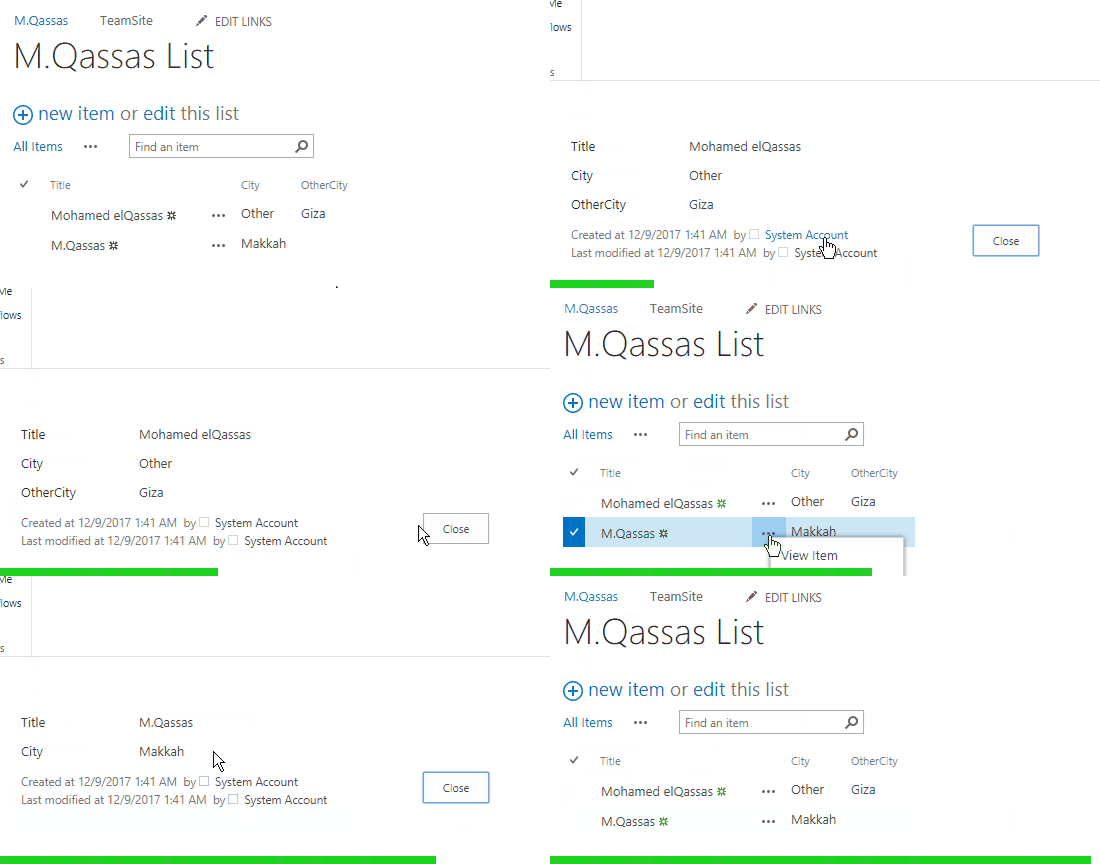
Download the full code for Display Form on GitHub at Show / Hide fields based on choice field selection in SharePoint
Conclusion
In conclusion, we have learned how to How to “Show / Hide fields based on choice field selection using JQuery in SharePoint 2016 / 2013“.
We have also learned, how to show and hide a column based on Choice field selection in SharePoint using JQuery for
- SharePoint List New Form.
- SharePoint List Edit Form.
- SharePoint List Display Form.
Download
Download the full code from GitHub at Show / Hide fields based on choice field selection in SharePoint, also Please, don’t forget to Follow Me to get the latest updates.
You might also like to read
- Show / Hide fields based on a drop-down field using SPUtility.js
- SharePoint Auto Populate Column based on another Column
- Disable SharePoint Field Using JQuery
- Disable Choice Field On Edit Form in SharePoint 2016
- Show and Hide Columns in SharePoint List Forms Using PowerShell
Have a Question?
If you have any related questions, please don’t hesitate to ask it at deBUG.to Community.


what if u wanted to make the field as read only in Edit form?
Check this https://spgeeks.devoworx.com/disable-field-edit-form-sharepoint/
Hello from Canada. I’m pretty new to SharePoint and I’m working on a French-Canadian 2016 Online site. I tried your tutorial, but it does not work. Maybe it’s because I have to use ‘the New Experience’ ? I heard it does not have anymore. How can I get around that problem? Or maybe because my field has accents? How Javascript deal with accents? Thank you in advance for your time…
Yes, you are right, you can’t use the above example with New Experience’ because the “Form Web Parts” is only available in the Classic experiences, check my detail answer at https://sharepoint.stackexchange.com/questions/225014/can%C2%B4t-access-to-default-newform-to-edit-content
Please don’t hesitate to inform me in case you need further clarification
Given that MS is phasing out the ability to return to the “Classic” view in the very near future. Is there anyway of doing this using the new Sharepoint online experience?
No Code: Use PowerApps for SharePoint Online new experience
Code: Use SPFX extension
I can get this to work when a choice field/column is not required, but if I change it to a required field the code stops working. I suspect it is related to the name of the field contains an asterix when its required but I can not seem to figure it out.
Here is my code
//Errors exist
$(“select[title=’Errors exist’]”).change(function() {
if ($(“select[title=’Errors exist’]”).val() != “Yes”)
{
$(‘nobr:contains(“Error type”)’).closest(‘tr’).hide();
$(‘nobr:contains(“Error comments”)’).closest(‘tr’).hide();
}
else
{
$(‘nobr:contains(“Error type”)’).closest(‘tr’).show();
$(‘nobr:contains(“Error comments”)’).closest(‘tr’).show();
}
});
Hello,
thank you for your article. I have only one Problem, the DisplayForm does not work.
Hi Mohamed,
Please disregard my previous comment. My bad. I had typed the column name in lower case while it should have been upper case. My colleague helped me identify it and it worked well. Great Article. Helped me a lot. Now, I will use this on my actual form and try.
No problem, you are welcome 🙂