In this post, we’ll learn how to sign DLL with a strong name key to an existing DLL file that you don’t have its source code, and you want to use this DLL in SharePoint and ASP.NET solutions without facing this error “A strongly-named assembly is required.“
Could not load file or assembly ‘dll, Version=1.0.0.0, Culture=neutral, PublicKeyToken=null’ or one of its dependencies. A strongly-named assembly is required.
How to Sign DLL with a strong name key to an existing DLL?
Here, we will provide two different ways to sing DLL with a strong name key in case,
- You don’t have a source code and you just have the DLL file.
- You have the source code for your DLL file.
DLL referenced file not had a Strong Key
If you have tried to build a SharePoint solution that has a reference to an existing DLL file that is not signed with a strong key, you will get the following error DLL referenced file not had a Strong Key. Therefore, in order to set a strong key for a DLL file that you don’t have its source code, you should follow the below steps:
Steps
- Open “Visual Studio Command Prompt” from Start Menu.

- Drop the DLL file in a local temp folder in drive C:\.
- Navigate to your DLL Path file by Typing cd\ to go to the Root C:\
- Type cd then Tap Button to navigate to your specific temp folder.
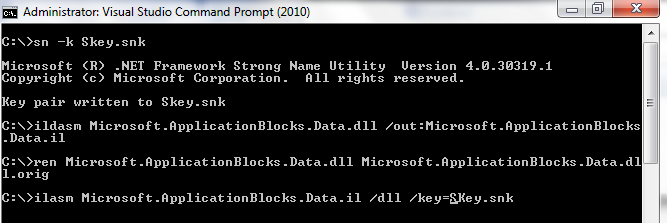
- Generate the Key file.
sn -k Skey.snk- Get the MSIL for the assembly.
ildasm Microsoft.ApplicationBlocks.Data.dll /out:Microsoft.ApplicationBlocks.Data.il- Rename the original assembly, just in case.
ren Microsoft.ApplicationBlocks.Data.dll Microsoft.ApplicationBlocks.Data.dll.orig- Build a new assembly from the MSIL output and your KeyFile.
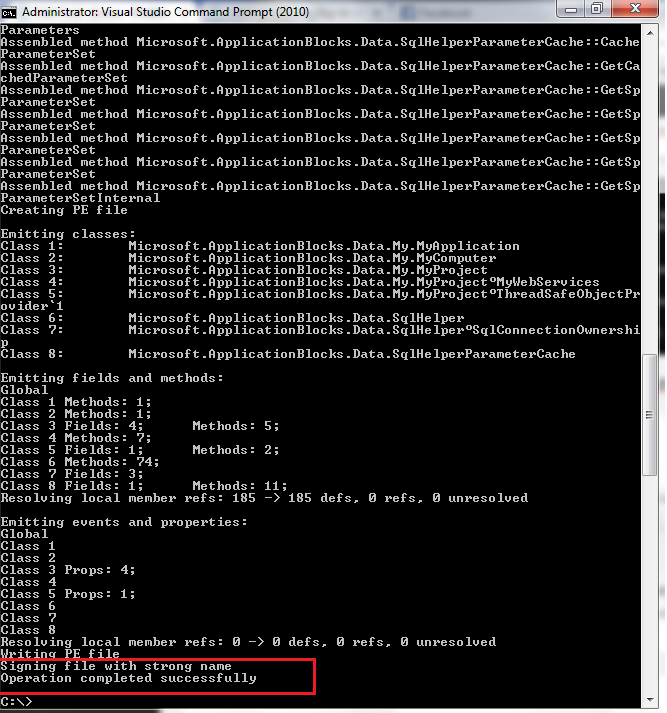
ilasm Microsoft.ApplicationBlocks.Data.il /dll /key=Skey.snkNow, the DLL file should be signed with a strong key and it’s read to use in your Visual Studio.
A strongly-named assembly is required
If you have the source code, and you would like to sing your project with a strongly key name, you should use Signing in Visual Studio as the following:
Steps
- Open your Project in Visual Studio as Administrator.
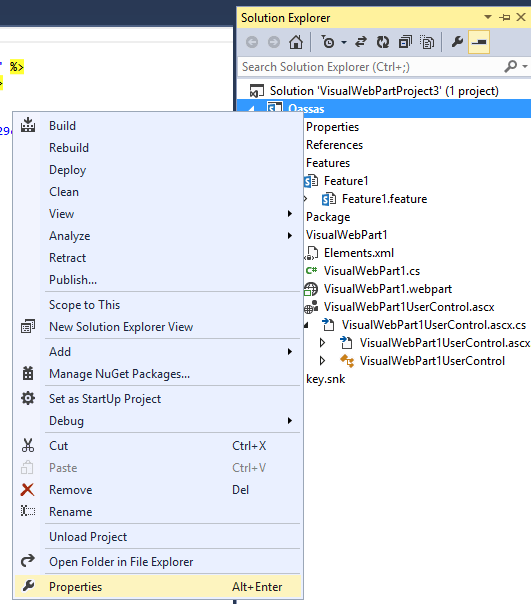
- In Solution explorer > Right Click on your Project > Select “Properties”.
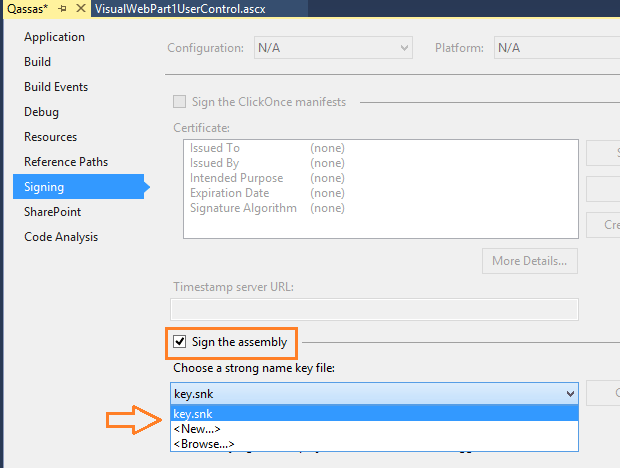
- Click on “Signing” tab > Check > “Sign this assembly”.
- Choose a strong file or create a new one.
After signing your assembly with a strong key, it should be ready now to be added as a reference to your SharePoint and ASP.Net solution by doing the following:
Steps
- Copy the Strongly-Key sinning DLL file to the SharePoint Web Application BIN Folder located at \\inetpub\wwwroot\wss\VirtualDirectories\web App Port\bin
- Open IIS.
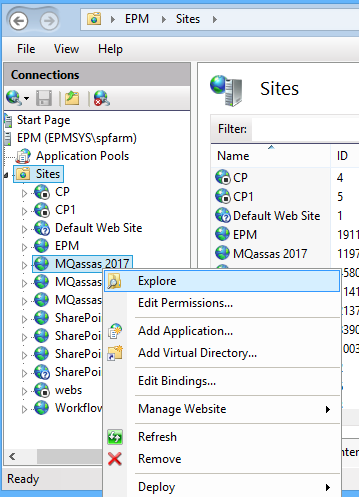
- Expand Sites > Right Click on your SharePoint Site > Select Explore to open the web site folder.
- Open the BIN folder, and paste the Strongly-Key sinning DLL file.
- Open your SharePoint solution in Visual Studio.
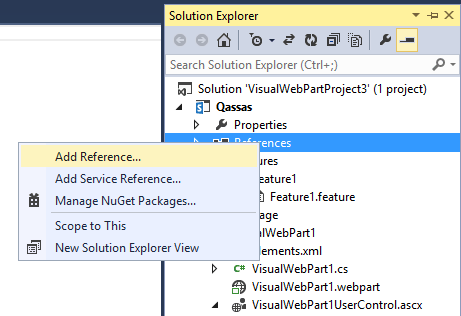
- Right-click on References > Select Add to add a new reference.
Don’t forget to remove the old reference before adding the new one.
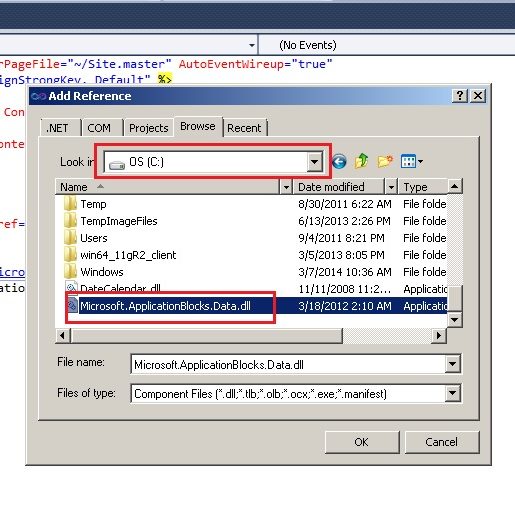
- Browse and select Strongly-Key sinning DLL file.
- Build and Deploy your solution that should be working properly.
Conclusion
In conclusion, we learned how to Sign DLL with a strong name key that you don’t have its source code to can use it in Visual Studio and avoid such errors A strongly-named assembly is required or DLL referenced file not had a Strong Key.
Applied To
- SharePoint 2016.
- SharePoint 2013.

