This article will guide you on creating a Travel Request with Approval in SharePoint Online, using the recently introduced Travel Requests with Approvals template available in Microsoft Lists.

What’s Microsoft Lists?
Before we are getting started to create Travel Request with Approval in SharePoint Online, let’s first know What’s Microsoft Lists in Microsoft 365?
Microsoft Lists is a Microsoft 365 App that allows you to create, manage, and share information in a structured way.
- Microsoft Lists can be used to track items, issues, tasks, and more.
- In Nov 2020, Microsoft announced the general availability of Microsoft Lists for all Microsoft 365 customers worldwide.

Read more at What’s Microsoft Lists App in a nutshell?
Travel Request with Approval Template in Microsoft Lists
One of the greatest features of Microsoft Lists is creating a list quickly from predefined templates. Currently, there are about 14 pre-built templates that can be used in Microsoft Lists.
There are new two templates that recently added that embed the Approvals app into the Lists experience and bring integration with the Approvals app in Microsoft Teams:
- Travel Requests with approvals: Manage and approve all your travel requests and keep an eye on budgets.
- Content Scheduler with approvals: Plan, schedule, and approve your content with this template. Filter down to just the items that are due soon or get notifications when authors check in their drafts.
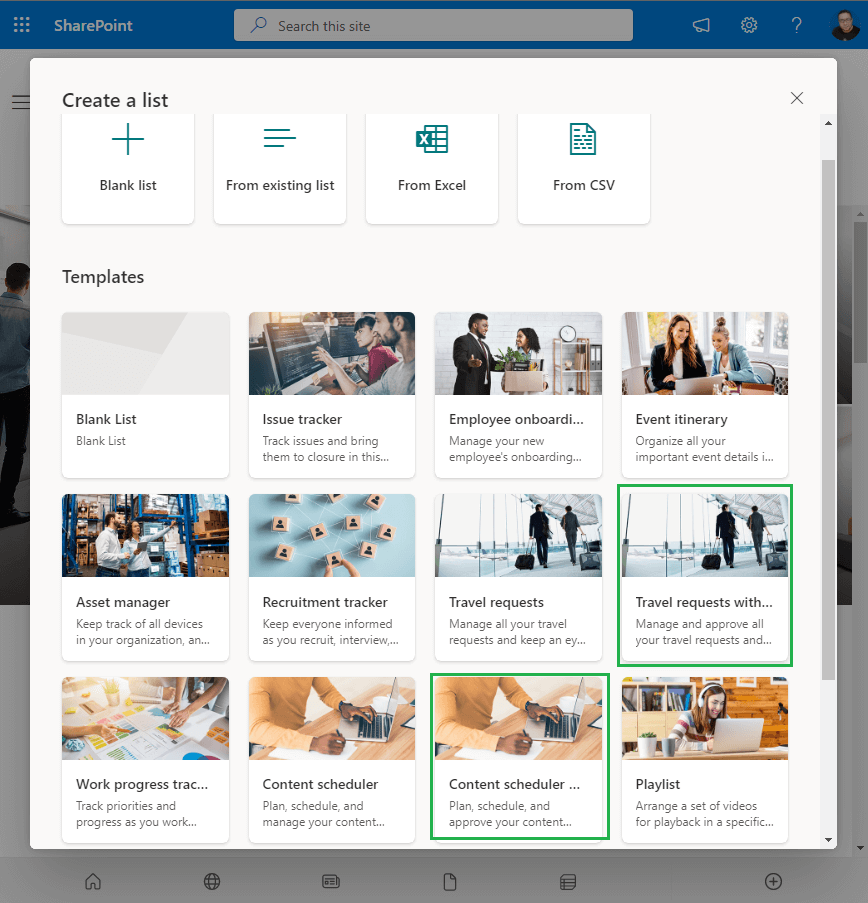
The purpose of this post is to demonstrate how to use the new Travel Request with Approval template in your SharePoint Online site to create and manage a list of travel requests that can be approved by designated approvers.
To create Travel Request with Approval in SharePoint Online without having to write any code, you can follow these steps:
Steps
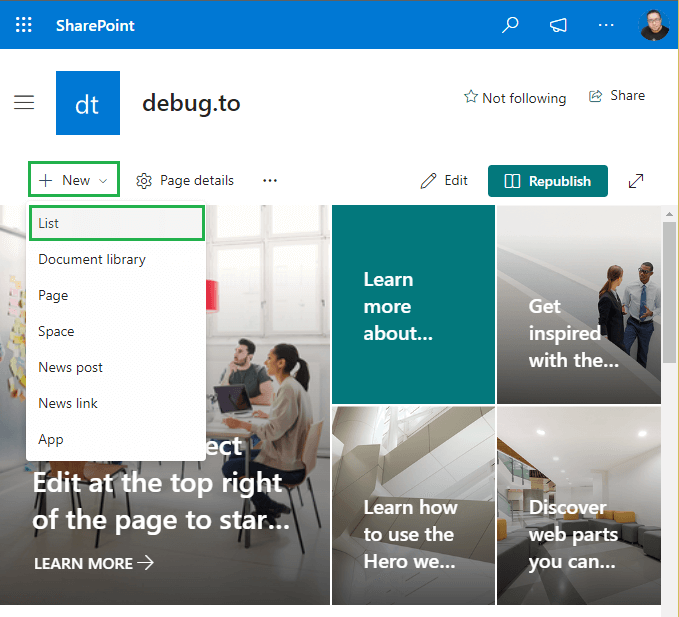
- Navigate to the SharePoint site where you want to create the list.
- Click on the “New” button located in the upper left corner of the screen.
- Select “List” from the drop-down menu.
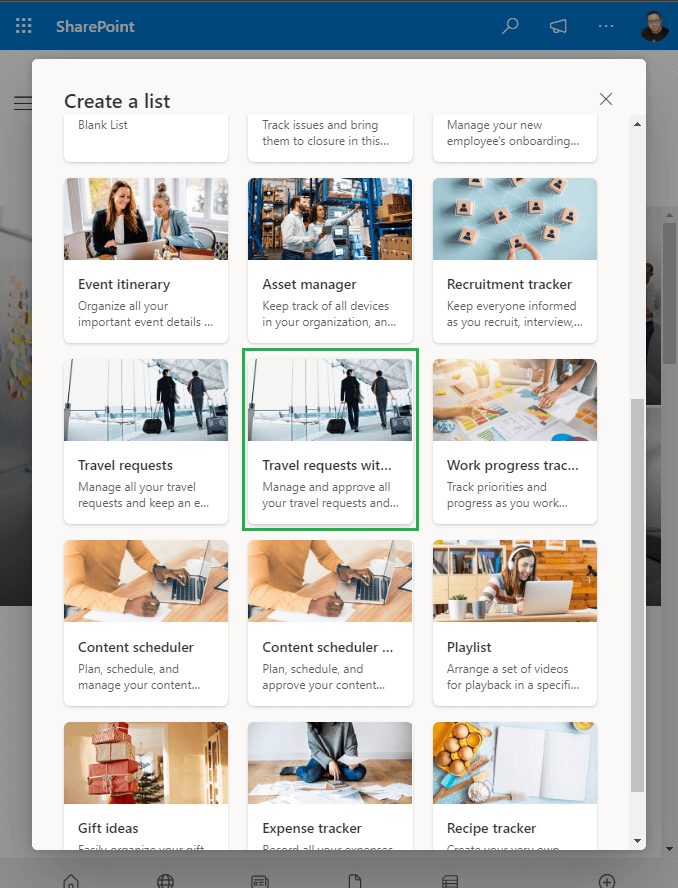
- On the “Create a list” page, select a Travel Requests with Approvals list template.
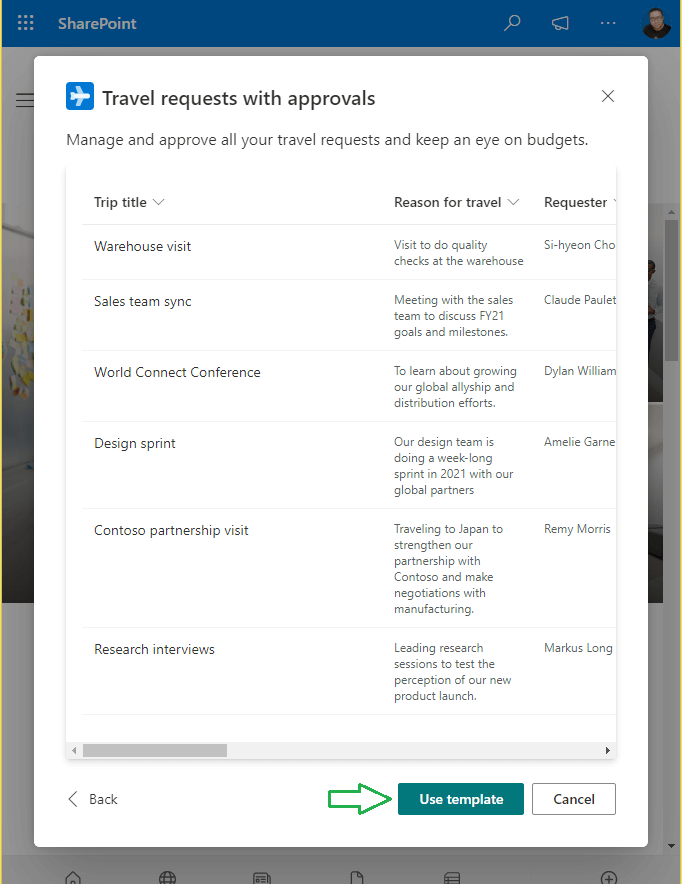
- Click on “Use Template” to use this template.
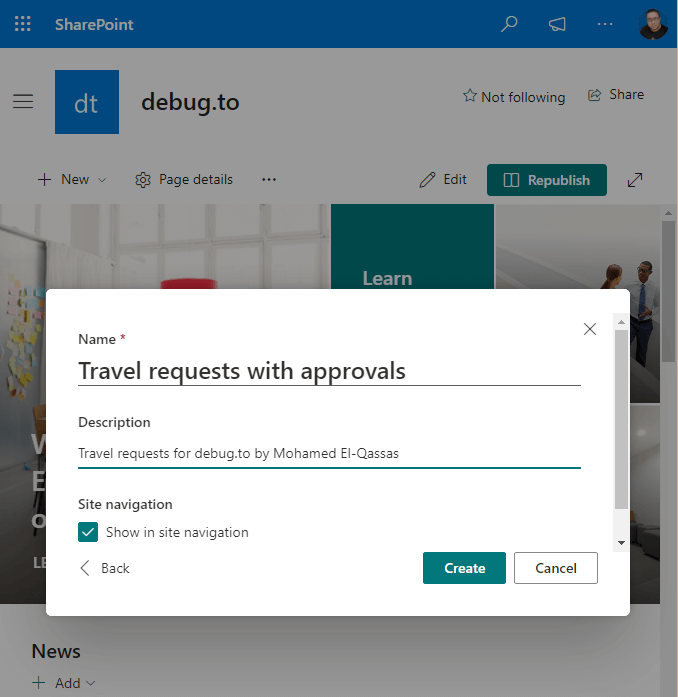
- Enter a name for your list in the “Name” field.
- Enter a description for your list in the “Description” field (Optional).
- Select whether you want to display the list in the site’s navigation bar by checking or unchecking the “Show in site navigation” box.
- Click on the “Create” button to create your new SharePoint list.
You may get this error This action is part of an experimental feature that is not supported in the current environment when creating a new Travel Request List.
Once the list is created, you can customize it by adding and removing columns, creating views, and setting up alerts. You can also share the list with others by giving them access to the site or specific permissions to the list.
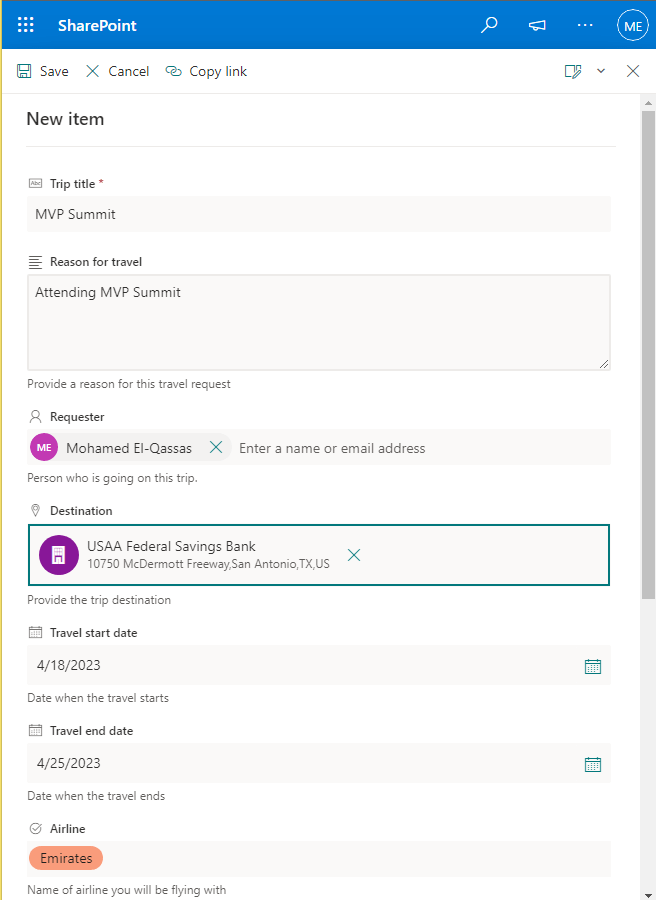
You can now add a new Travel Request by clicking the “New” button and filling out all the required fields, as shown below.
Steps
- Now, you can add a new Travel Request by clicking New button and providing all required fields as shown below.
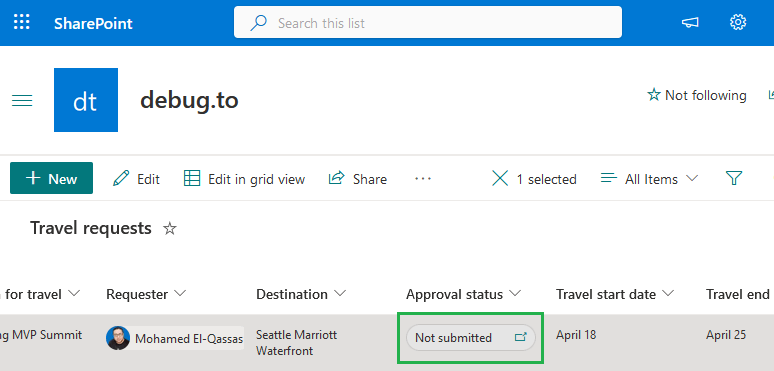
- After the new Travel Request is created, you will be able to see an “Approval Status” field with a status of “Not Submitted“.
- Click on the “Approval Status” field and specify the list of “Approvers” along with any other relevant details.
- Finally, click on the “Submit” button to send the Travel Request for approval.
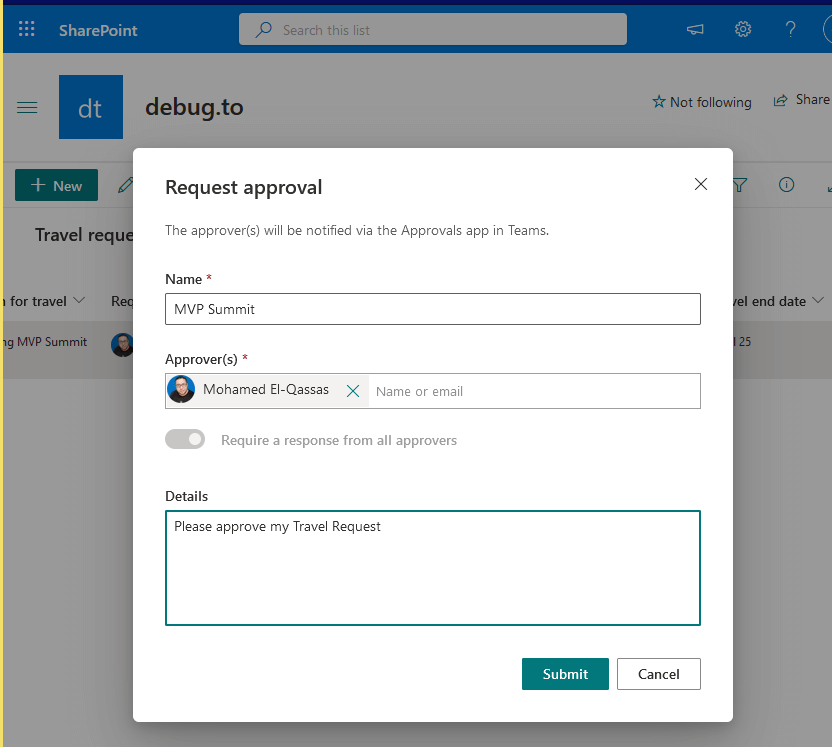
- The List will now generate an approval request, as indicated below.
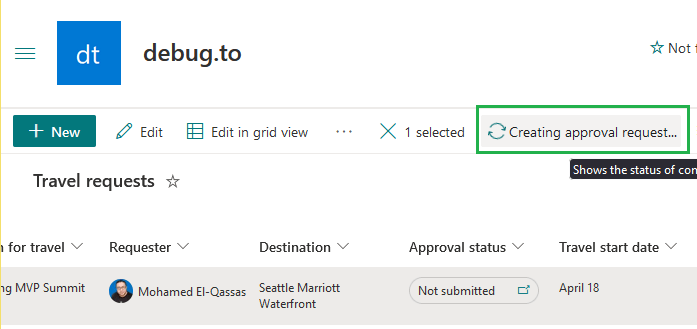
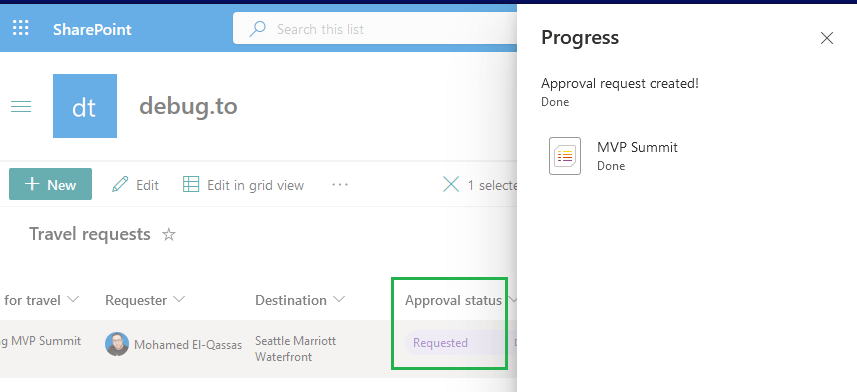
- Please wait for a moment until the approval request is processed and the “Approval Status” changes to “Requested“.
Approve Travel Request in Microsoft Teams
As an Approver, you can approve your assigned requests from either the SharePoint list or the Approvals App in Microsoft Teams by following these steps:
Steps
- Open Microsoft Teams Desktop Client App.
- As Approver, Sign in with your Microsoft Work Account.
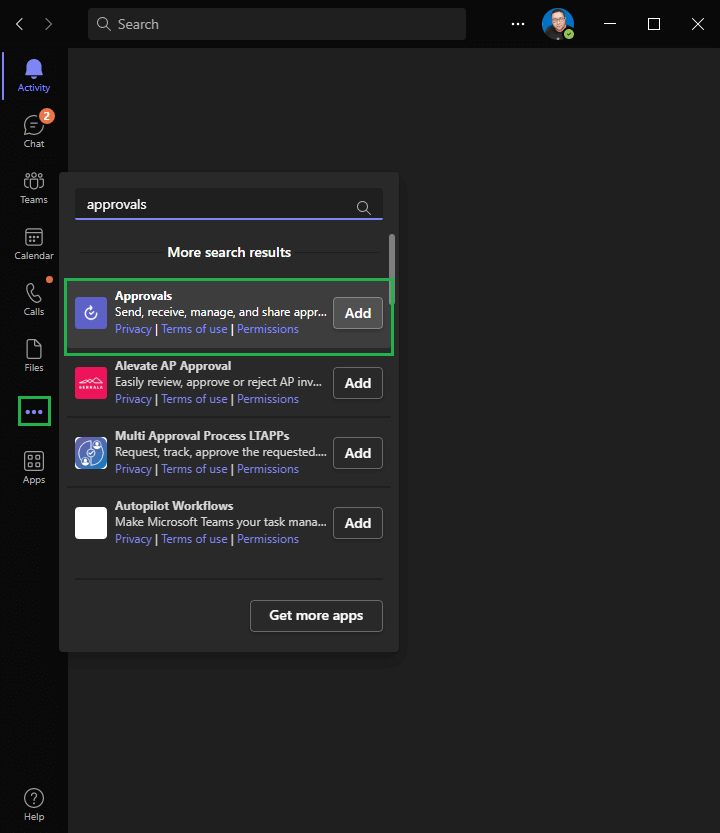
- To add the Approvals App for the first time, click on the three-dots icon and search for “Approvals“. Then, click on “Add” to add the app to your available apps.
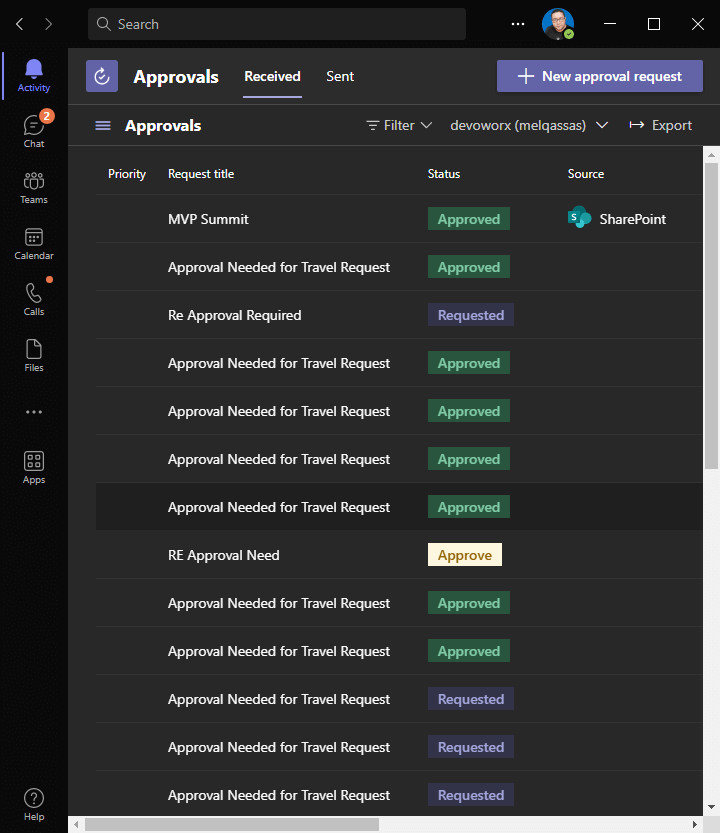
- After that, click on “Activity” and you will see that a new approval notification has been received, as indicated below.
- To view the details of a notification item, simply click on the notification item.

- At this point, you have the option to either approve, reject, or reassign the new Approval Request, as demonstrated below.
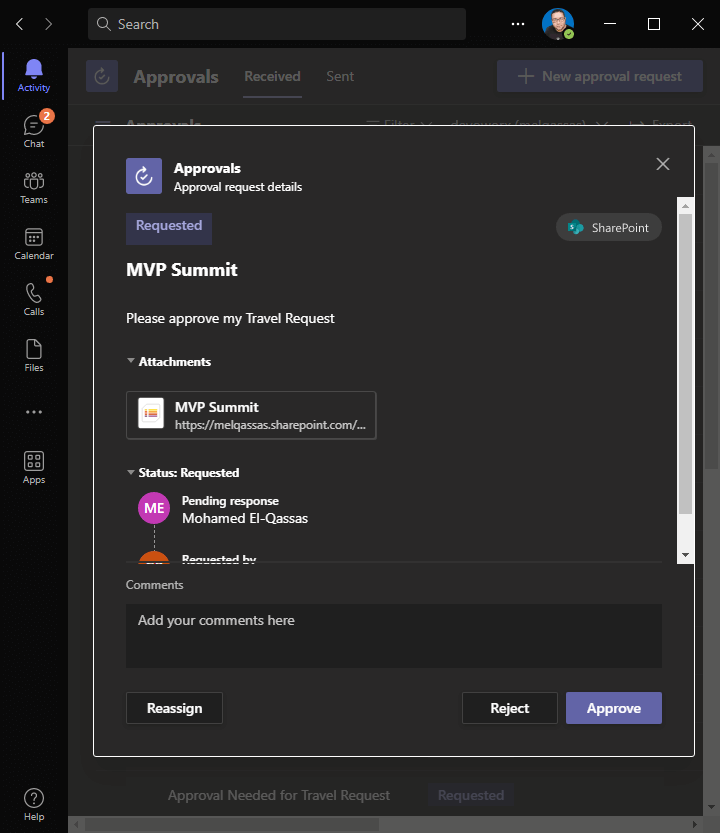
- After taking an action in the Approval request, you will be able to view the entire history of approvals.
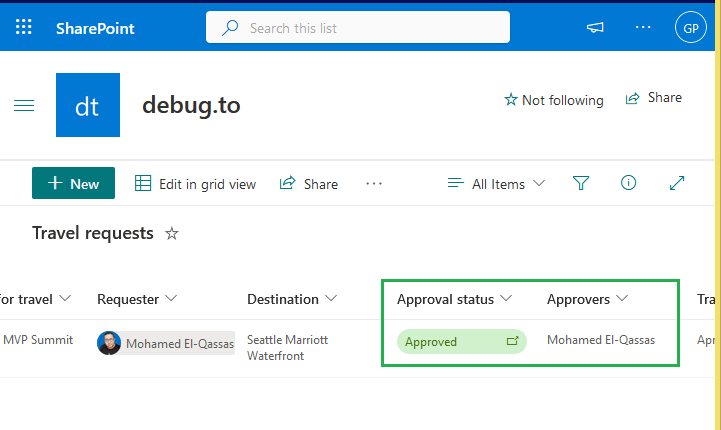
- After the Travel Request has been approved, navigate back to your Travel Request list and you will notice that the Approval Status has been updated to “Approved“.
Conclusion
In summary, we have gained knowledge on how to create a Travel Request with Approval in Microsoft Lists, a new feature that allows users to create a travel request with a built-in approval process. The best part is that we don’t need to write any code to set it up.
Furthermore, we have learned how to send and approve a new travel request in Microsoft Teams step by step. This feature helps to streamline the travel request process by allowing users to approve requests from within the Teams application, without the need to switch between multiple platforms.
By following these steps, users can easily set up and manage travel requests with built-in approval workflows, saving time and increasing efficiency in their daily work.


is it possible to change the displayed information of approval request details in Teams for approver point of view?