SQL Server Reporting Services (SSRS) is a server-based report generating software system from Microsoft. It is part of a suite of Microsoft SQL Server services, including SSAS (SQL Server Analysis Services) and SSIS (SQL Server Integration Services).
In this article, we will learn How to install and configure SSRS Native Mode step by step.
You might also like to read Install and Configure Power BI Report Server Step by Step
Applies To:
- SQL Server Reporting Services SSRS 2016.
- SQL Server Reporting Services SSRS 2014
- SQL Server Reporting Services SSRS 2012.
- SQL Server Reporting Services SSRS 2008.
How to Install and configure SSRS?
In this post, we considered that you have already installed SQL Server as mentioned at How to Install SQL Server 2012 Step by Step and How to install SQL Server 2019 Developer Edition.
Install and configure SSRS Perquisites
Before we getting started to Install and configure SSRS, you should prepare the following Prerequisites:
- Make sure that you have the same SQL Server version installation media that was used when the SQL Server is being installed.
- Create a new service account for Reporting Service. (Microsoft recommends to specify and use a separate account for each SQL Server service)
- Specify the authentication type and the account that has permission to connect to the database server. (Will be used during configuring the Report Server DB)
- Specify the authentication type and the account that the report server will use to connect to the report server database. (Will be used during configuring the Report Server DB)
- For the production environment, Don’t install SSRS on the database server, instead, you should create a new server for SSRS.
Install SQL Server Reporting Services
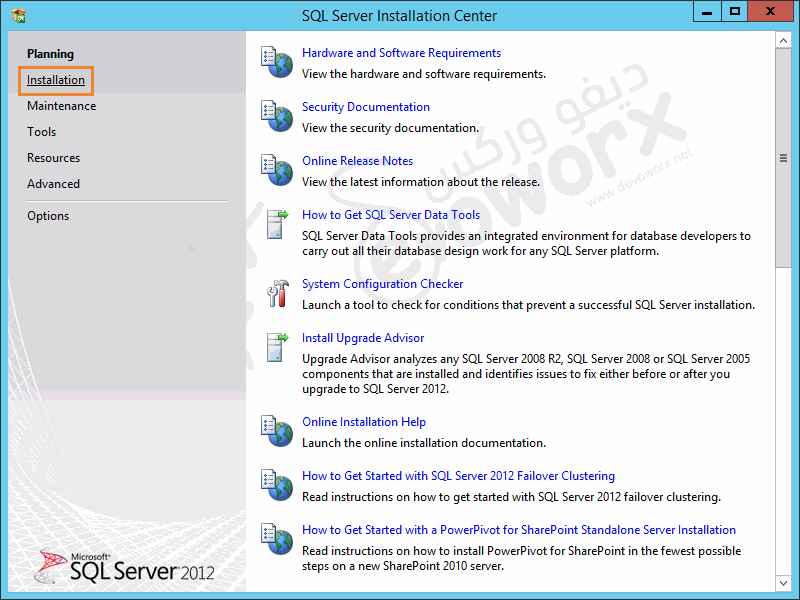
- Mount your SQL Server Media ISO/CD > Run SQL Server Installation file > From SQL Server Installation Center > Click on Installation.
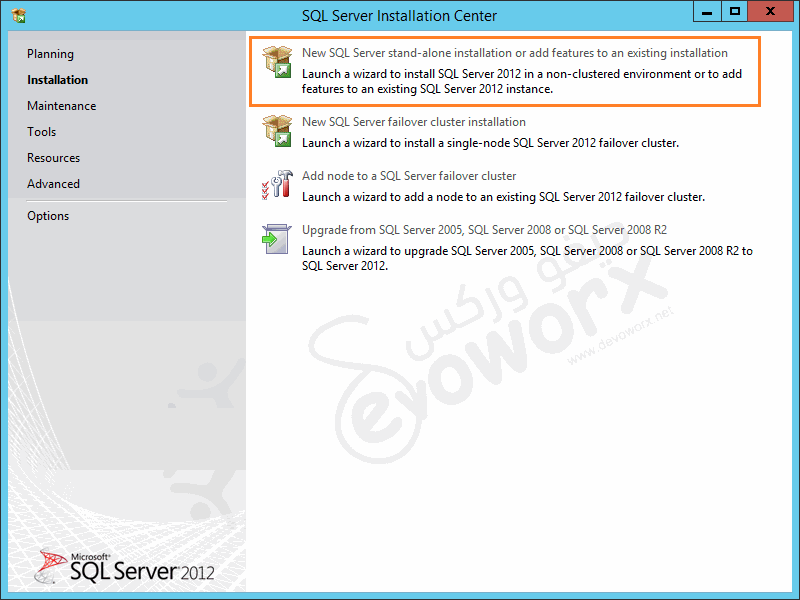
- Click on New SQL Server stand-alone installation or add features to an existing installation.
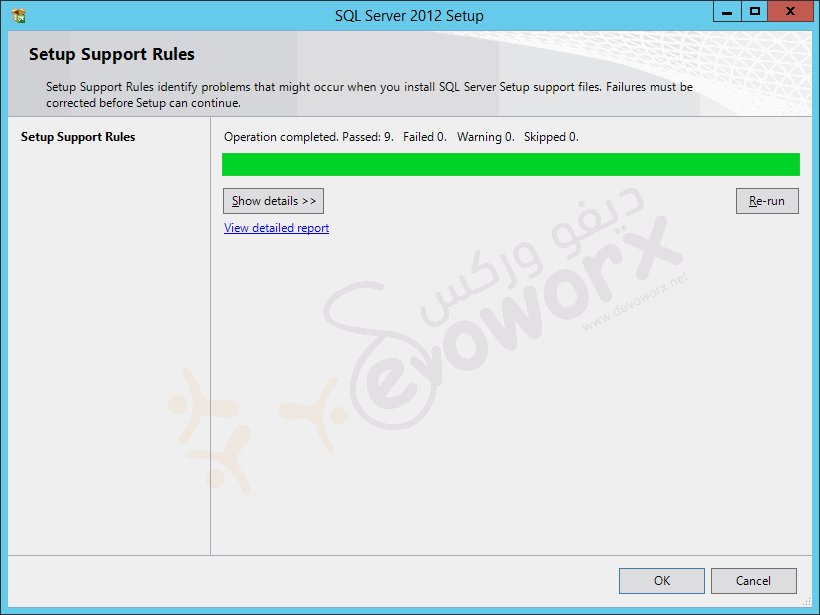
- Click OK after the Setup Support Rules have been passed.
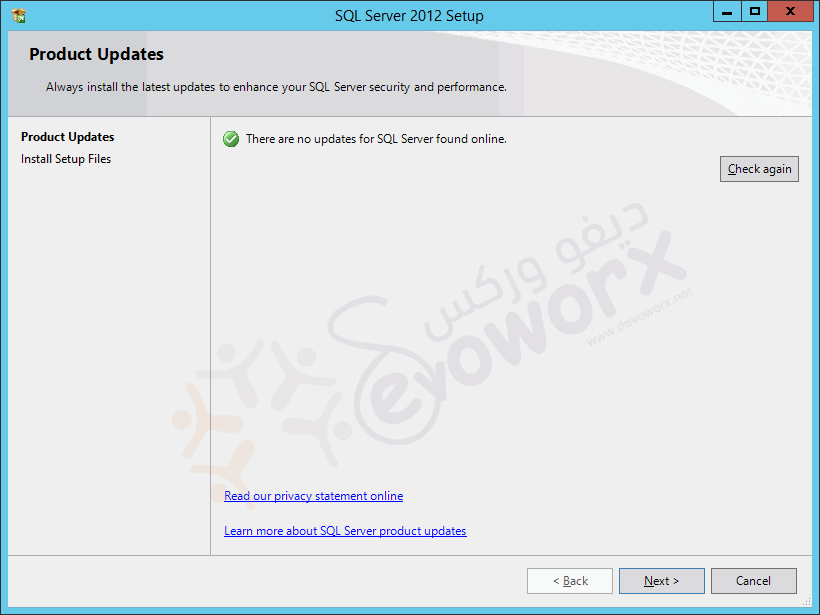
- Check Product Updates and click Next.
- Again, Check Setup Support Rules and click Next.
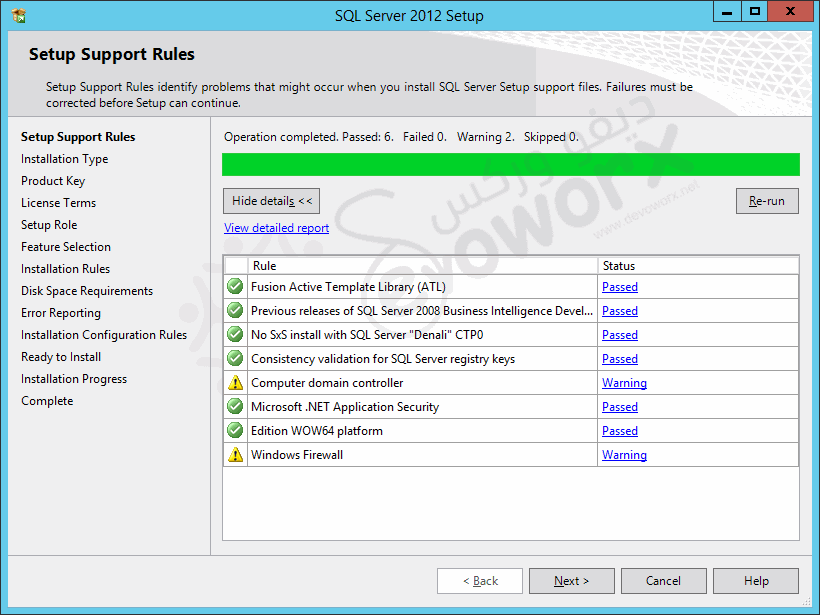
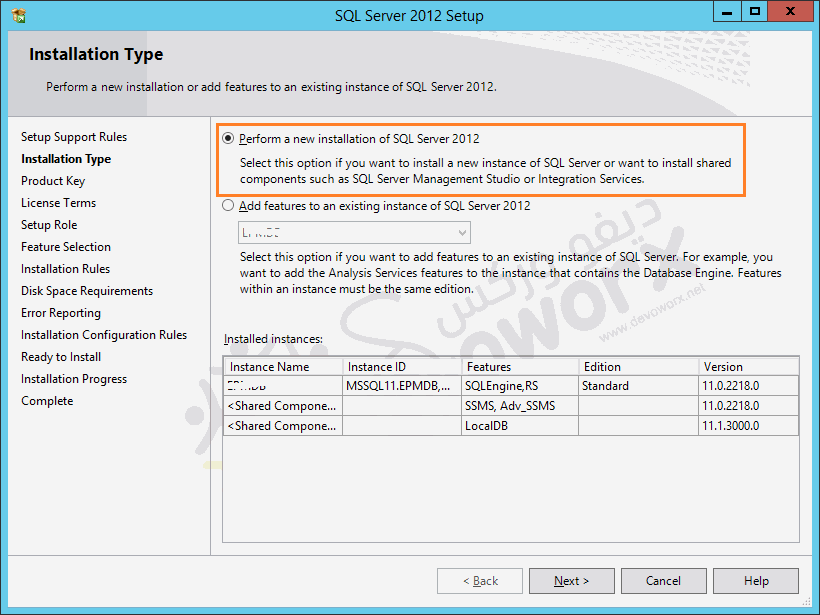
- From Installation Types > Check Perform a new installation.
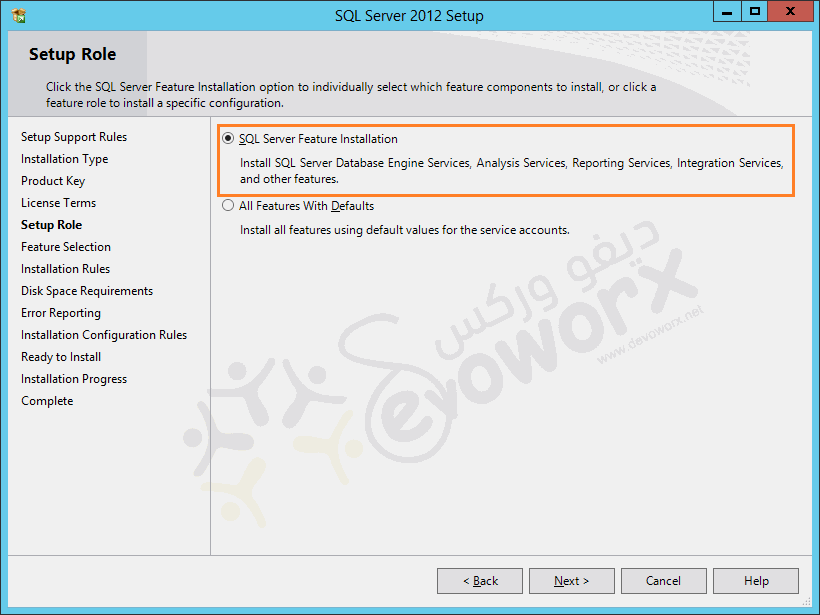
- From Setup Role > Select SQL Server Feature Installation.
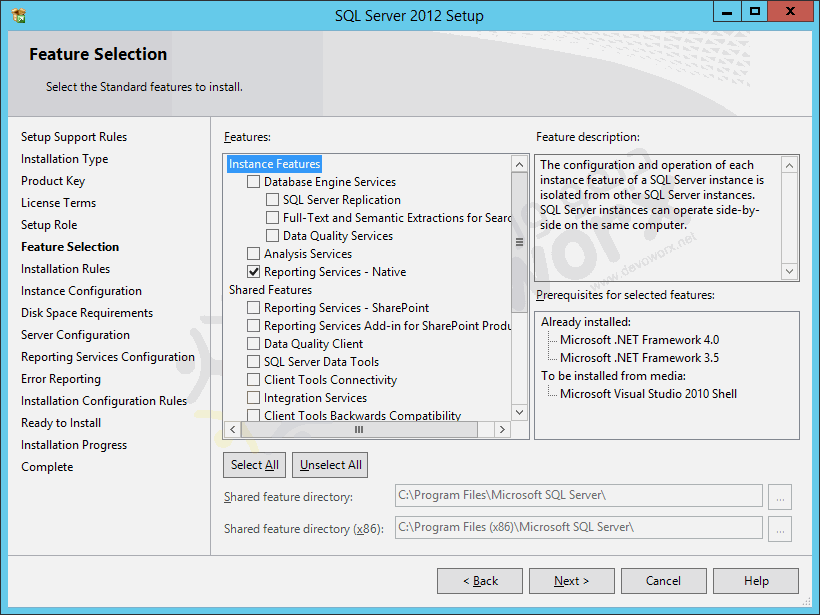
- From Feature Selection > Below Instance Features
- Select Database Engine Services.
- Select Reporting Service -Native > Click Next.
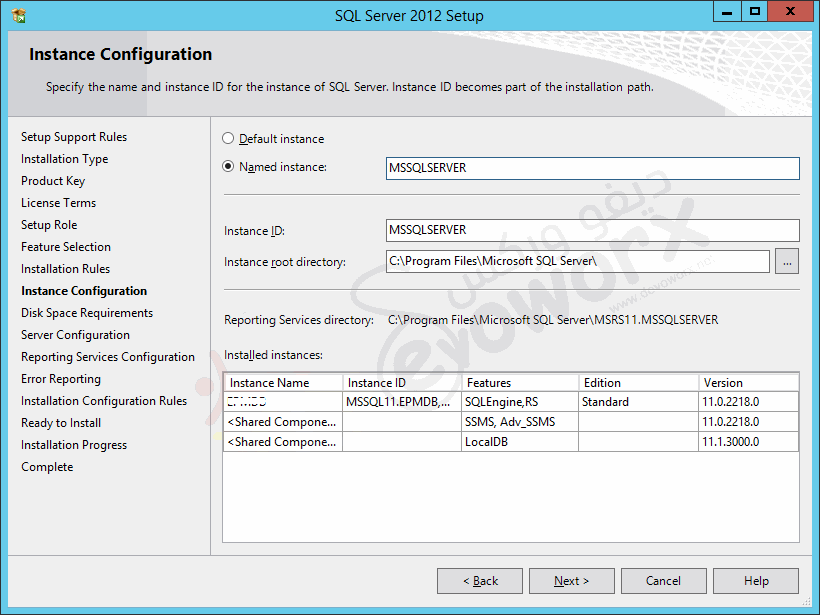
- Configure instance by setting the instance name or leave default.
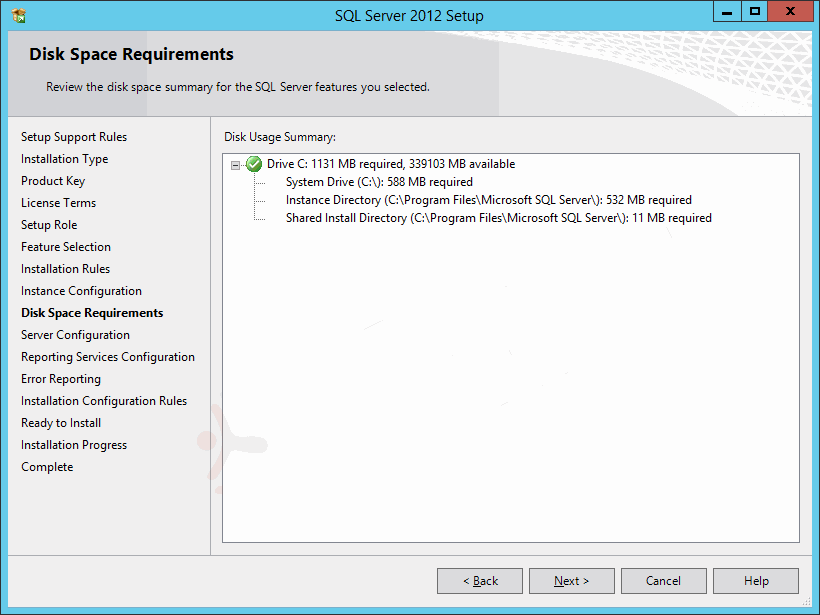
- Check Disk Space Requirement > Next.
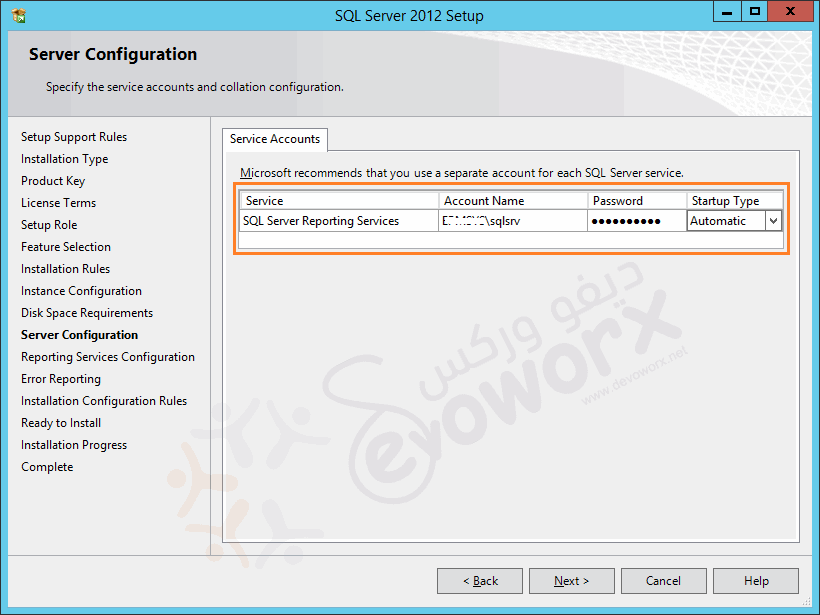
- In Server Configuration > Set SSRS Service Account > Next.
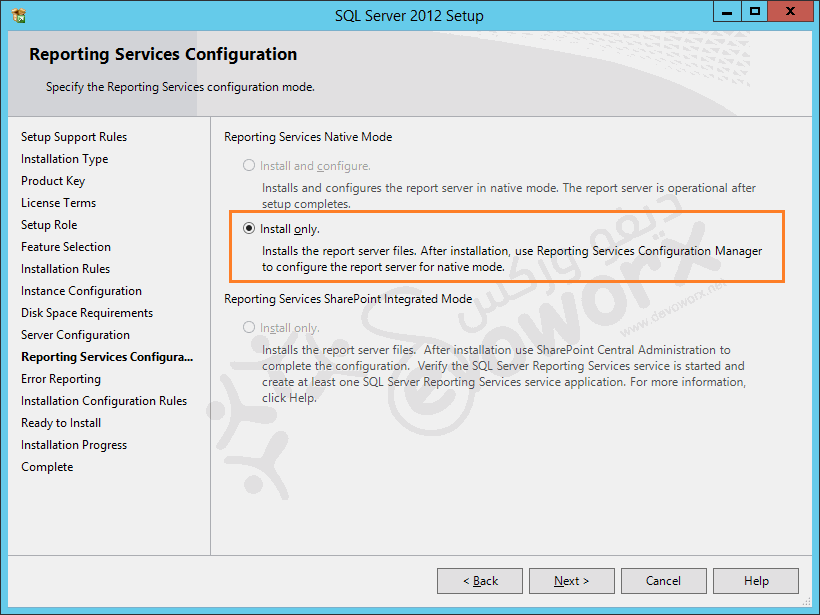
- In Reporting Service Configuration > Check Install only.
- In Error Reporting > Click Next.
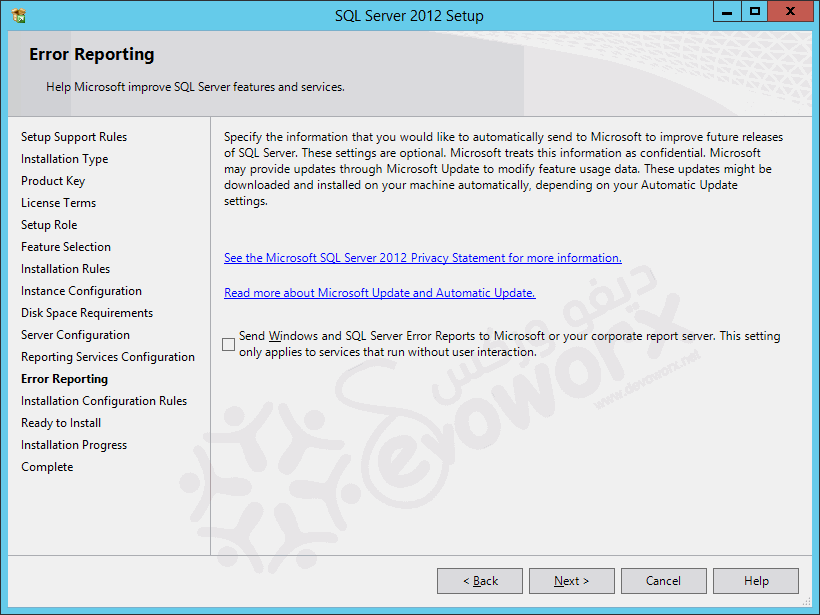
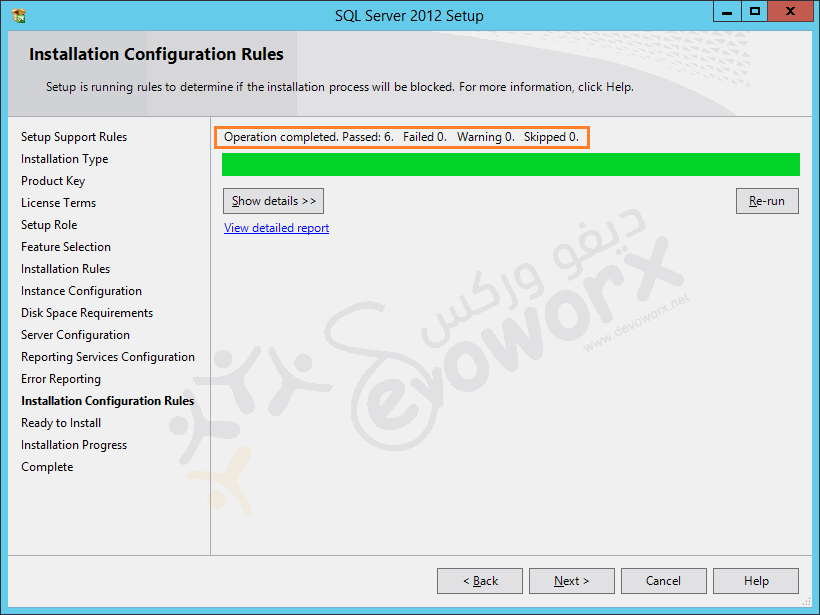
- Once the Installation Configuration Rules have been passed > Click Next.
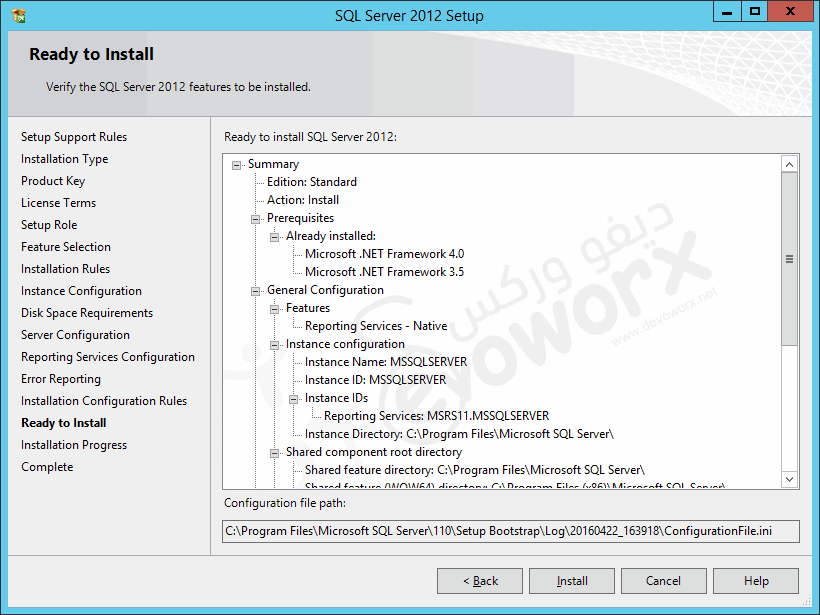
- In Ready to install > Click on Install.
- Complete the installation wizard and click Finish.
You might also like to read Install and configure SSRS 2016
Configure SQL Server Reporting Services
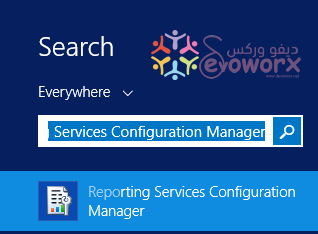
- Open Reporting Service Configuration Manager.
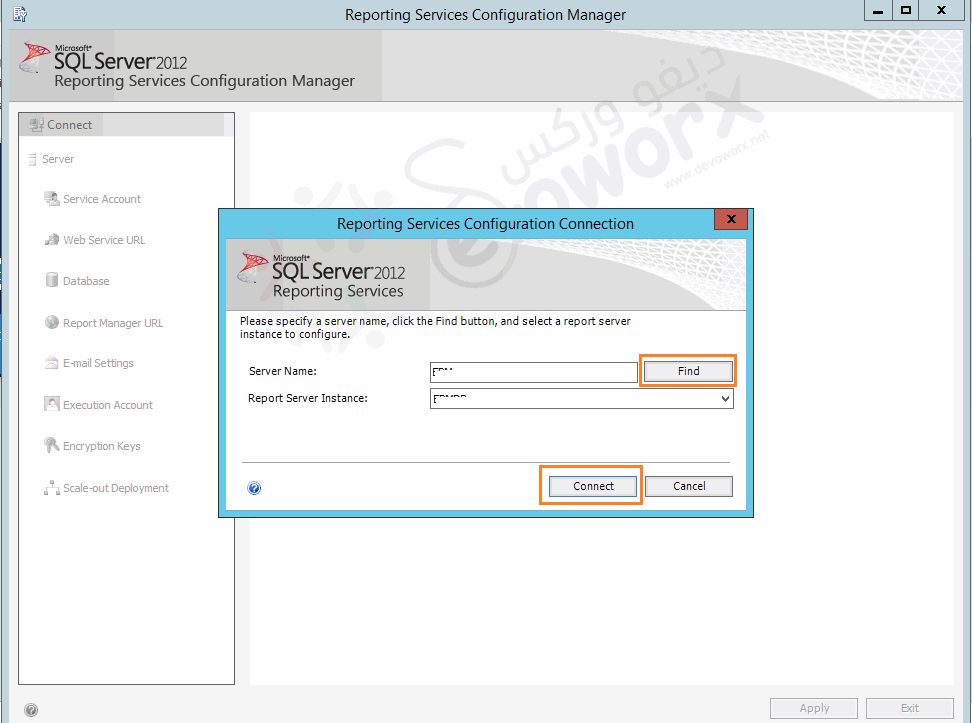
- Click Find and select the existing instance that has been selected to add SSRS feature > Click on Connect.
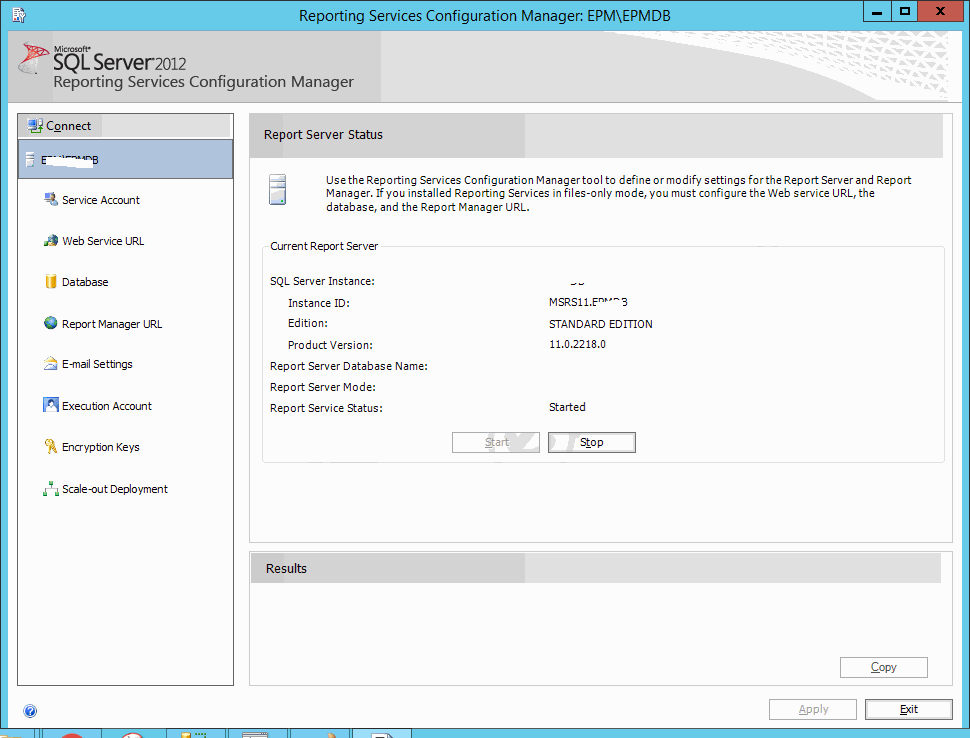
- The Report Server Status should be shown with the current report server status and basic information about report server.
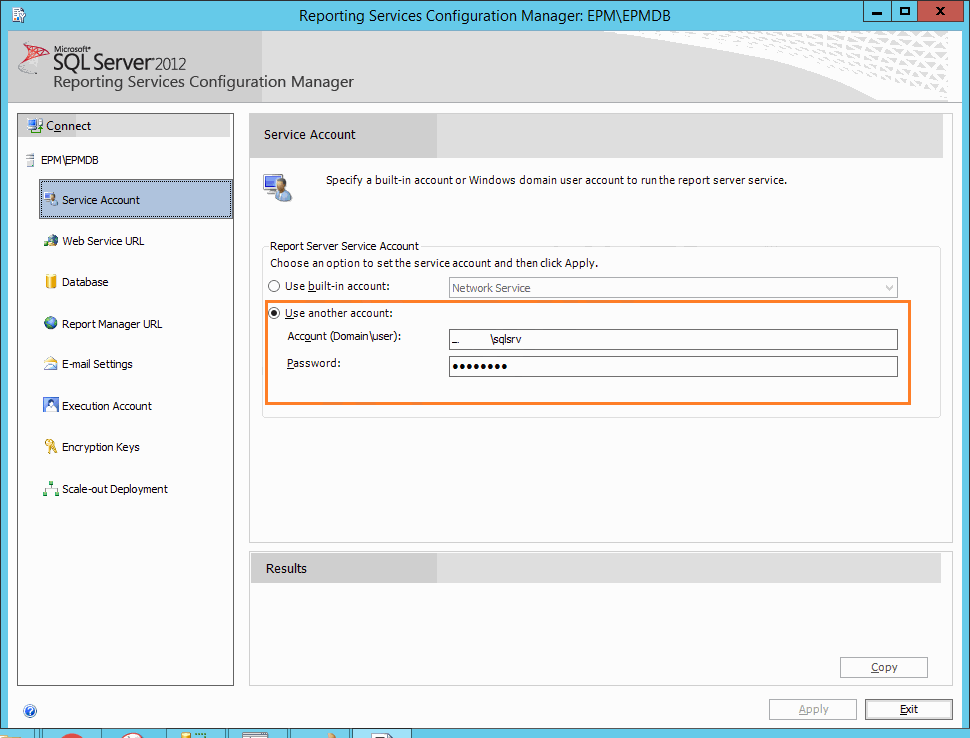
- Go to Service Account section to check the service account that has been set during the installation, you can also change the current service account through this section based on your requirement.
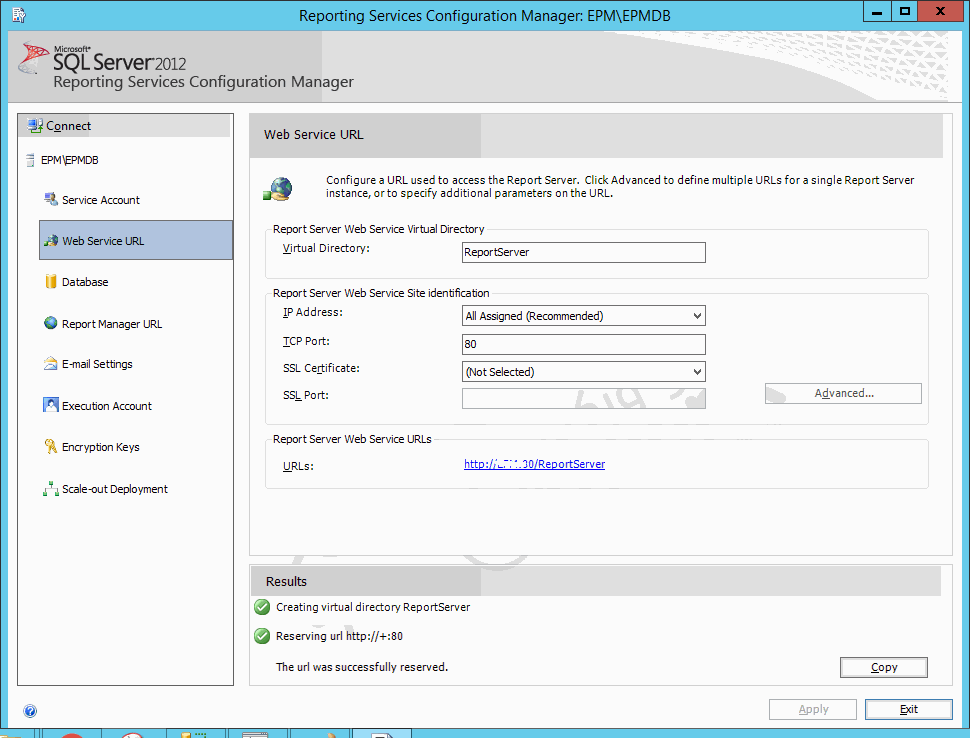
- Go to the Web Service URL section to configure the URL and port number for Report Service Web Service > Click On Apply to generate it.
- Got to Database section > Click on Change Database.
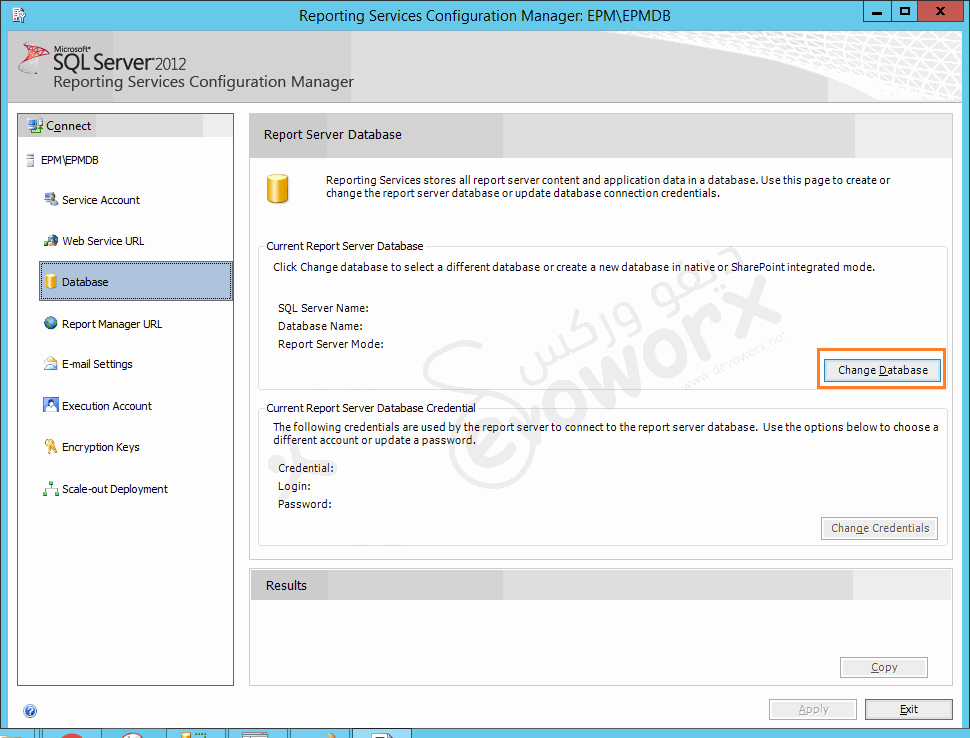
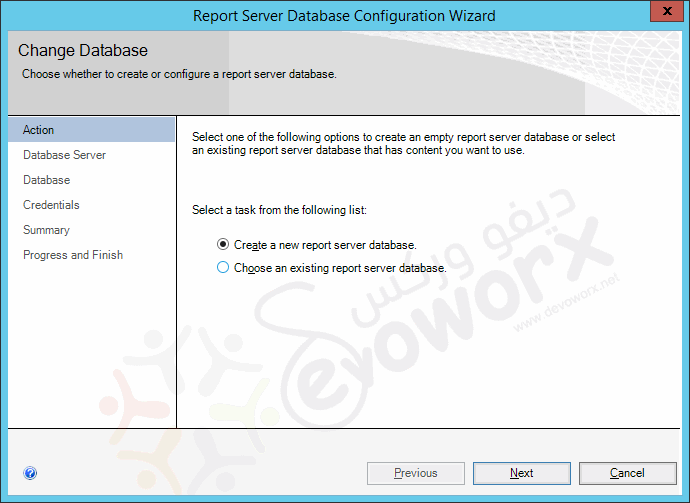
- Follow the Change Database wizard > Check Create a new report server database > Next.
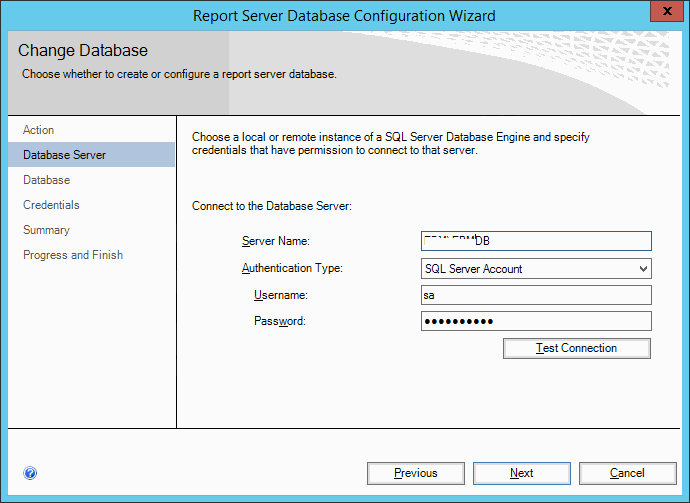
- Select Authentication Type “SQL Server Account” > Set the Username and Password for the account that should have permission to connect to SQL server.
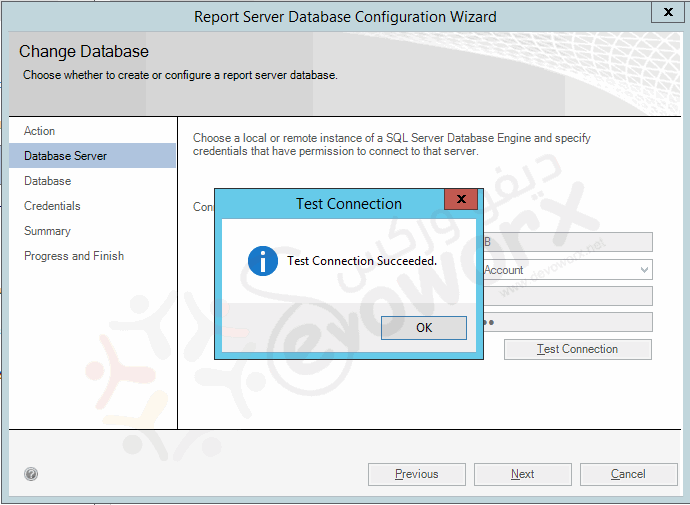
- Click on Test Connection > Next.
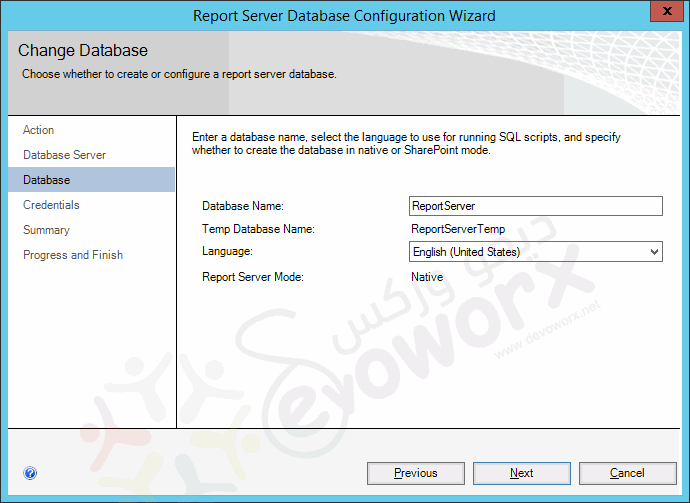
- Type your Database Name or leave it as default > Next.
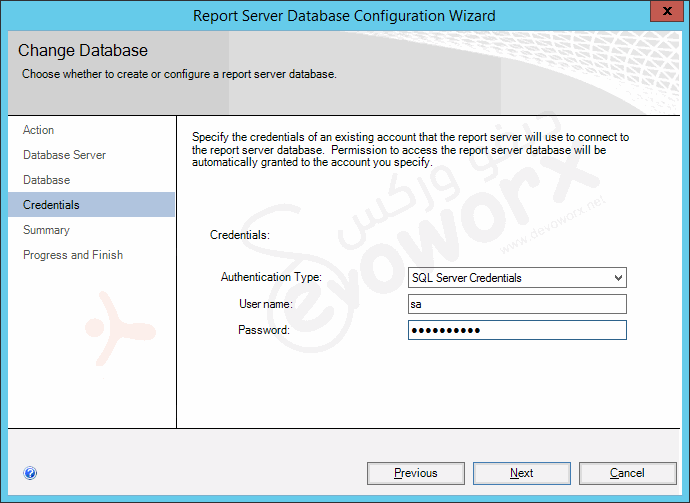
- Again set the credential for the user that should have permission to access the Report Server Database.
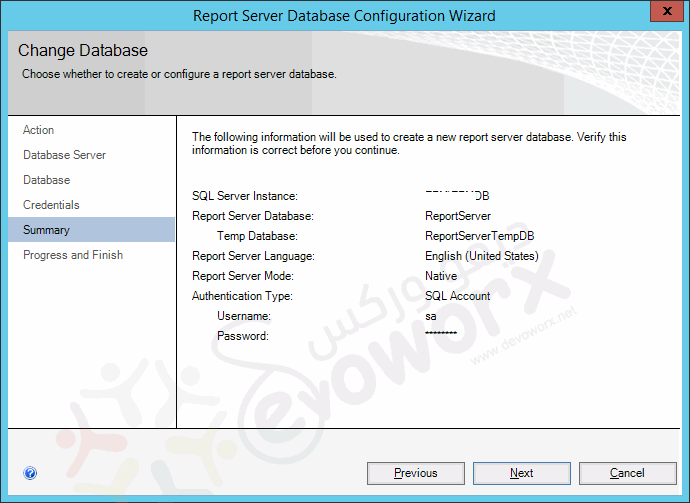
- Review the Summary > Next.
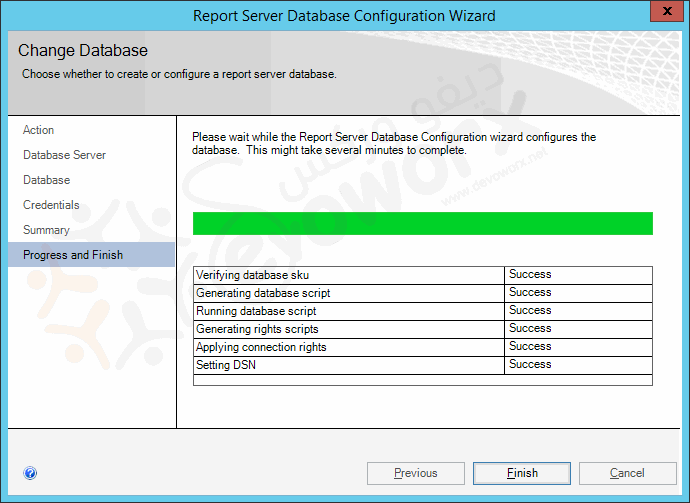
- Wait until the Report Server Database Configuration wizard complete > Click on Finish.
- The Database section should show the current Report Server Database.
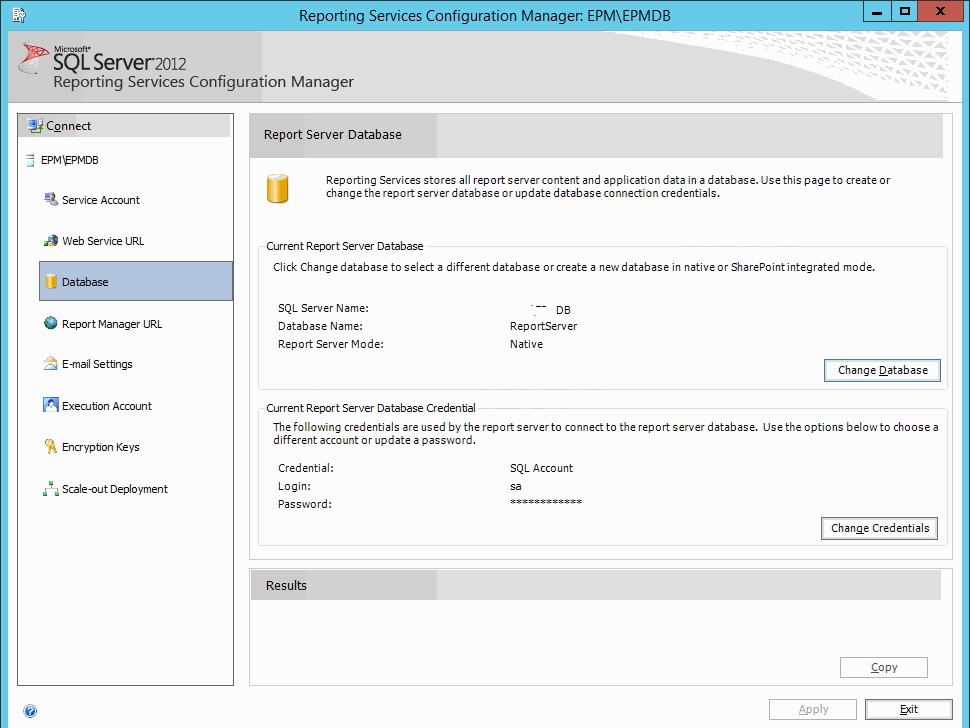
- Go to Report Manager section to configure the URL that will be used to access Report Manager. > Click on Apply.
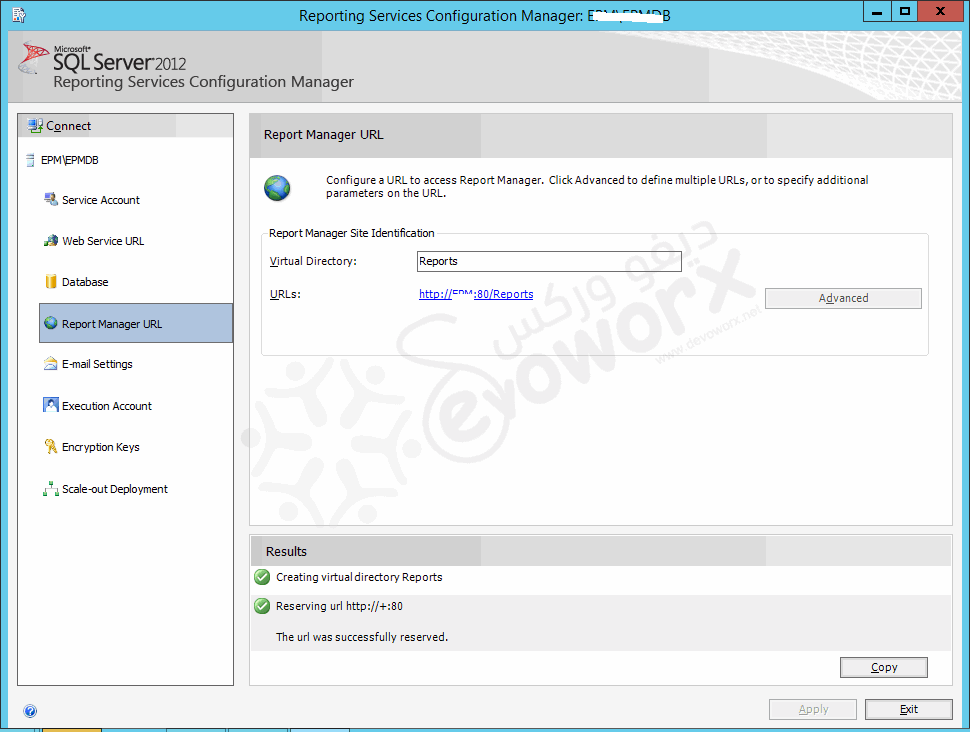
- Try to navigate to the Report Manager URL to open Report Manager.
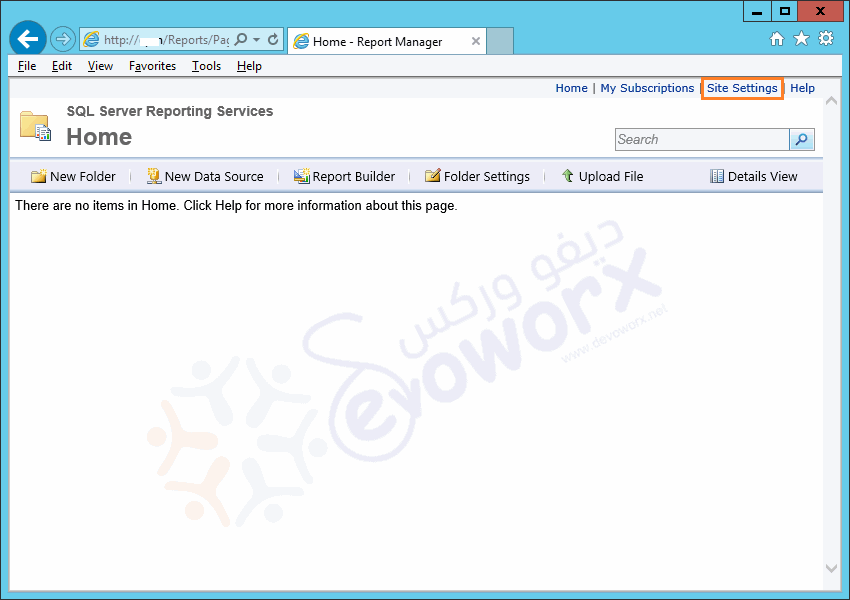
Note: in case you got any permission issue to open report Manager, please check
- SSRS Permission Issue: User does not have required permissions. Verify that sufficient permissions have been granted and Windows User Account Control (UAC) restrictions have been addressed.
- SSRS 2016: You are not allowed to view this folder. Contact your administrator to obtain the necessary permissions.
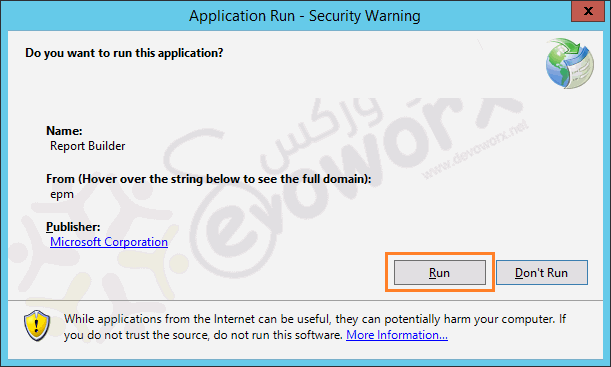
- Click on Report Builder to build your report.
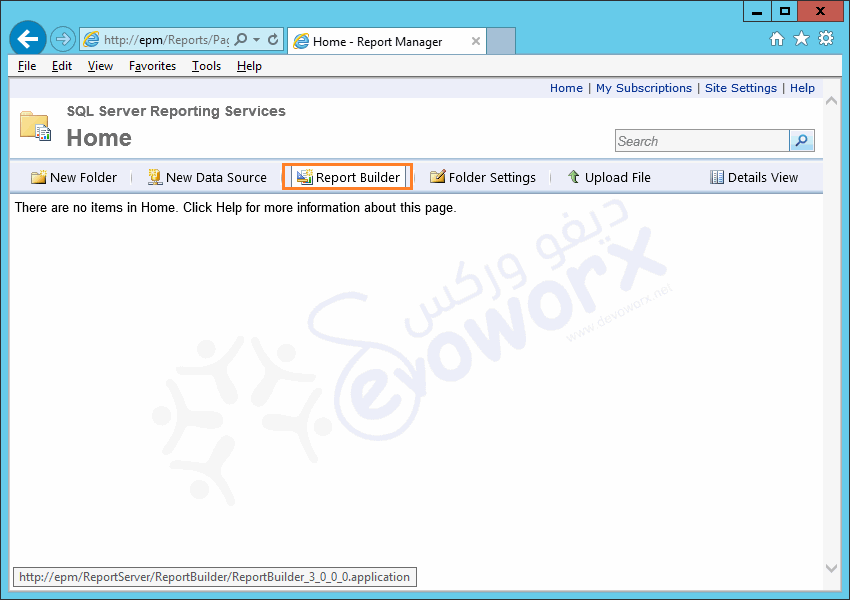
- Click on Run.
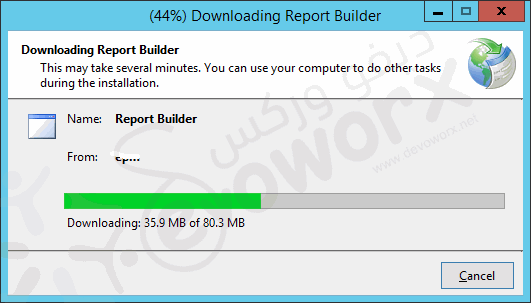
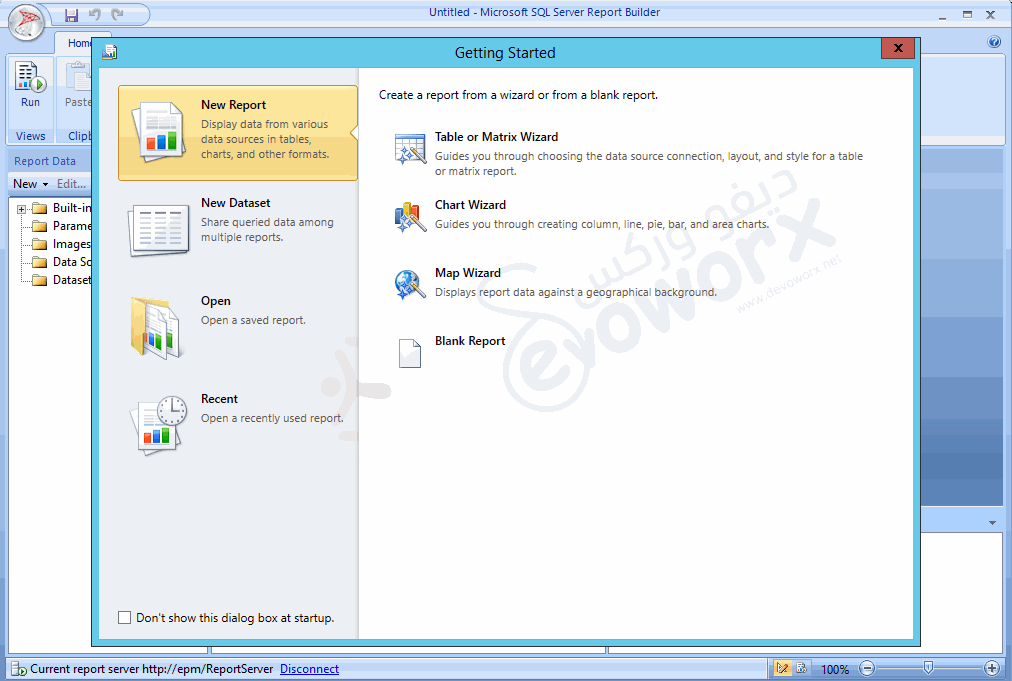
- Great, the report builder is ready now to create your first report.
- Go now to Encryption Keys to take a backup of the symmetric key that used to encrypt sensitive data in the report server database like connection strings, credentials …etc.
Note: the symmetric key backup is very important especially in case of migrating or moving the report server installation to another server. you can restore this symmetric key to be able to access the encrypted content.
Conclusion
In conclusion, we have learned
- What’re the prerequisites to Install and Configure SSRS?
- How to Install and Configure SSRS step by step?

Pingback: Supported SQL Server Version for SharePoint 2016 | SPGeeks
Pingback: SSRS: SharePoint List does not exist | SP Geeks
very useful, thanks
Thanks for your feedback 🙂
Superb Explanation
great article